The Couchbase DevRel team has been working with the Bad Website Club on freeCodeCamp materials.
freeCodeCamp is a non-profit organization that consists of an interactive learning web platform, an online community forum, chat rooms, online publications and local organizations that intend to make learning software development accessible to anyone.
The Bad Website Club is an online community helping new learners in their programming journey.
We have been streaming to show fCC learners what could happen to their project in more ‘real-life’ conditions. We started with the Responsive Web Design course, took some examples like the Survey form, completed them and pushed them to production. The whole series is streamed on YouTube, LinkedIn, Twitter and Twitch, and the recordings are available on this youtube playlist if you want to check it out: New Couchbase Streams: Starting July 31st!
I was personally streaming on the Survey project. In this blog post series, I will show you all the additional steps you can do publish the code on GitHub, deploy the Survey online with Netlify, and storing its content on Couchbase Capella.
Step 1 – Create an HTML Form
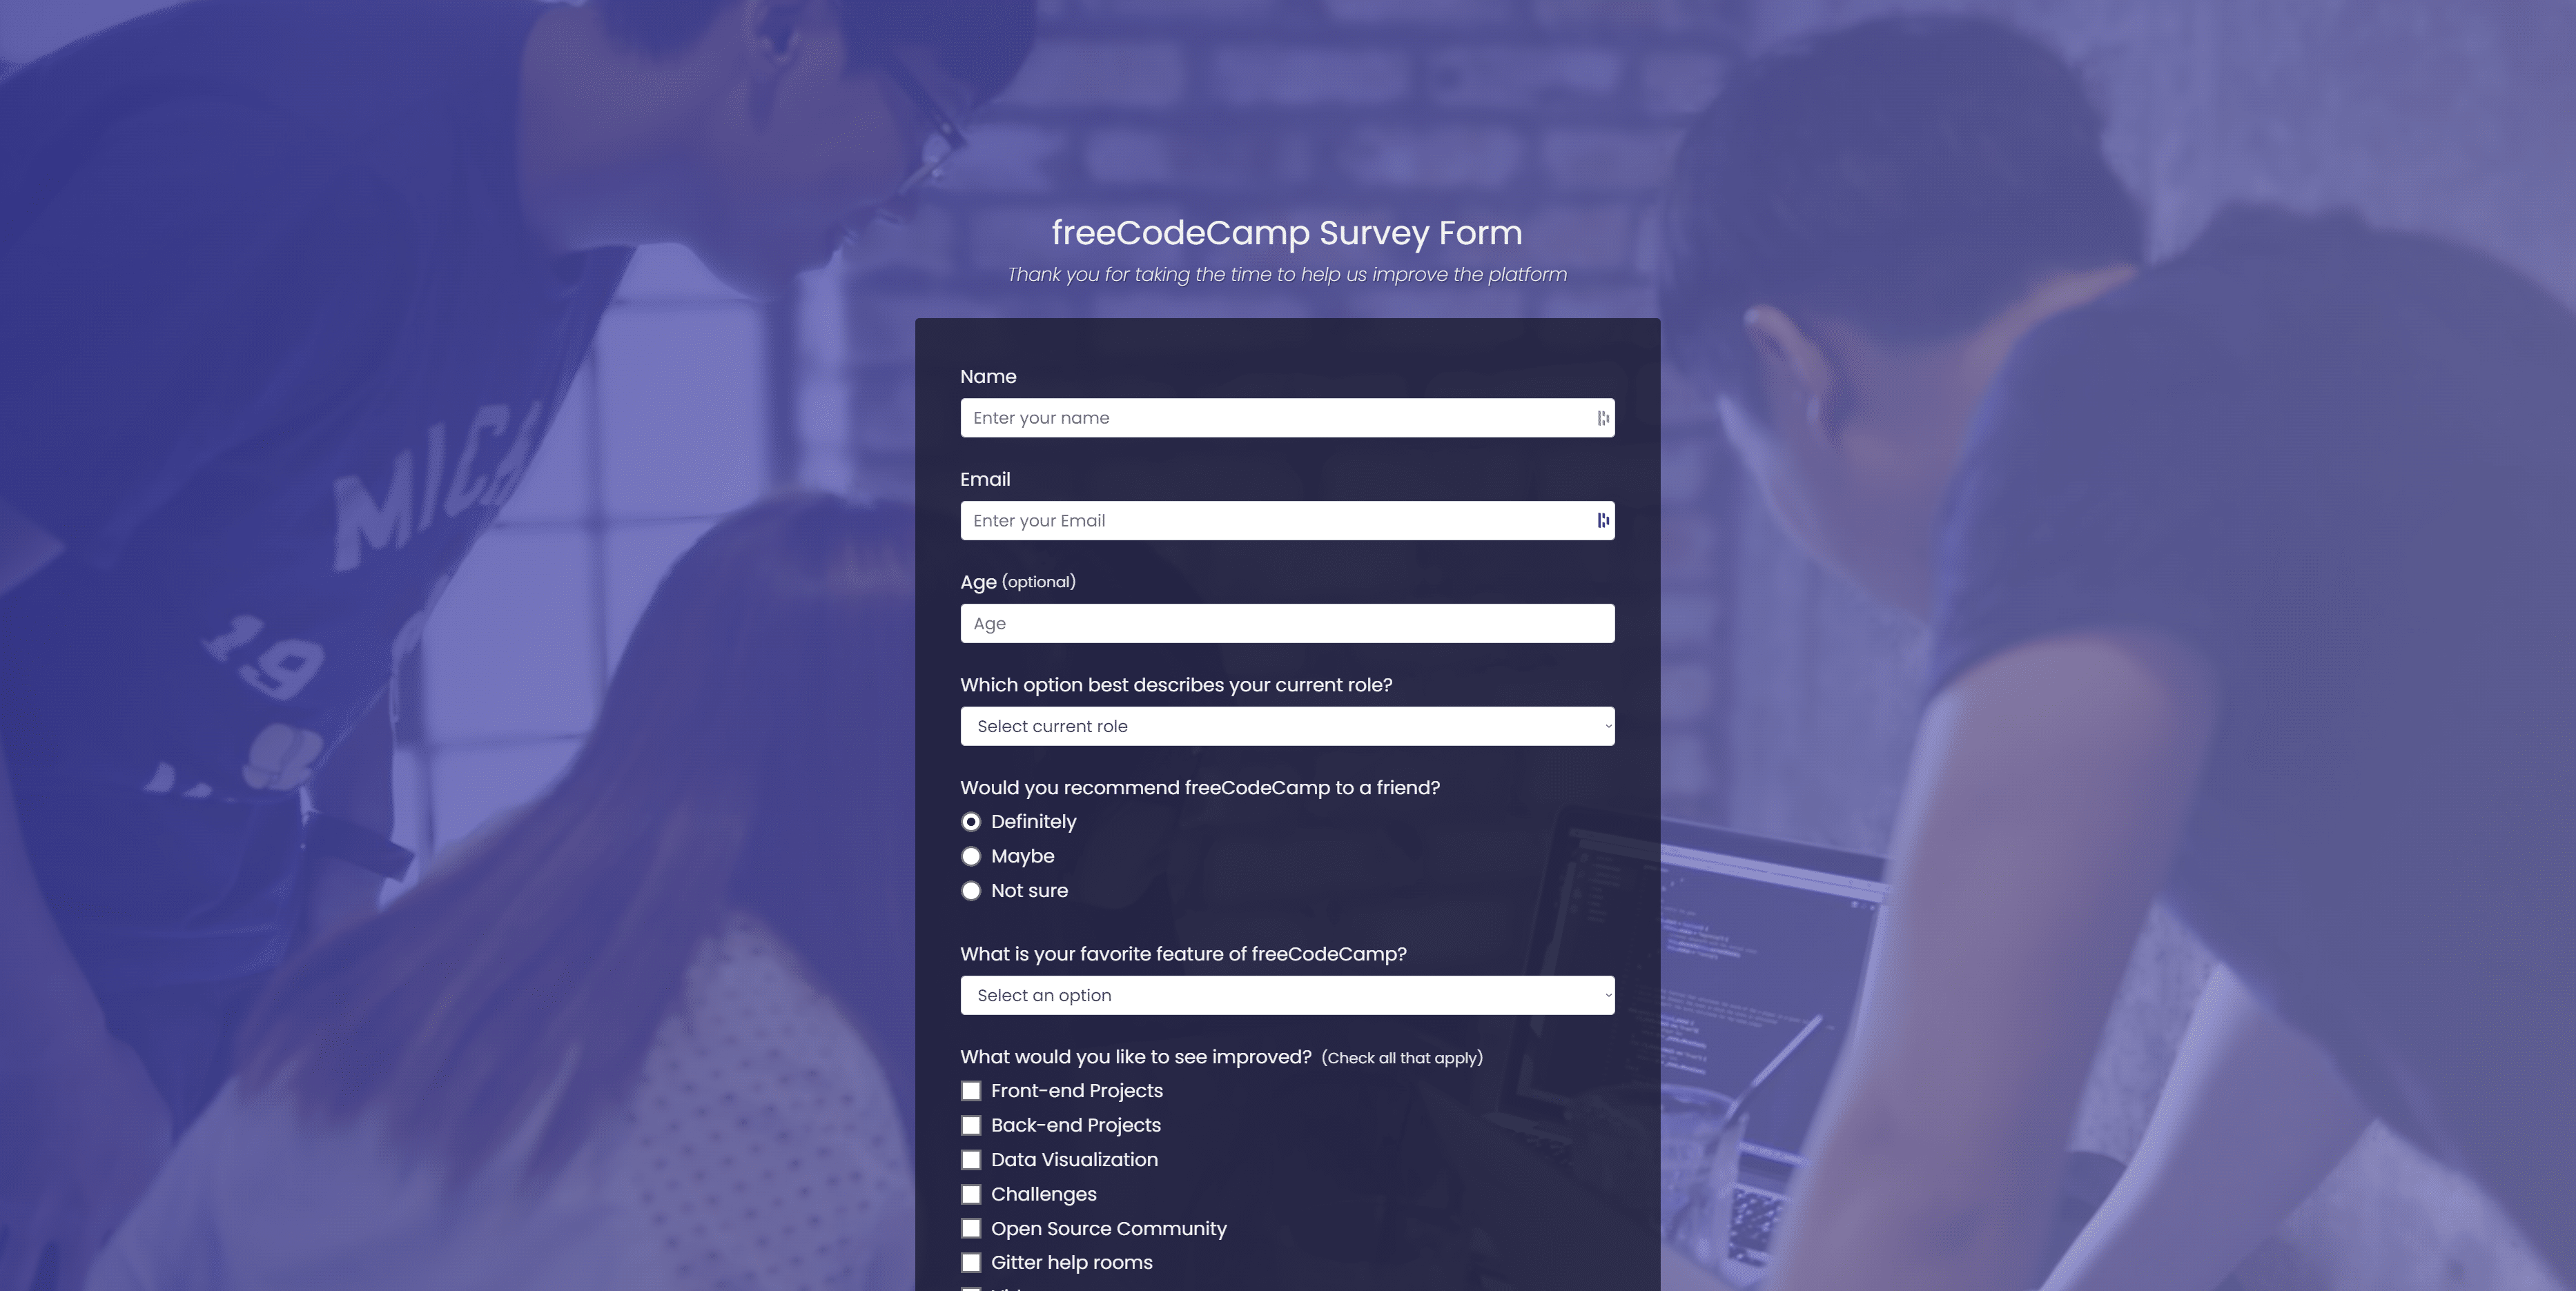
Getting a lot of inspiration from the FreeCodeCamp survey example (copy, paste, and trim), I get the following HTML form. It’s a bit simpler than the original one.
|
1 2 3 4 5 6 7 8 9 10 11 12 13 14 15 16 17 18 19 20 21 22 23 24 25 26 27 28 29 30 31 32 33 34 35 36 37 38 39 40 41 42 43 44 45 46 47 48 49 50 51 52 53 54 55 56 57 58 59 60 61 62 63 64 |
<!DOCTYPE html> <html> <head> <link rel=“stylesheet” href=“./styles.css” /> </head> <body> <div class=“container”> <header class=“header”> <h1 id=“title” class=“text-center”>Survey Form</h1> <p id=“description” class=“description text-center”> Thank you for taking the time to help us improve the platform </p> </header> <form id=“survey-form”> <div class=“form-group”> <label id=“name-label” for=“name”>Name</label> <input type=“text” name=“name” id=“name” class=“form-control” placeholder=“Enter your name” required /> </div> <div class=“form-group”> <label id=“number-label” for=“number” >Age<span class=“clue”>(optional)</span></label > <input type=“number” name=“age” id=“number” min=“10” max=“99” class=“form-control” placeholder=“Age” /> </div> <div class=“form-group”> <p> Would you recommend this awesome survey to a Friend ? </p> <label ><input name=“recommend” value=“recommend” type=“checkbox” class=“input-checkbox” />yes</label > </div> <div class=“form-group”> <button type=“submit” id=“submit” class=“submit-button”> Submit </button> </div> </form> </div> </body> </html> |
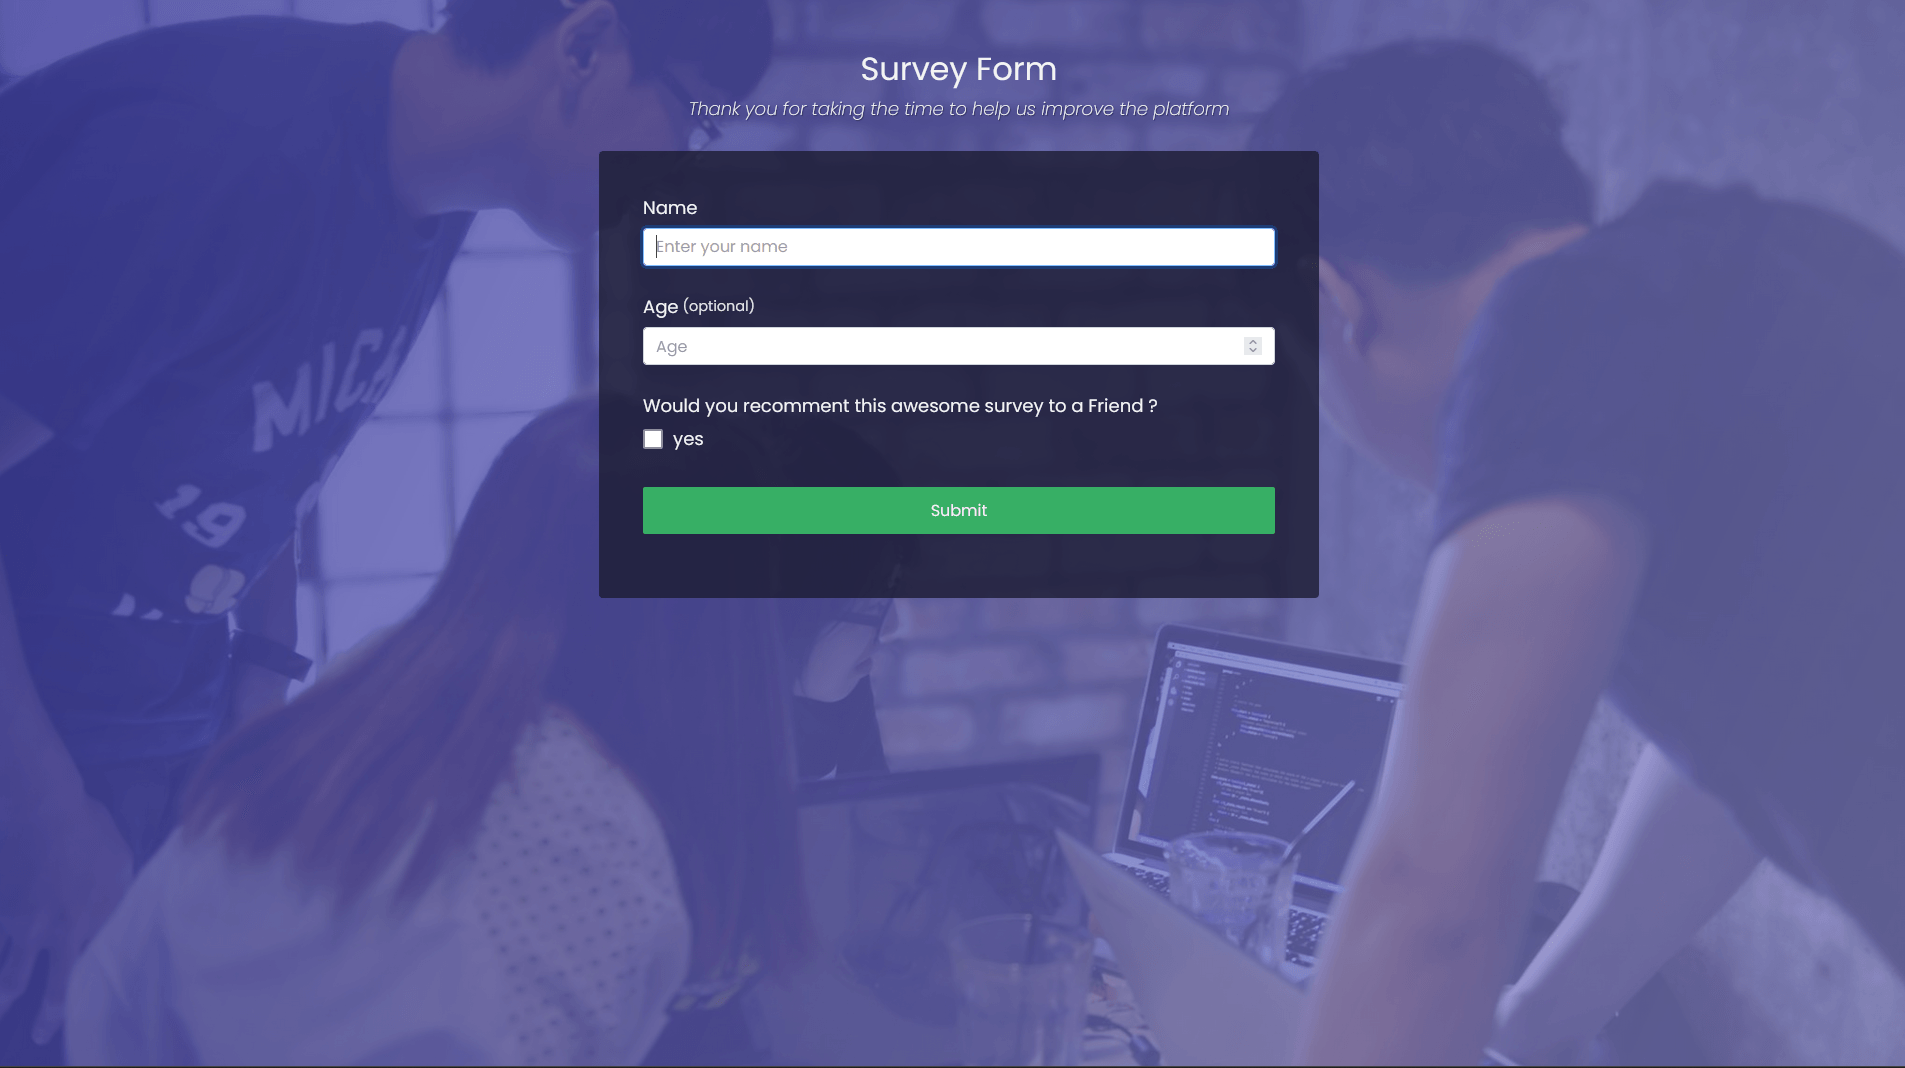
The styles.css file is exactly the same than the original. Open here to see the survey form in action. You can open in your browser, right click on the page and you should see something like view page source or inspect. Click on that and this will open a panel which shows the code of the page. While you are in this view you can click on link like style.css or click on the styles tab to view the CSS applied to certain elements as well.
To test this code sample you can first clone this repository to your local computer using the terminal or you can download it as a zip file).

Go to your browser and on the top bar select file, open, than select the index.html file from the folder (or zip folder) that was downloaded. Take a look at your browser URL, it shows a path to a local file. And you should see something like this, that does not do anything when you click on submit.
The question then is, how do we deploy it to the Internet, how do we make it do something? We need some backend code to be executed after the click. And then make that code store the form content in the database.
Step 2 – Git, Github, Netlify
Let’s start by deploying this form live on the Internet. To that end we are going to use Netlify. First thing first, making sure that we have the Netlify CLI available, and that we are logged in. If it’s not installed, the fastest route is to type in your terminal:
|
1 |
npm install netlify–cli –g |
You wil find more details in the Netlify get started docs.
Typing netlify version in my terminal currently gives me netlify-cli/15.6.0 win32-x64 node-v18.5.0. So I know it’s installed and ready.
Then the next thing to do is type netlify login in your terminal. It will take you through the Netflify sign in form.
Now everything should be ready to move to the deployment phase. But just to make sure we are going to test things locally. Because that’s what most developers do. To that end, type netlify dev in your terminal.
It should output the following in your terminal and open your form in your browser.
|
1 2 3 4 5 6 7 8 9 10 11 12 13 14 15 16 17 18 |
◈ Netlify Dev ◈ ◈ Ignored general context env var: LANG (defined in process) ◈ No app server detected. Using simple static server ◈ Unable to determine public folder to serve files from. Using current working directory ◈ Setup a netlify.toml file with a [dev] section to specify your dev server settings. ◈ See docs at: https://cli.netlify.com/netlify-dev#project-detection ◈ Running static server from “freecodecamp-survey” ◈ Setting up local development server ◈ Static server listening to 3999 Adding local .netlify folder to .gitignore file... ┌─────────────────────────────────────────────────┐ │ │ │ ◈ Server now ready on https://localhost:8888 │ │ │ └─────────────────────────────────────────────────┘ |
If you take a look at the browser URL bar again, you will see that it is different. It looks like a webite address, not a local file. Congratulations, you just run your first local server, serving your HTML and CSS file, using Netlify dev! You have a website running on your machine. Now let’s make this accessible to everyone on Internet, both the source code and the site itself.
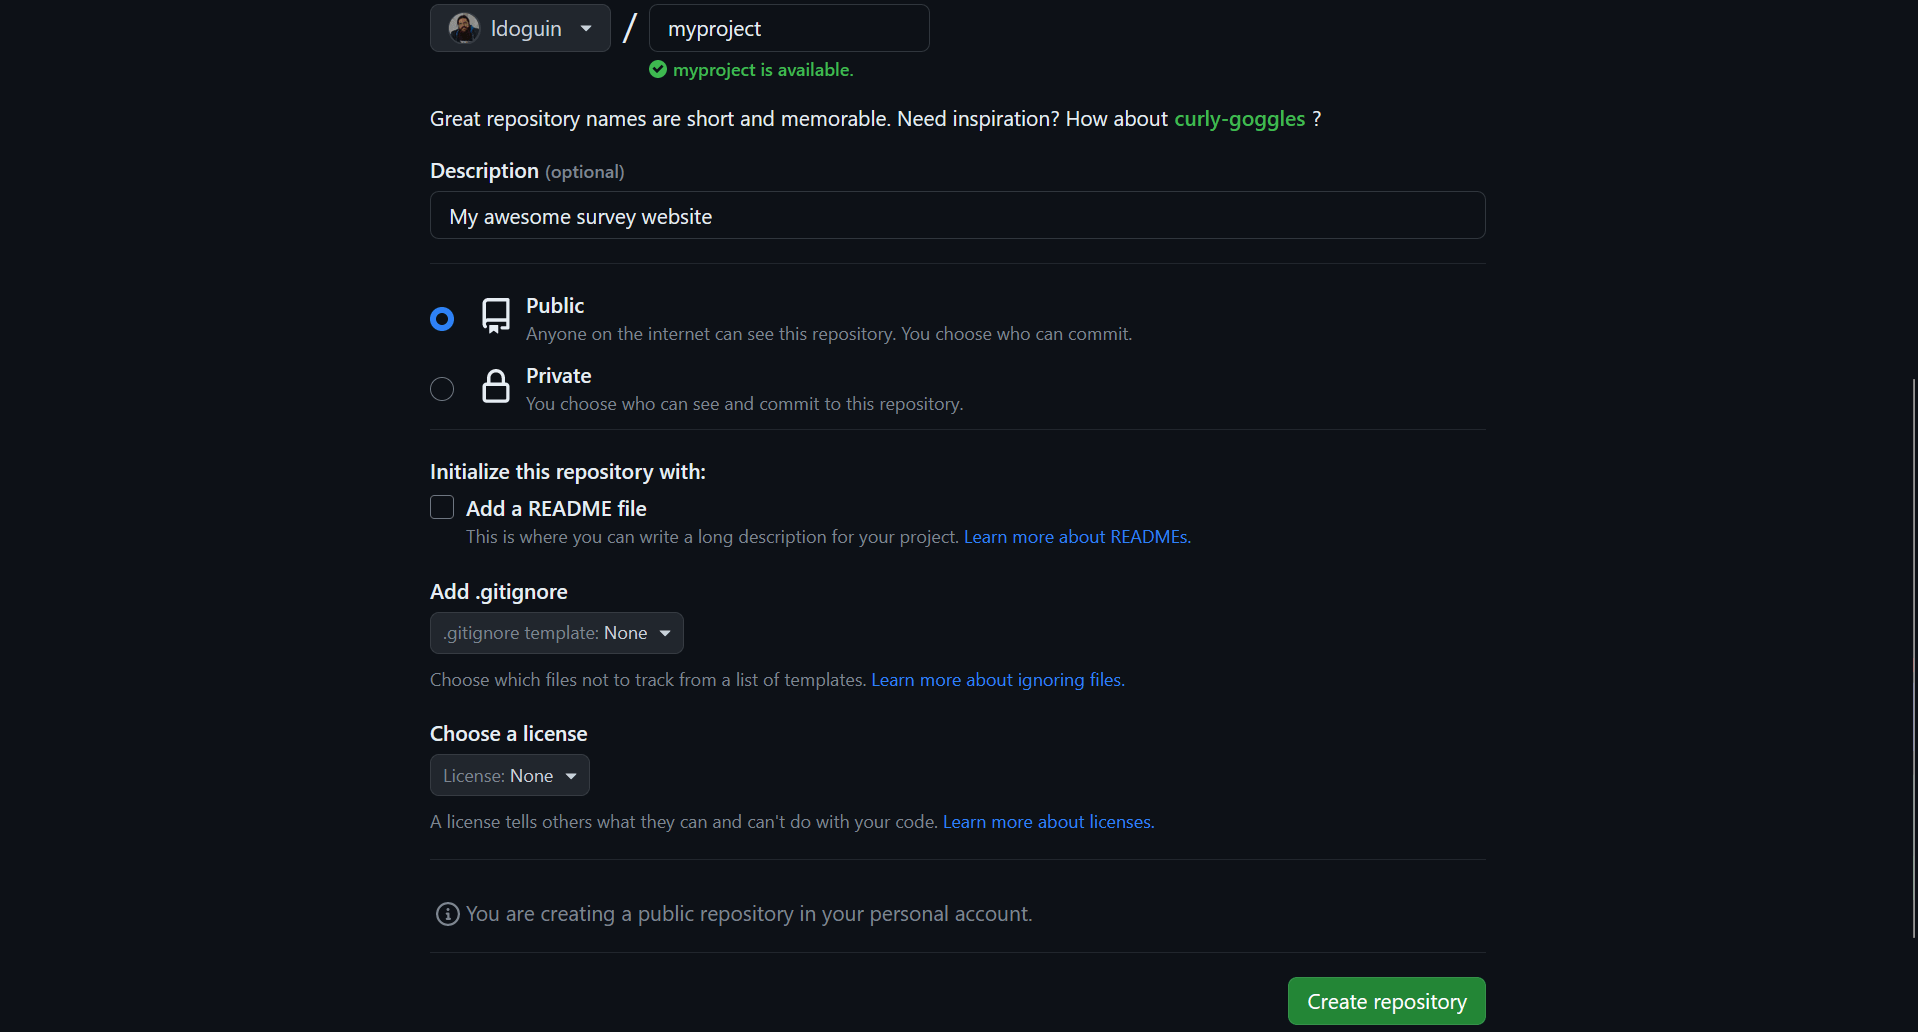
Go to GitHub (or GitLab, or Heptapod, or any other code source hosting solutions, there are others out there!) and create a new Repository. Visit https://github.com/new for Github. You are now in the repo wizard creation. I have only setup my organization, my repo name and a description than clicked on the Create Repository button.
It will give you all the instructions needed to convert your working folder in a git repo, and link it to your GitHub project. This is what I typed in my terminal (you can either copy and paste the below into your terminal or press enter after each line of the below to have it execute. Note, you will have to change line 6 to be your project repository URL):
|
1 2 3 4 5 6 7 |
echo “# myproject” >> README.md git init git add README.md git commit –m “first commit” git branch –M main git remote add origin https://github.com/ldoguin/myproject.git git push –u origin main |
This is the resulting terminal output:
|
1 2 3 4 5 6 7 8 9 10 11 12 13 14 15 16 17 18 19 20 21 22 23 24 25 26 27 28 29 30 31 32 33 34 35 36 37 38 39 40 41 42 |
[C:CodeCouchbasemyproject] $ echo “# myproject” >> README.md [C:CodeCouchbasemyproject] $ ls Directory: C:CodeCouchbasemyproject Mode LastWriteTime Length Name —— ——————– ——— —— –a—— 8/4/2023 12:11 PM 28 README.md [C:CodeCouchbasemyproject] $ git init hint: Using ‘master’ as the name for the initial branch. This default branch name hint: is subject to change. To configure the initial branch name to use in all hint: of your new repositories, which will suppress this warning, call: hint: hint: git config —global init.defaultBranch <name> hint: hint: Names commonly chosen instead of ‘master’ are ‘main’, ‘trunk’ and hint: ‘development’. The just–created branch can be renamed via this command: hint: hint: git branch –m <name> Initialized empty Git repository in C:/Users/Laurent Doguin/Documents/Couchbase/myproject/.git/ [C:CodeCouchbasemyproject] $ git config —global init.defaultBranch main [C:CodeCouchbasemyproject] $ git branch –m main [C:CodeCouchbasemyproject] $ git add .README.md .index.html .styles.css [C:CodeCouchbasemyproject] $ git commit –m “first commit” [main (root–commit) 356ece7] first commit 3 files changed, 245 insertions(+) create mode 100644 README.md create mode 100644 index.html create mode 100644 styles.css [C:CodeCouchbasemyproject] $ git remote add origin https://github.com/ldoguin/myproject.git [C:CodeCouchbasemyproject] $ git push –u origin main Enumerating objects: 5, done. Counting objects: 100% (5/5), done. Delta compression using up to 8 threads Compressing objects: 100% (4/4), done. Writing objects: 100% (5/5), 1.95 KiB | 999.00 KiB/s, done. Total 5 (delta 0), reused 0 (delta 0), pack–reused 0 To https://github.com/ldoguin/myproject.git * [new branch] main -> main branch ‘main’ set up to track ‘origin/main’. [C:CodeCouchbasemyproject] $ |
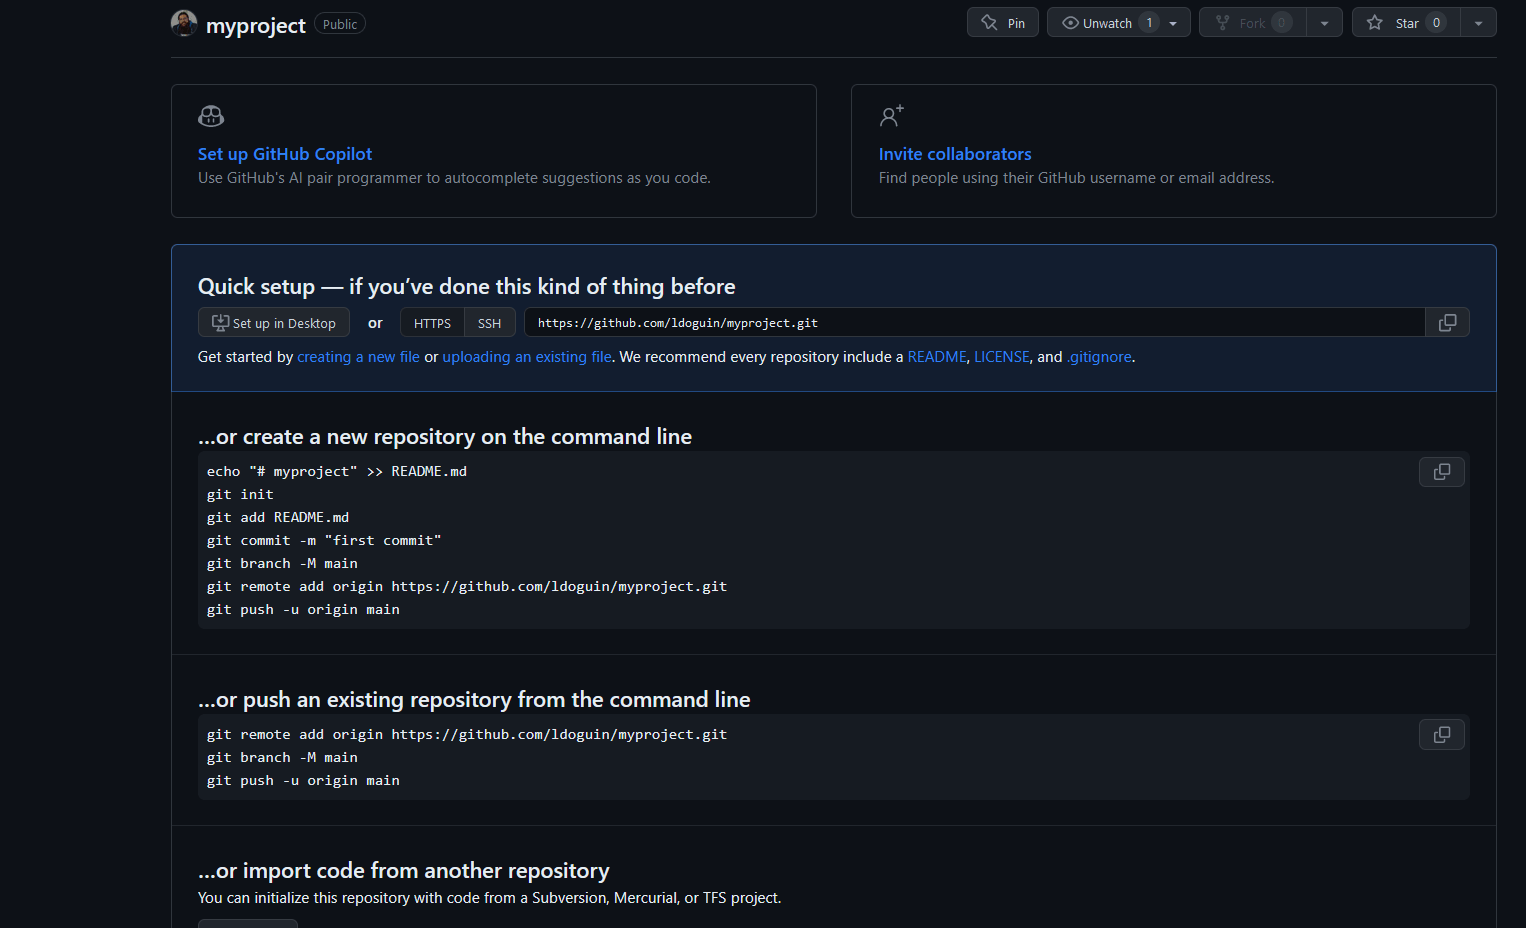
Now if I go back to the Github page and reload it, this what I see:
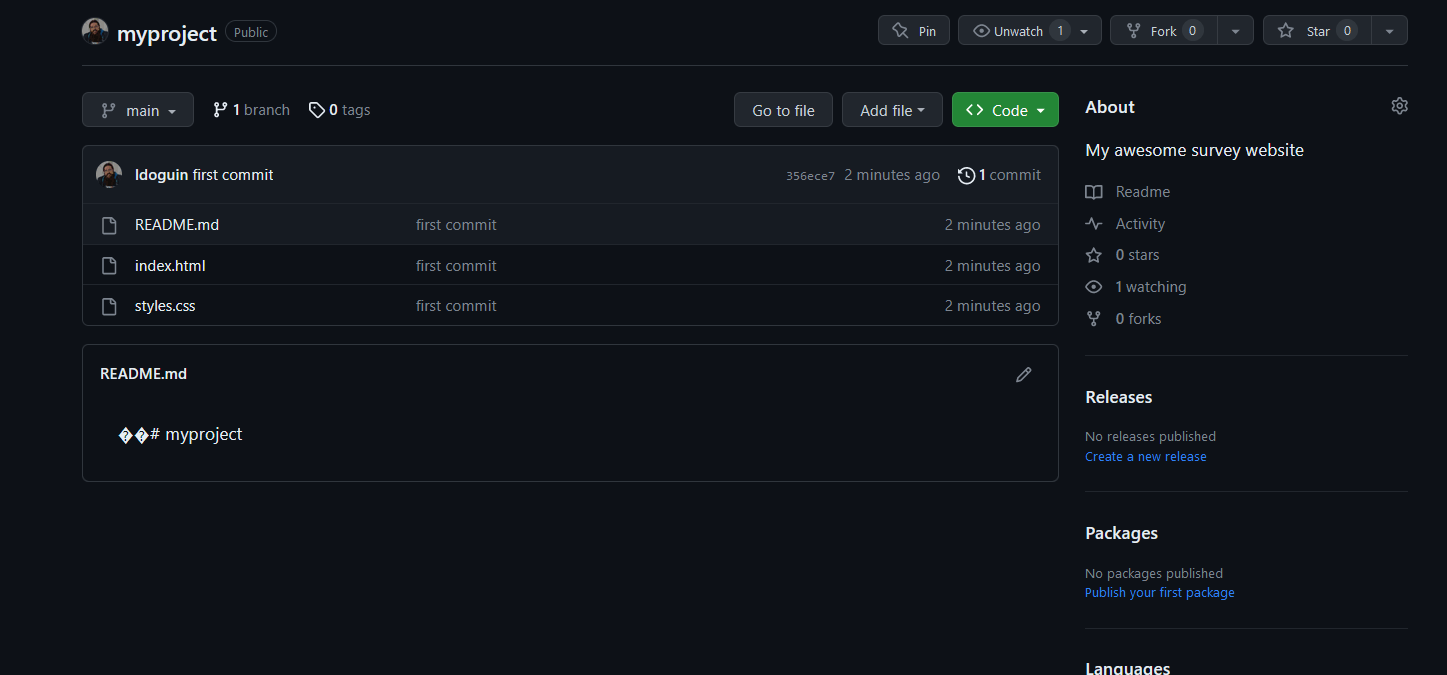
Congratulations, your code is now available on Github, for everyone to see, learn from, contribute to. It’s now time for Production! Let’s make that website live 💪
Go ahead and visit https://app.netlify.com/start/deploy. This will get you to Netify’s new project wizard. You will see various buttons to help you start, GitHub, GitLab, Bitbucket, AzureDevops. Let’s click on GitHub.
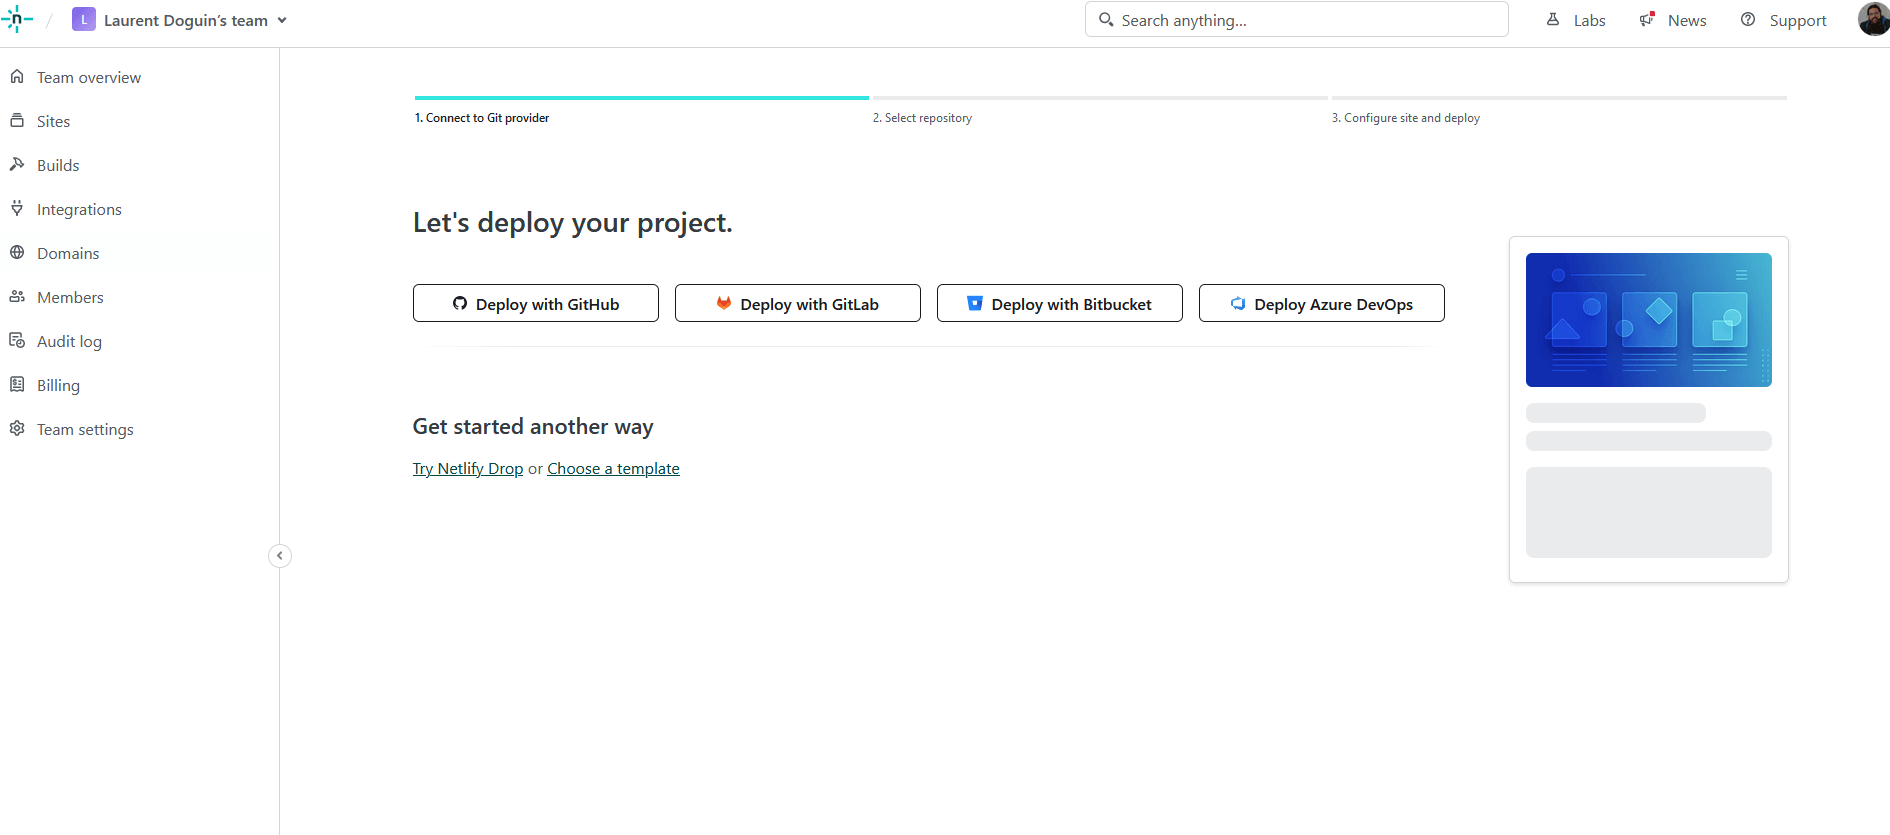
You will see a couple windows asking you to link your GitHub profile to Netlify. Go ahead and proceed, it will take you to the following page.
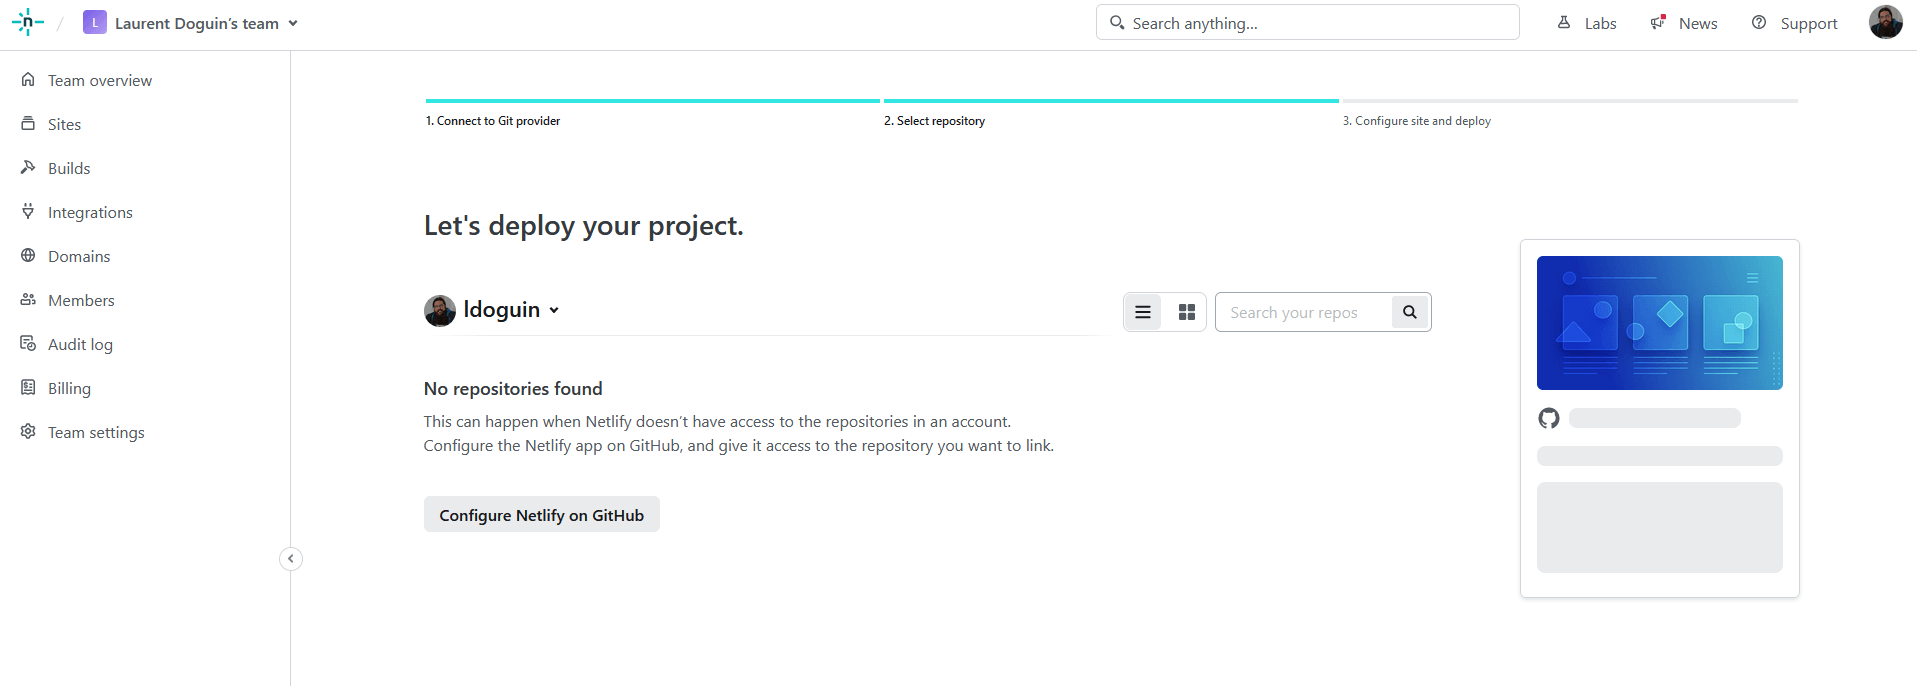
Netlify is telling me I have no Netlify app installed on any GitHub org. Click on Configure Netlify on GitHub, it will open a poup window asking you to select the GitHub org you want to install Netlify in, and which repo to give it access to.
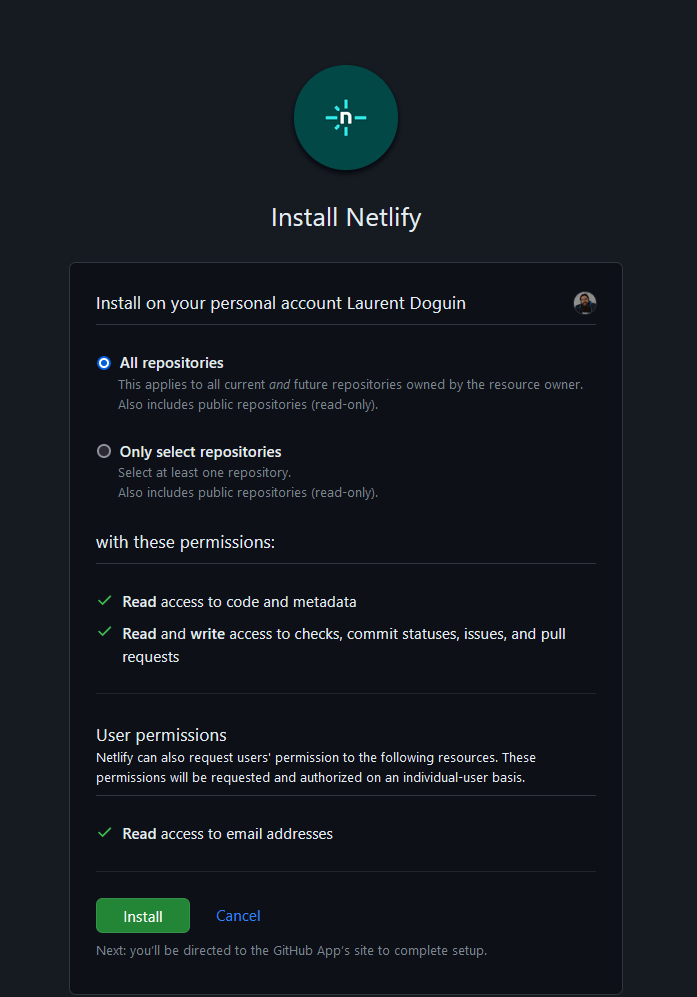
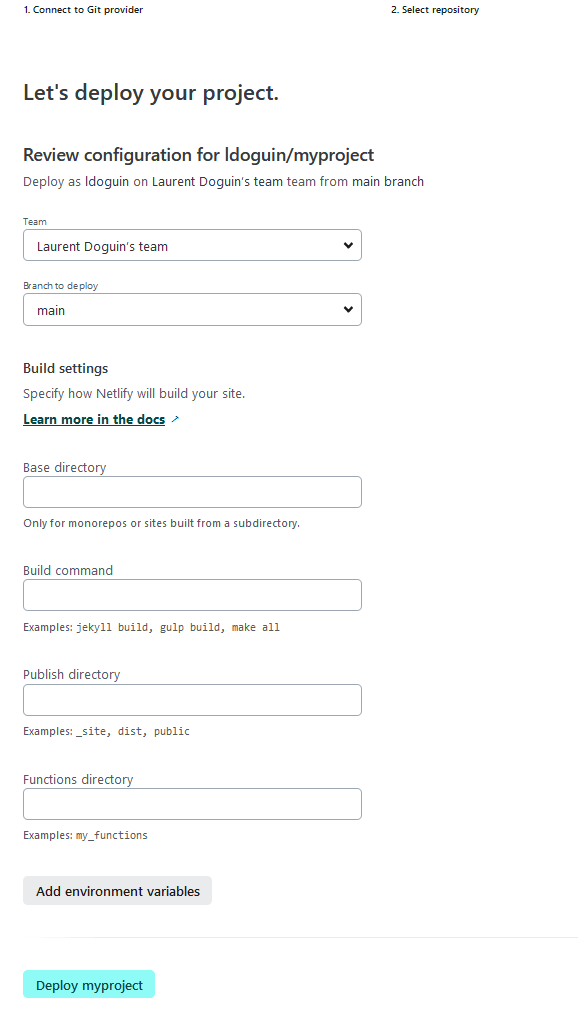
I leave the default and proceed to the next step. From now on you should see every repo in your GitHub account.
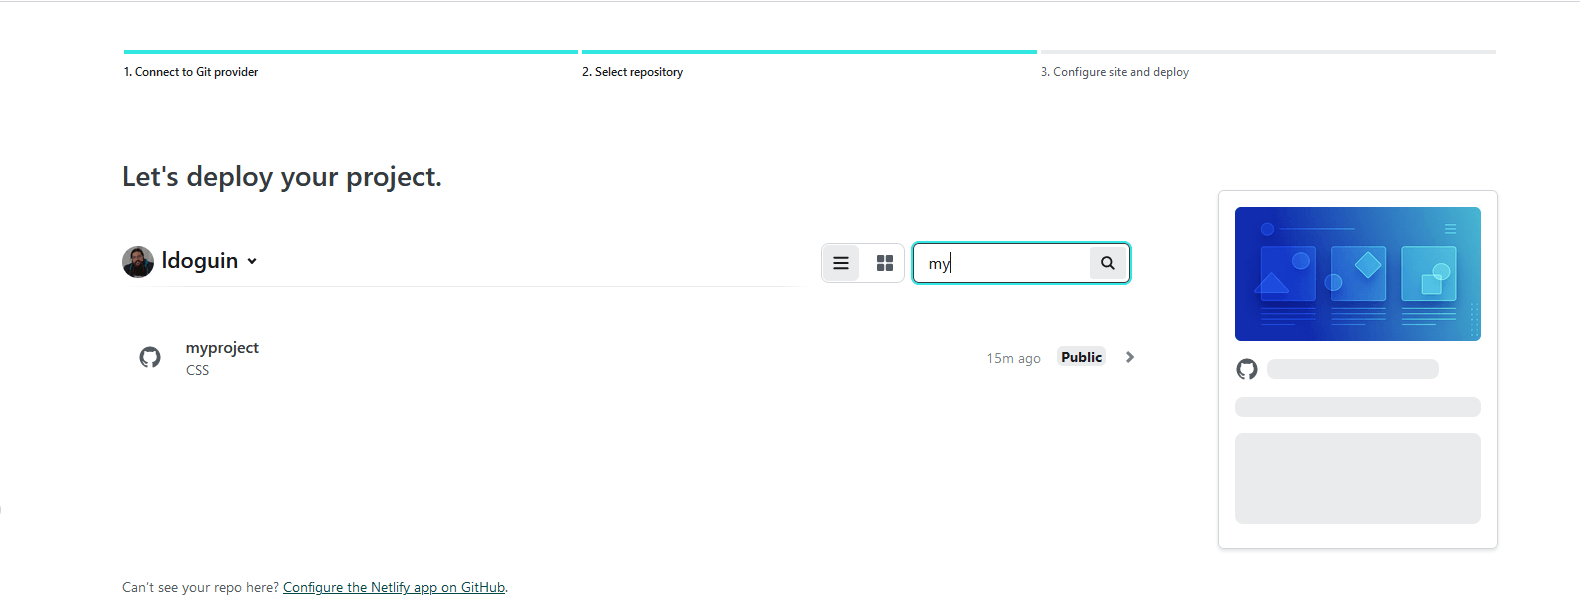
I will leave the default and click on Deploy myproject:
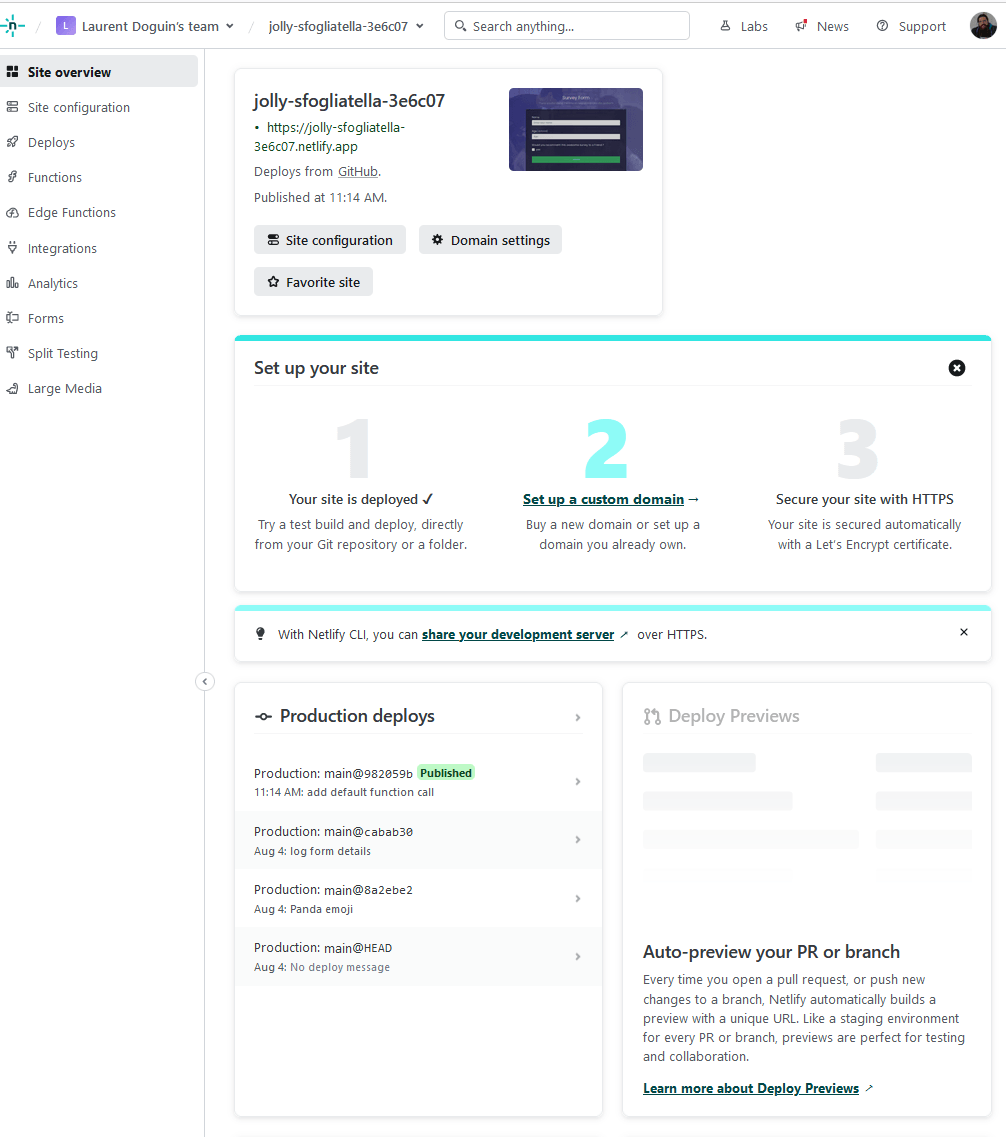
You will see a link to your newly deployed on the internet website, for me it’s https://jolly-sfogliatella-3e6c07.netlify.app/. Netlify provides sandboxes environment under the netlify.app domain for you to deploy things without having your own domain name.
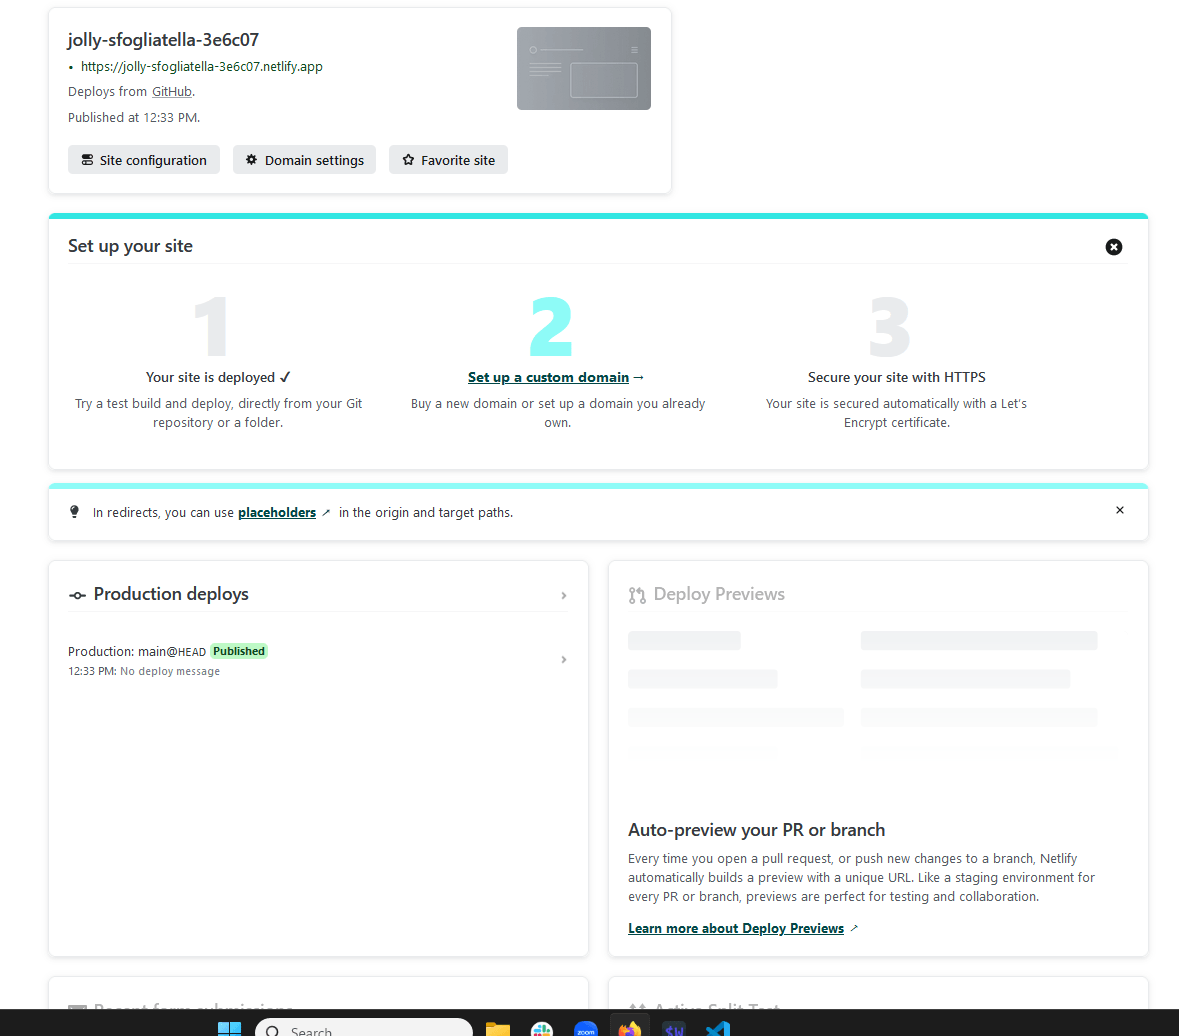
Congratulations, your website is now live on the Internet. Take a minute to celebrate 🎉.
Now we can link this Netlify project by entering netlify link in the terminal. A list of options will be offered. Select the default one, which should be Use current git remote origin (https://github.com/yourOrg/yourProject). Because you have deployed through GitHub, Netlify has the git information of your repo and can infer which project to use (and also at that point you probably have only one project). This is what the output looks for me:
|
1 2 3 4 5 6 7 8 9 10 11 12 13 14 15 |
[C:CodeCouchbasemyproject] $ netlify link netlify link will connect this folder to a site on Netlify ? How do you want to link this folder to a site? Use current git remote origin (https://github.com/ldoguin/myproject) Looking for sites connected to ‘https://github.com/ldoguin/myproject’... Directory Linked Admin url: https://app.netlify.com/sites/jolly-sfogliatella-3e6c07 Site url: https://jolly-sfogliatella-3e6c07.netlify.app You can now run other `netlify` cli commands in this directory [C:CodeCouchbasemyproject] $ |
We can try a couple things now. I am going add a 🐼 emoji to my form because why not. In index.html, I am modifying line 9 from this: <h1 id=”title” class=”text-center”>Survey Form</h1> to this <h1 id=”title” class=”text-center”>Survey Form 🐼</h1>
I then save the file, and push this changes to Github. Then, in the terminal, I type netlify open:site:
|
1 2 3 4 5 6 7 8 9 10 11 12 13 14 15 16 17 |
[C:CodeCouchbasemyproject] $ git add .index.html [C:CodeCouchbasemyproject] $ git commit –m“Panda” [main caa6f87] Panda 1 file changed, 1 insertion(+), 1 deletion(–) [C:CodeCouchbasemyproject] $ git push Enumerating objects: 5, done. Counting objects: 100% (5/5), done. Delta compression using up to 8 threads Compressing objects: 100% (3/3), done. Writing objects: 100% (3/3), 360 bytes | 180.00 KiB/s, done. Total 3 (delta 1), reused 0 (delta 0), pack–reused 0 remote: Resolving deltas: 100% (1/1), completed with 1 local object. To https://github.com/ldoguin/myproject.git 356ece7..8a2ebe2 main -> main [C:CodeCouchbasemyproject] $ netlify open:site Opening “jolly-sfogliatella-3e6c07” site url: > https://jolly-sfogliatella-3e6c07.netlify.app |
Something very cool is happening. Because your GitHub repo is linked to Netlify, a new deployment will be automatically done by Netlify. So when opening the website, you will see the Panda <3.
At that point we have a Github Repository that holds our code, that is integrated to Netlify, that will automatically create new deployment when you push new code. And we also have a configured netlify CLI in our working folder. We are ready to write backend code!
Step 3 – Backend
In this chapter we will answer the following question: What happens when someone fill the form and click on submit ?
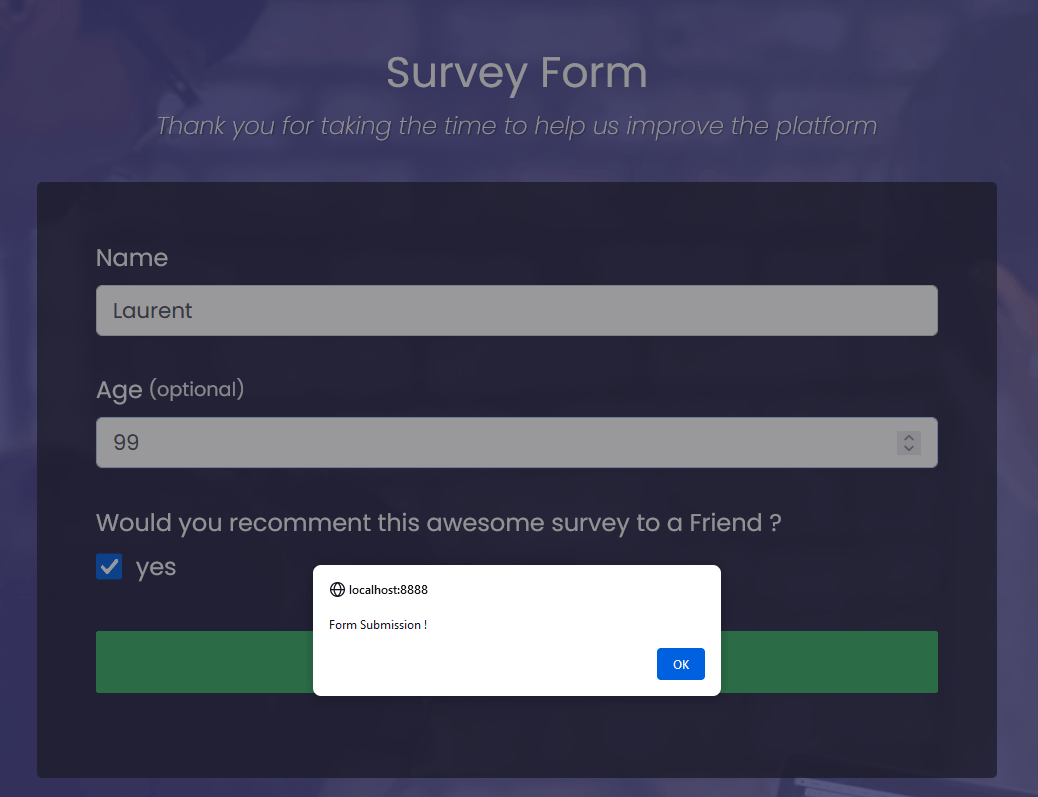
The answer right now is: Nothing. Let’s change that. By writing some JavaScript. We are going to display a popup alert when someone enters valid information and click on Submit. In your index.html file you will put the following <script> code between the last closing div tag </div> and before the closing body tag </body>.
|
1 2 3 4 5 6 7 8 9 10 |
<script> const form = document.getElementById(‘survey-form’); <1> form.addEventListener(‘submit’, handleForm); <2> async function handleForm(e) { e.preventDefault() <3> alert(“Form Submission !”) <4> } </script> |
|
1 2 3 4 |
<1> Get the Dom element representing the form by using its id <2> Each time the submit event occurs, run the handleForm function <3> The natural behavior of a form submission is to reload the page, we don‘t need that, hence we prevent the default behavior to happen <4> The alert function display a popup with a message |
If you save your code and reload the page, fill the form, click on submit, you should see something like this:
Now that we have something happening when a user submits the form, let’s go a bit further. We want to look at the content of the form and make sure we can get the right data in JSON. We want a string for the name, and integer for the age and a boolean for the recommendation.
And it turns out that the HTML checkbox is not playing nice. The value it gives by default is no value, and once checked it gives the content of the value field. We are going to add another input field, hidden, to make sure the default value will be False.
|
1 2 3 4 5 6 7 8 9 10 11 12 13 14 |
<label> <input id=“hiddenRecommend” name=“recommend” value=“false” type=“hidden” /> <input id=“recommend” name=“recommend” value=“true” type=“checkbox” class=“input-checkbox” />yes</label> |
Now about the JavaScript Code, the are some interesting new lines to look into.
0
1
With that being sorted, let’s get serious and start creating a Netlify function. Enter netlify function:create in your terminal. You should see something like:
2
Select Serverless function, leaves the default for the next question about path, keep JavaScript as the language, keep the default hello-world template, than give a name to your function. Mine is called saveform. This will generate new files in the netlify folder. If you run netlify dev now, you will see new lines in the logs:
3
This means that our netlify dev server is also serving our newly created function. Take a look at the newly generated file ./netlify/functions/saveform/saveform.js.
4
5
Let’s try it out by calling this function when the user clicks on submit. Just add the following code after the last console.log call:
6
7
Add, commit and push. netlify open:admin
At this point, you have a frontend and a backend deployed, on the Internet. But all we are doing is calling the default function created by Netlify’s wizard. The next step is to send the content of the form to that function, and store it in a database.
Step 4 – Database
First thing to do is figure out how to send the form details to the function. This requires us to change our GET method to a POST method. These things are called HTTP request methods, sometimes reffered to as HTTP verbs. You can take a look at the full list on MDN. A Get method request is used to only retrieve data. A post method request is used to create or change data. This is exactly what we want. We want to create a new entry in our Dababase when someone submits a form. An HTTP request has a method, some headers(Metadata about your requests, here we are saying the request will be JSON content with the Content-Typ header), and a body. The body of our request will be JSON text.
8
9
Our frontend HTTP request to our backend is changed, now we need to adapt the backend code.
0
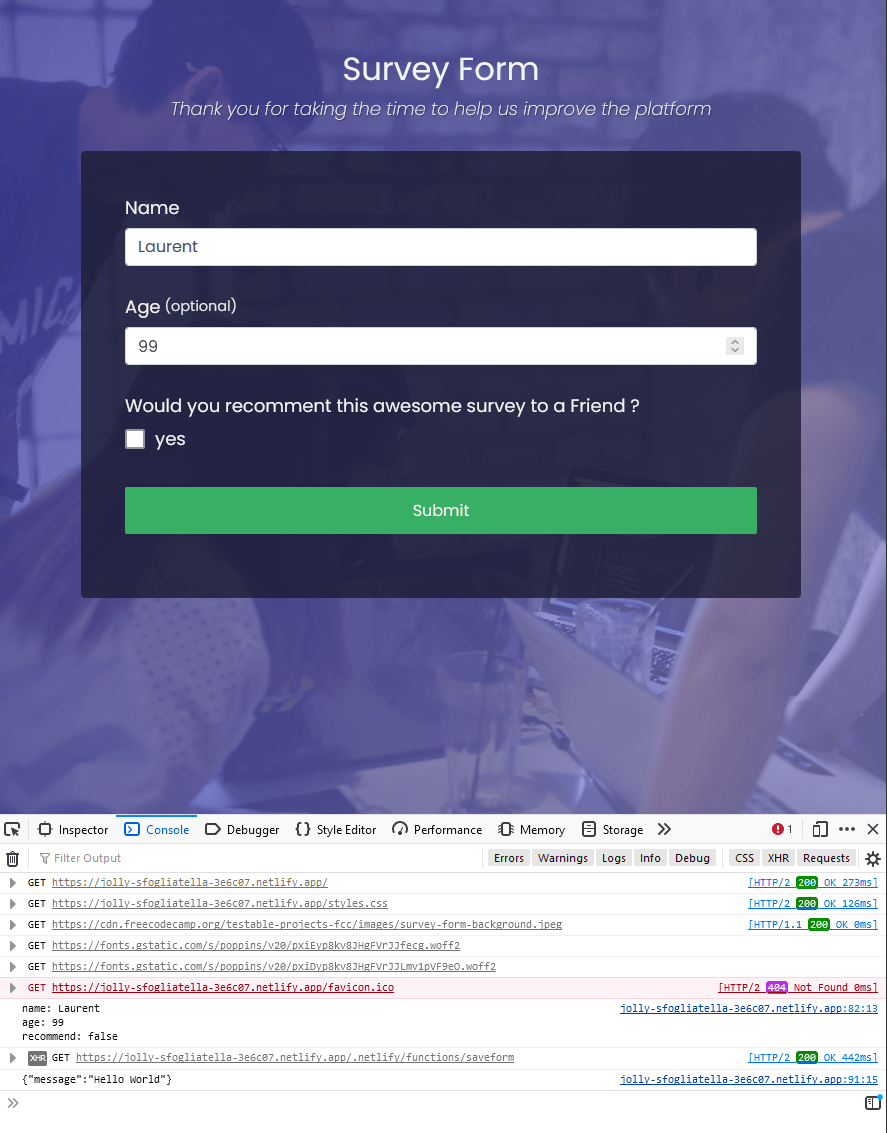
1
You should see a different message in the web dev console, you should see {“name”:”yourName”}.
We have sent the form data to the backend and made sure of it. Now on to the database side of things. Working at Couchbase, this is the database I am going to use. A simple way to try, go to https://cloud.couchbase.com/sign-up, create an account, you get a 30 day trial, no credit card required.
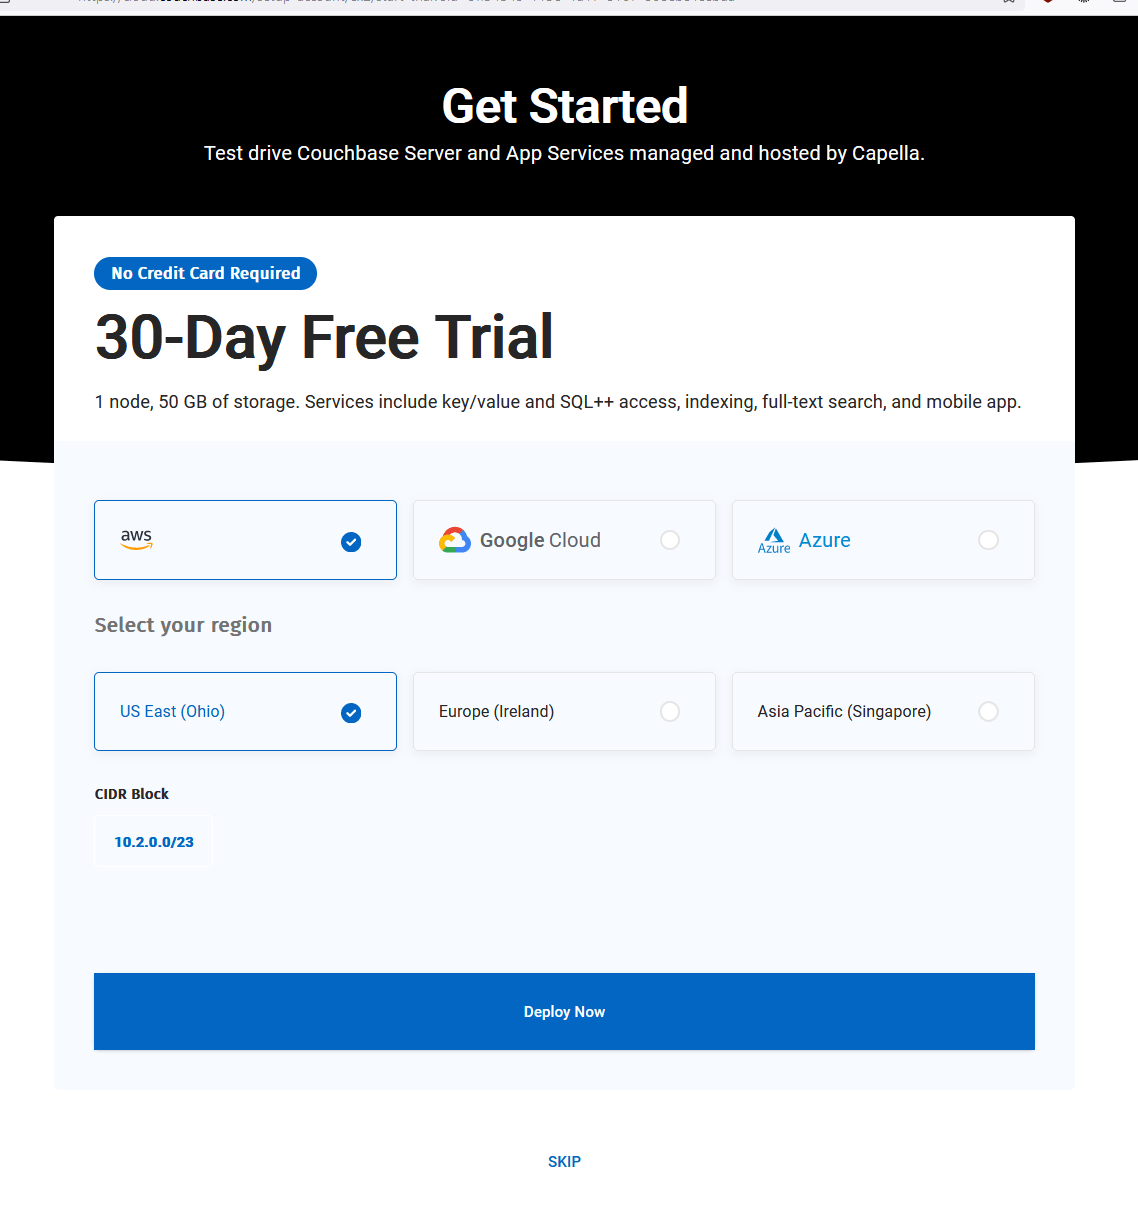
You can leave the default on, or choose your favorite cloud provider and closest region. Click on Deploy now and wait for the deployment of your database.
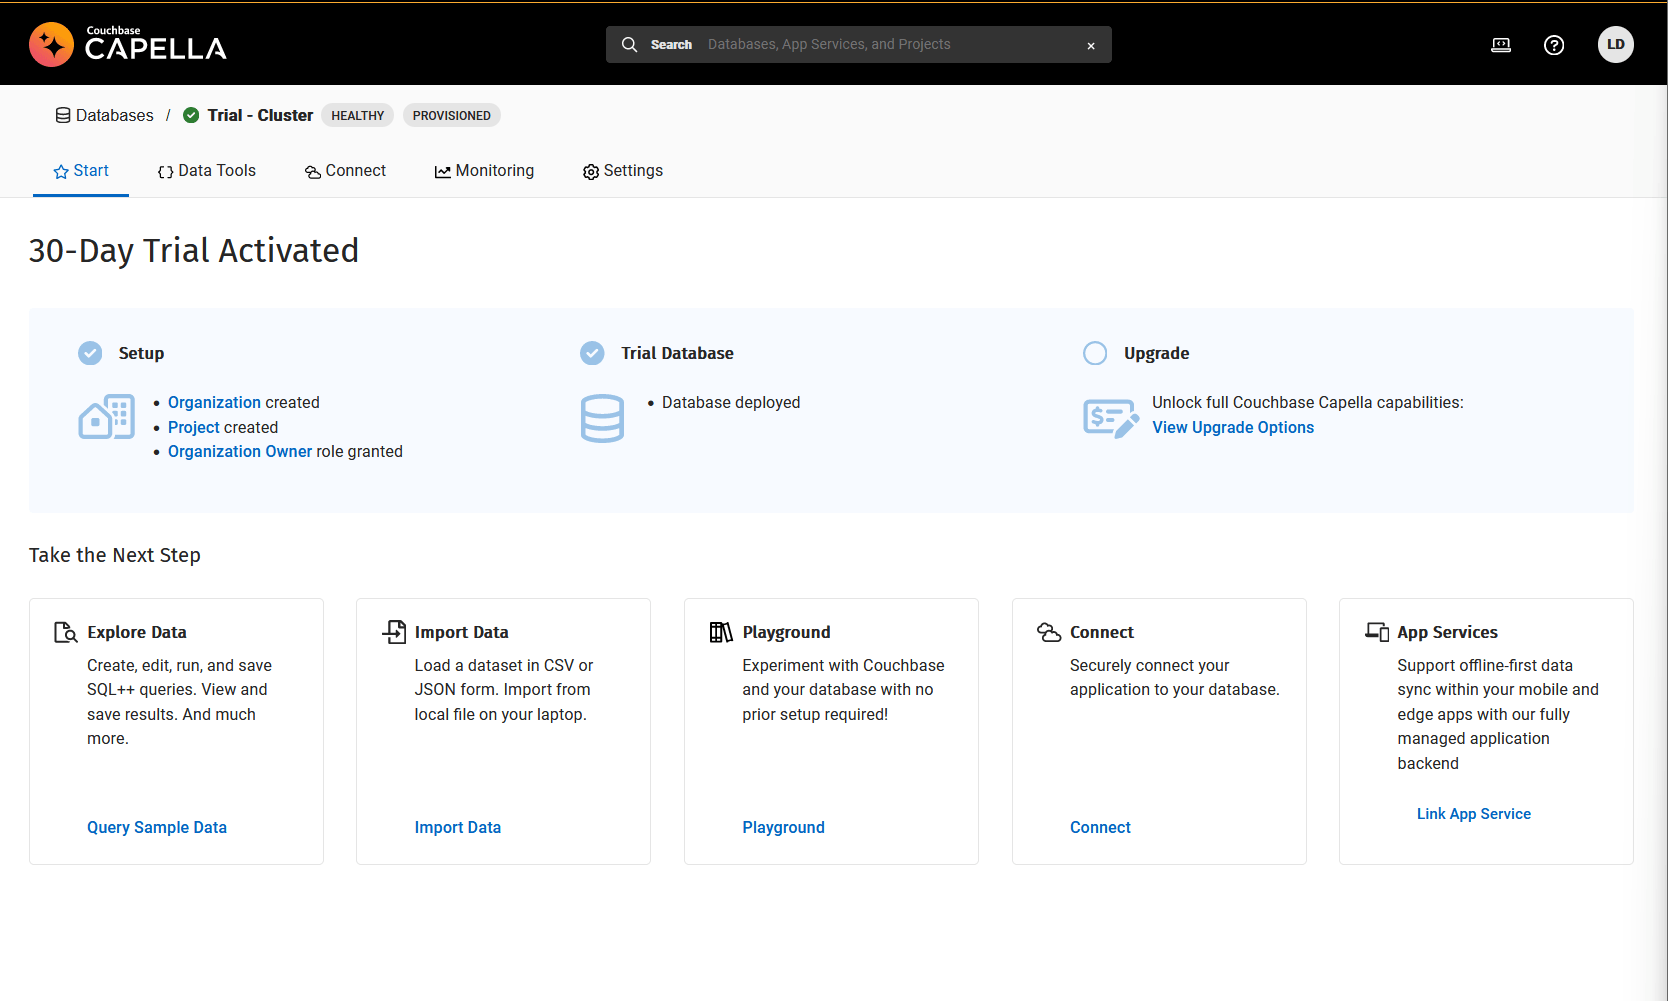
Two things we want to do from there. Make sure we can connect to that database from our backend code, and make sure we can write the data somewhere. Go ahead and click the Connect tab.
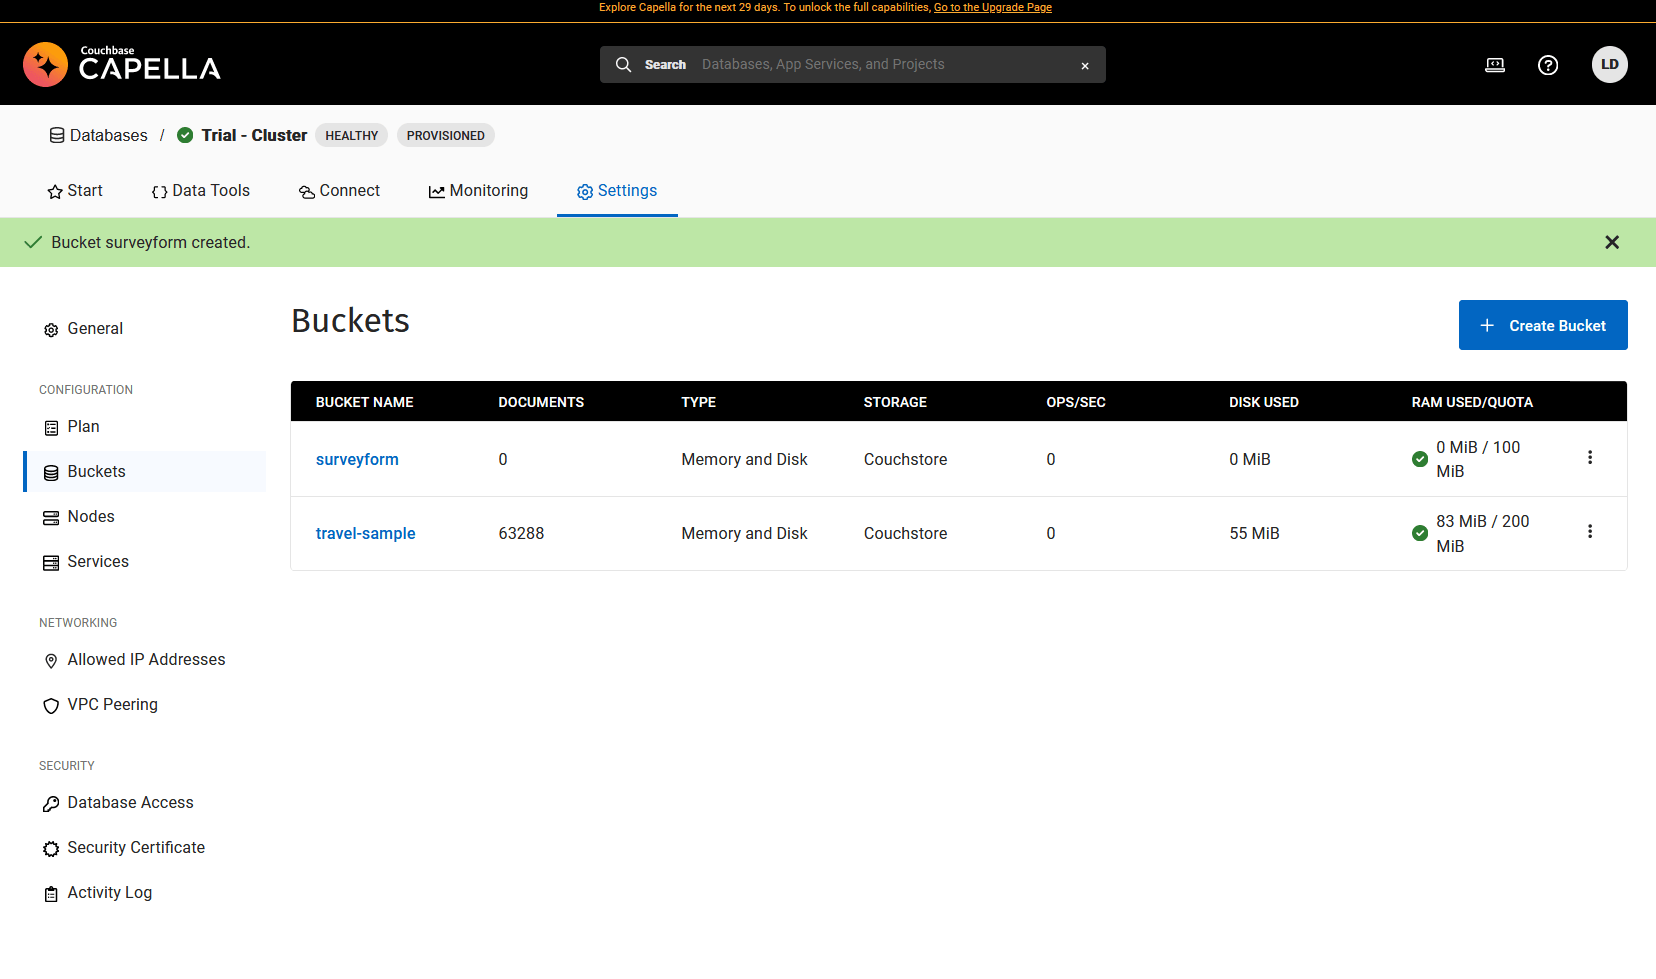
In Couchbase we store data in Buckets. By default the trial comes with a travel-sample bucket preimported. We are not going to use it. Instead we are going to create our own bucket. Click on Settings on the top level menu, than on Buckets on the left menu.

Now click on + Create Bucket, give it a name and leave the rest to default settings.Than Click on Create Bucket.
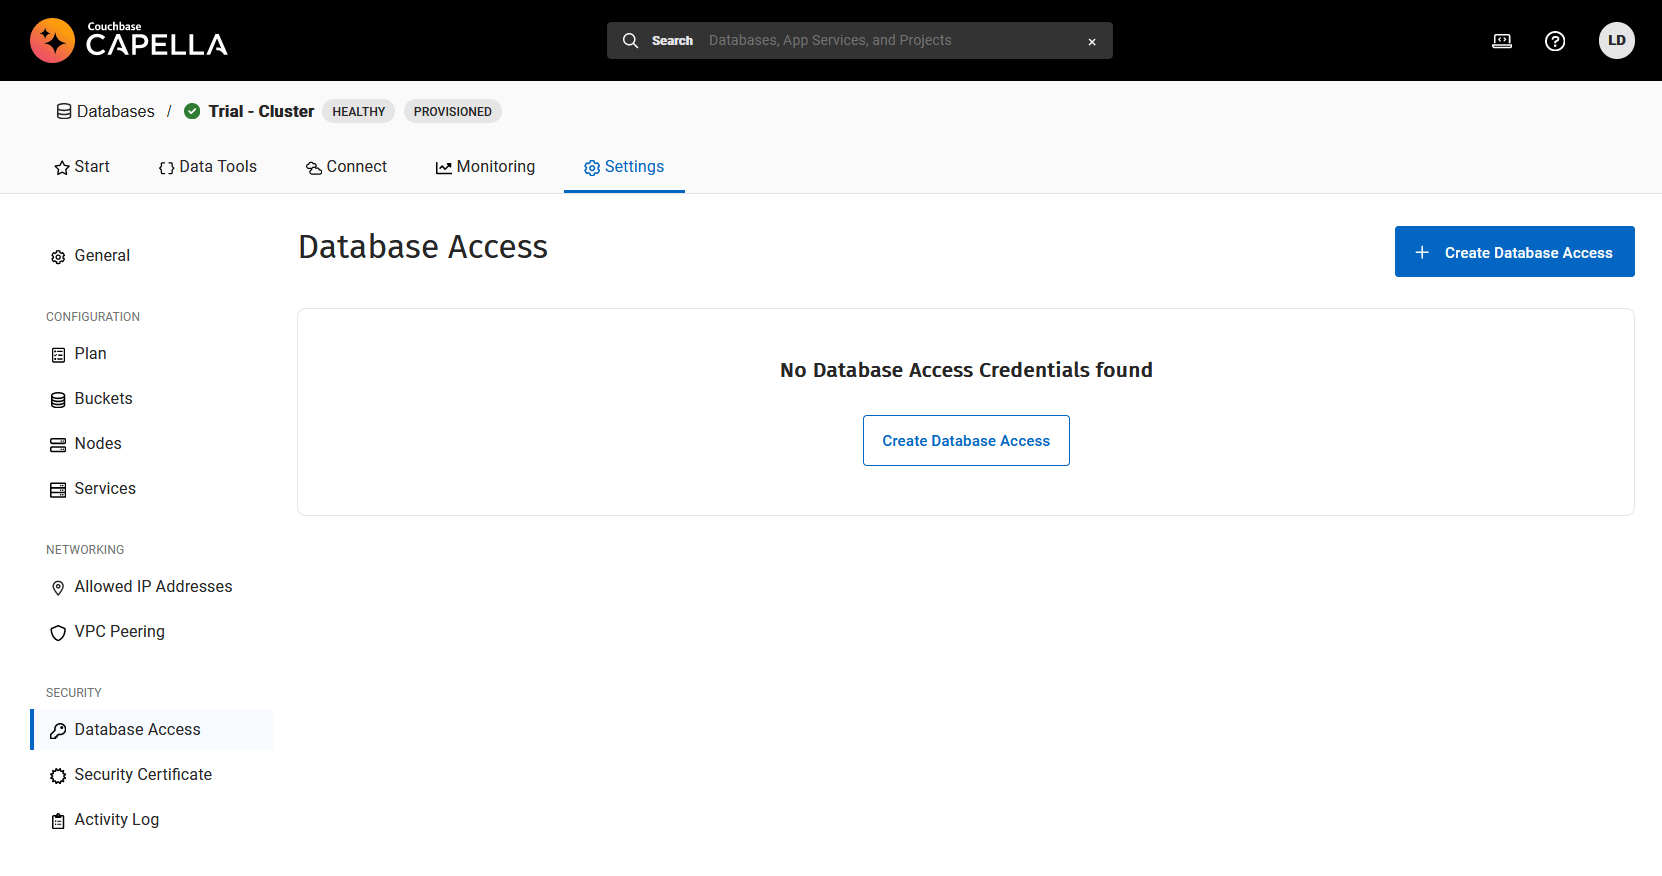
We have a new Bucket, now we need to create associated credentials. Click the Database Access button, than Create Database Access button.
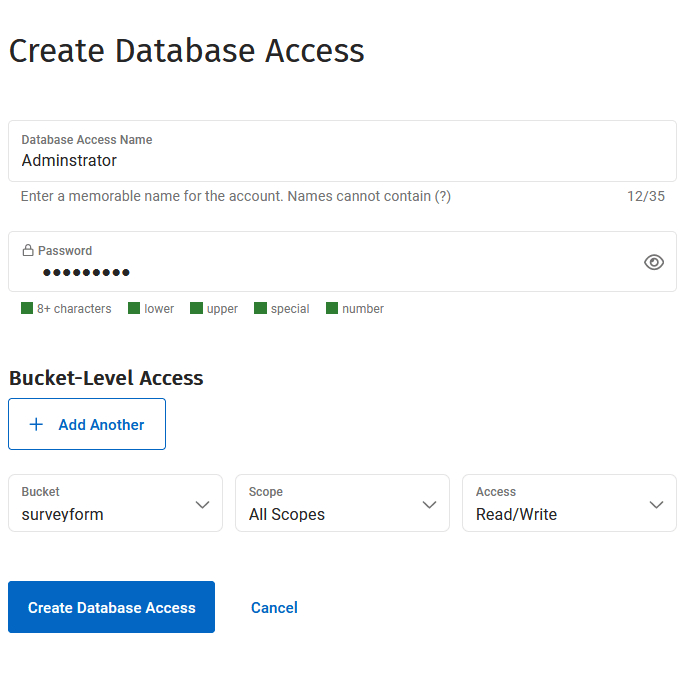
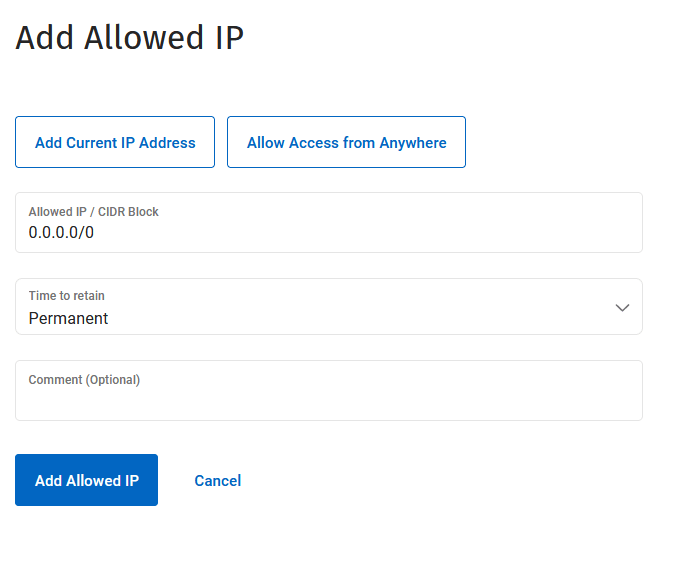
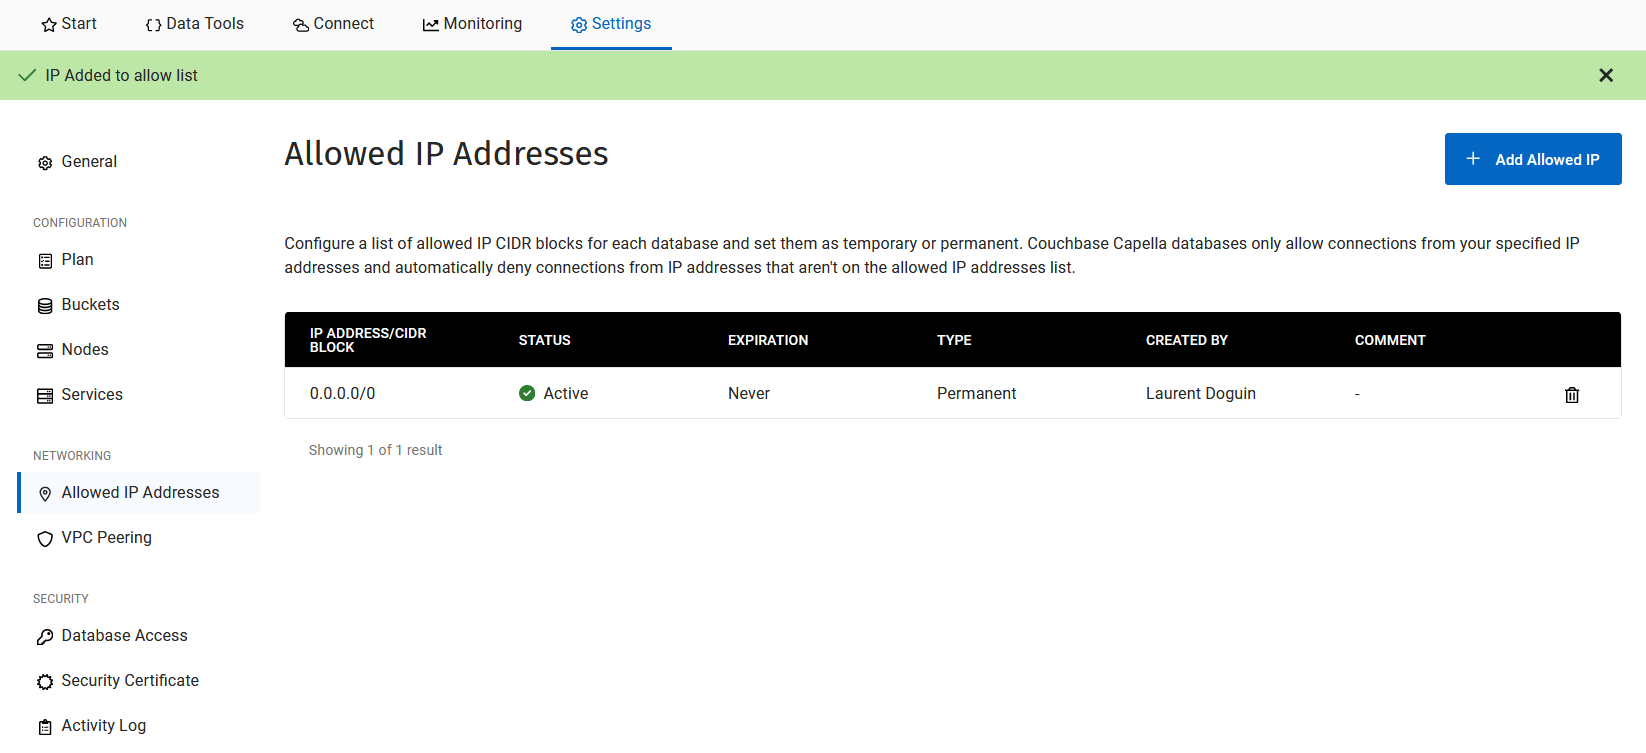
Make sure you remember both username and passaord and click on Create Database. One last thing to do is to allow this database to be reachable publicly. Right now it’s hidden. Click on Allowed IP Addresses, than Add Allowed IP. Click on Allow Access from Anywhere, follow the instructions. This should prefill the form, than click on the Add Allowed IP button. You might think this is a bit cumbersome. Why isn’t it the default?
Now click on the Connect tab. You will see the Connection String, select your database credentials, switch the language to Node, and it will give us the right instructions to connect to the database from our backend code.

We can copy and paste this to our function code, and add a couple more things:
2
3
For Couchbase you need to install it. Running npm i couchbase@4.2.4 will do the trick. Right now Netlify/Couchbase compatibilty is assured for Couchbase version 4.2.4 or below. This is due to the nature of our SDK. It’s a JavaScript interface on top our our C SDK. And C dependencies expect to find their system dependencies in the right version. Right now Couchbase 4.2.5 is expecting to find GLIBC_29 but it’s not available on the Ubuntu system running our Netlify backend code.
Now that we have dependencies, let’s be explicit in how build them. You can add a netlify.toml file at the root of the repository with the following content:
4
It’s doing a couple things. Installing the dependencies and removing the debug symbol table from couchbase_impl.node. This file is the C library used by our Node SDK. And it’s too big for Netlify right now. So we are removing unnecessary clutter coming from the build process.
5
Now you could add the new files, commit and push to GitHub. But that would push your password to GitHub. We don’t want that. Instead you can test it by running netlify dev. Go ahead and resubmit the form.
If everything went well, you have written data to your Database! You can check this out easily by going to the Couchbase Capella UI. Cick on Data Tools, select your Bucket, Scope and collection, and you should see your survey from document.
This is great, you just wrote code to connect your database!
Step 5 – Configuration Management
To avoid pushing our credentials on GitHub, we are going to use environment variables. Environment variables are common to every Operating Systems and is the best way to manage configuration across different environments (different OSs, clouds, test, staging, preproduction, production, whatever fits your workflow).
6
7
On Mac or Linux, you can run export MYVARIABLE=”value” in your terminal. On Windows you can run $Env:MYVARIABLE=”value”
To define them in Netlify’s context, you can go though the UI and do it manually, or use the CLI:
8
Now you can add your files, commit and push your code. Congratulations, you went fullstack. Backend, Frontend and Database. And deployed everything live! But our work is not over. There are still a couple things we can do to make this more professional.
Step 6 – User feedback
Right now we don’t have much happening when the user clicks on the Submit button of our form. We need to change this to let them know they have been successfully recored, or not. First step it check for an error on the dev side of things. HTTP status code are well made, anything equals or higher than 400 is usually an error, so we can do something like this:
9
0
To test it, just make a typo somewhere in your Connection String or Credentials to Couchbase. You should see errors in the webconsole once clicking on Submit. But the web console is just for us, we need to add a proper error or success message to our user.
I added a couple span HTML elements with error and success message right before the end of the form. Note the hide CSS class that makes them invisible for now.
1
And here is the corresponding CSS. Displaying the error in red, hiding or showing an element, and a nice fade-out animation because I am fancy like that.
2
Now to put everything together. The first two lines get the new span elements just added. The call to form.reset() is clearing all values from the form when the returned response status code is 200. Than the rest is playing with CSS classes to make the message appear, than fading out with the addition of the fade-out class, than a 7000ms timeout function will remove every classes and hide the element again. It’s pretty much the same when there is an error.
3
4
Now you can test submit a form again and see the different success or error message, depending on what you decided to do. When you are happy you can add, commit and push that code.
Congratulations, you made it to the end of this guide! You have used git, GitHub, Netlify and Couchbase Capella to deploy an HTML form on the web, and made sure that the content was stored in a database each time users submit the form.
Ready for more?
- Check out Couchbase developer resources: sample applications, code, and tutorials.
- Join our Community Hub to use Discord, Forums, and more.

Leave a comment
You must be logged in to post a comment.