
If you’d like to watch this blog live, here is a video of Nyah Macklin & Jessica Rose walking through the process of installing Git and setting up a GitHub account. Watch below or read on.
In our last post, we learned about tools we can use to edit our code, like Visual Studio Code. Today, we will learn about an online tool we can use to store, share and track different versions of our code, GitHub. But before we can start learning about GitHub, we have to talk about Git (and yes they are different).
What is Git?
Git is a version control system. But what is that? The official Git docs states: “Version control is a system that records changes to a file or set of files over time so that you can recall specific versions later.” If you play video games, Git is like a memory card that saves your game (your code in this instance) at many different places in time. Git will save a snapshot of your code at a specific point in time and you can access that snapshot later.
What is GitHub?
GitHub is a web-based tool for storing/housing/sharing those snapshots/saved moments in time of your code. Many engineers take the snapshots using Git and then push those snapshots up to GitHub, where other engineers can view and edit (with permission) those snapshots and can even add new snapshots themselves. While GitHub sounds similar to Git, these are two different things. Git is the underlying version control system and GitHub is a suite of tools built around Git to make it easier to use and understand.
Setting up Git & GitHub
Before we can start using these helpful tools, we have to get set up.
Introducing The Command Prompt aka The Terminal
The terminal (or the Command Prompt on Windows) is not this big scary place that you commonly see hackers in movies use.

It usually just seems scary because it is not as pretty as the rest of our computers. Actually, we can think of the terminal like the backstage of your computer.
This is actually where we will use Git! But first we have to install Git.
Part 1 – Installing Git
For Windows users
- Visit the Git official website and select the Downloads button in the center of your screen.
- Select Windows from the list of operating systems and select the latest version of Git for Windows.
- The downloaded file will pop up in the top right of your screen or the bottom left of your screen. Once it has finished downloading, double click to open the file. This will launch the Git installer.
- Follow the on-screen instructions. For now, the default options will do just fine. Click Next until the installation begins.
- Congrats! 🎉 You’ve installed Git on your Windows machine. Skip down to Part 1.5 – Introduce Yourself to Git.
For macOS users
- Open the terminal. If you don’t know what the icon for it looks like, open your Finder app and search for the Terminal app or use Spotlight to search for it (hold down command and the space bar at the same time to open Spotlight).
- Once you open the Terminal, Type: git –version and press enter. If Git isn’t already installed, macOS will prompt you to install it. Many usually choose to download homebrew to then install Git, and further instructions on that process can be found here.
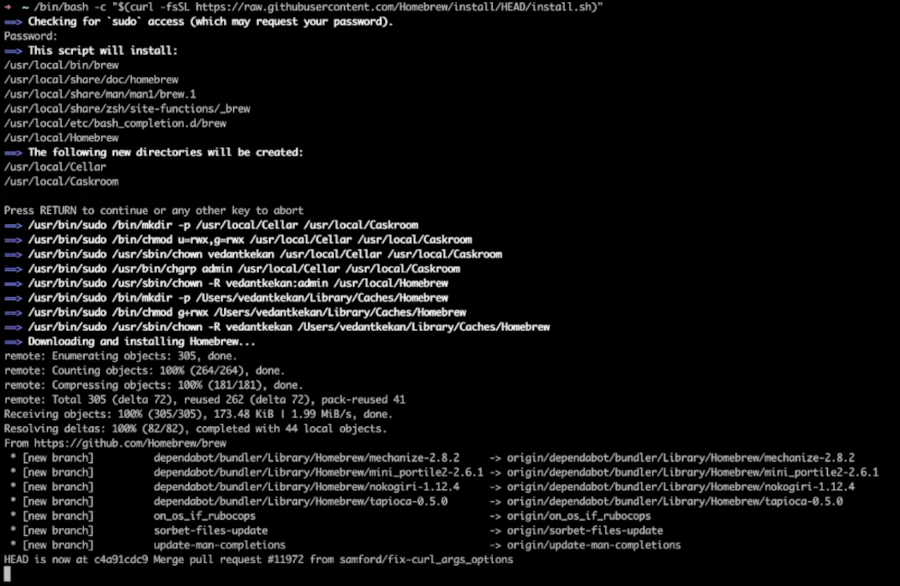
- Click the icon in the screenshot which will copy the text and then paste it to your terminal and press enter.
- Side note: This might cause the Terminal to ask for your computer password to verify that you are authorizing this installation. Provide that password (you will learn more about sudo commands like this one later, but in short, sudo means admin level access to your computer, which is often needed to install package managers like homebrew (and npm for example).
- Some text will populate your screen and then end, similar to this, press enter whenever it designates:
Homebrew is installed. Go back and finish installing Git by typing into a new terminal window: brew install git.
This is what should populate on your screen: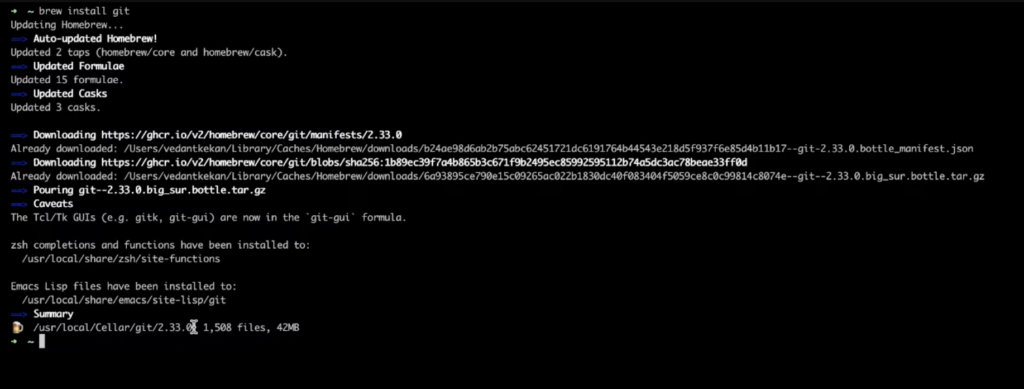
- You can verify that Git was successfully installed by typing into your terminal: git –version – which should have a version number pop up. This means Git was successfully installed! Now skip down to Part 1.5 – Introduce Yourself to Git.

For Linux users
- Open the terminal.
- Depending on your distribution, type one of the following commands and press enter:
- For Debian/Ubuntu: sudo apt-get install git
- For Fedora: sudo yum install git
- Enter your password if prompted.
- Wait for the process to complete.
Part 1.5 – Introduce Yourself to Git
Before you start using Git, you’ll need to tell git who you are. Here’s how:
- Open your terminal or the Command Prompt if not already open.
- Type: git config –global user.name “Your Name” – and press enter. Replace “Your Name” with, well, your name!
- Next, type: git config –global user.email “youremail@example.com” – and press enter. Use your email address in place of “youremail@example.com“.
And… that’s it! Git now knows who you are. Now let’s make a GitHub account.
Part 2 – Sign Up for GitHub
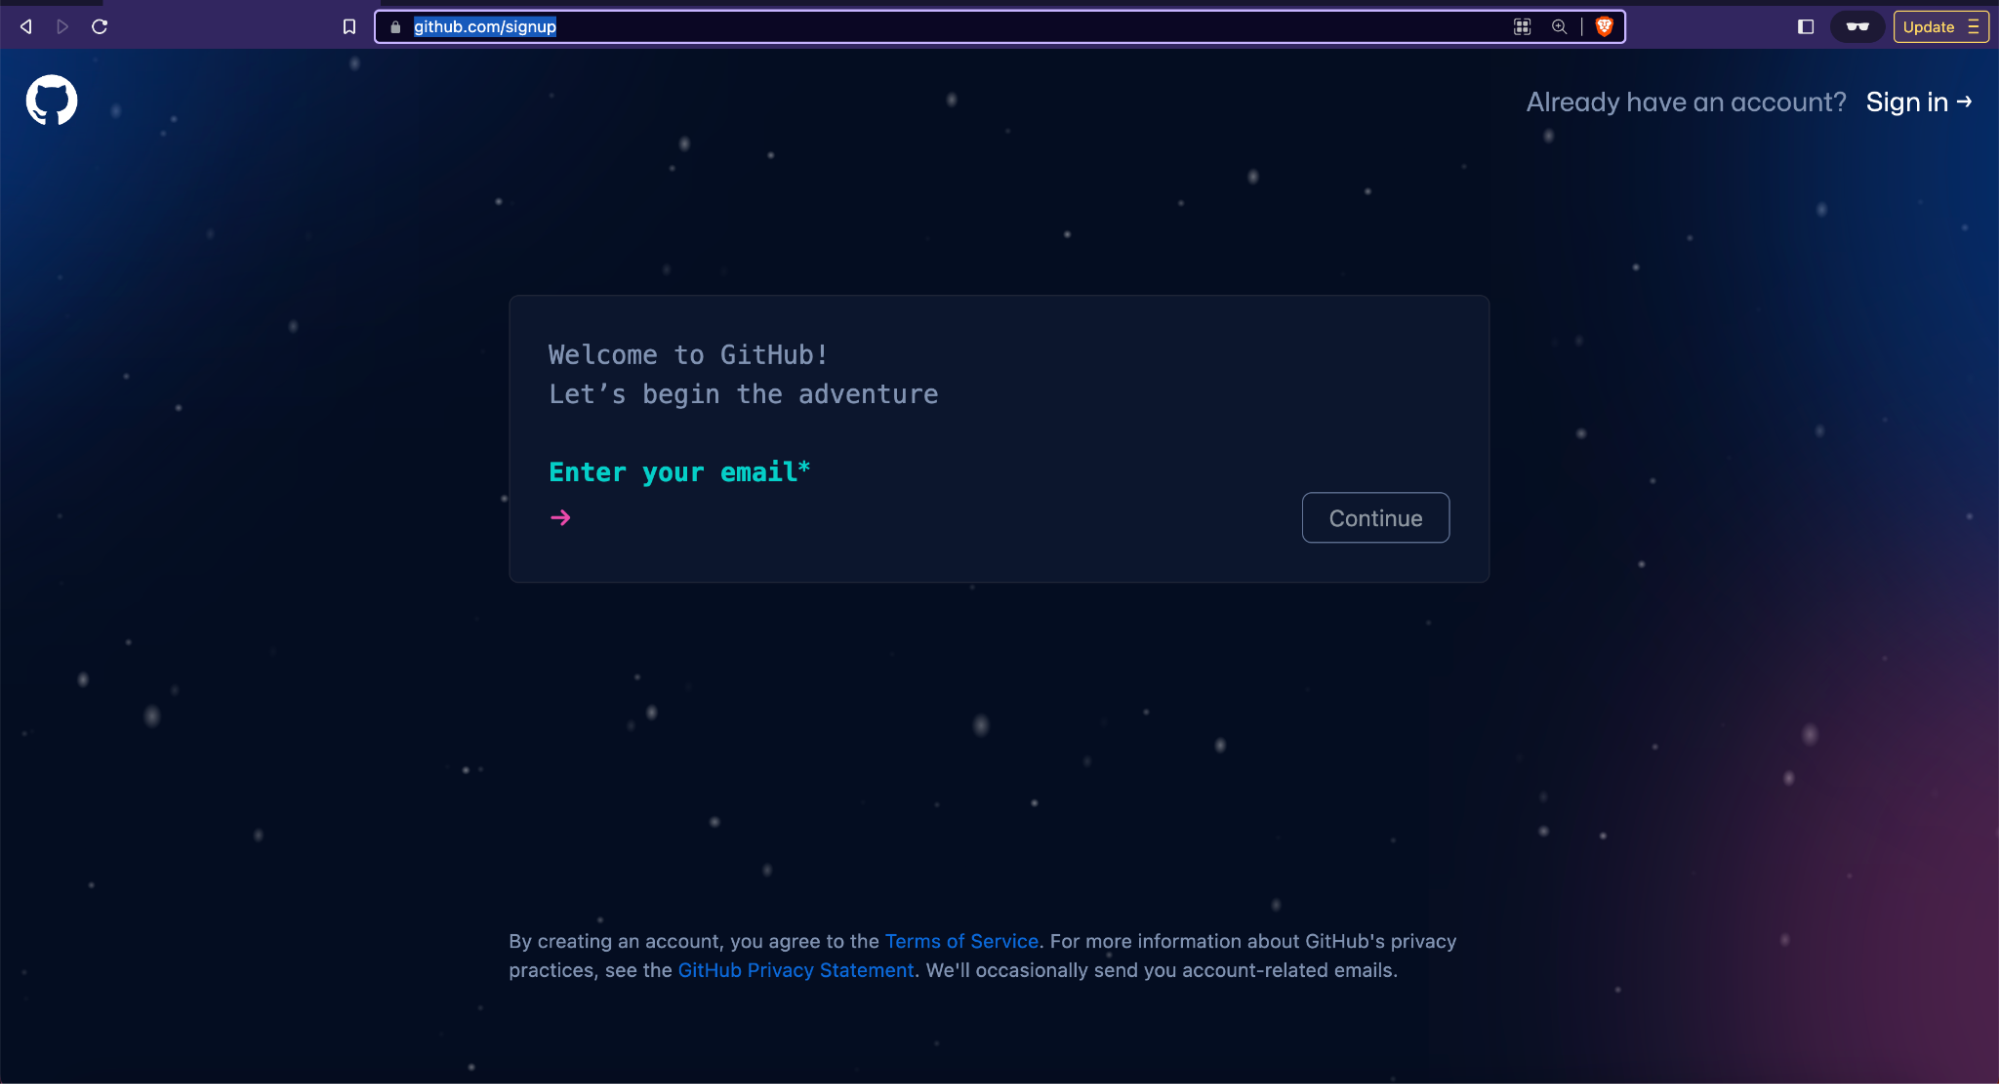
Navigate in your browser to github.com/signup and follow the on screen instructions:
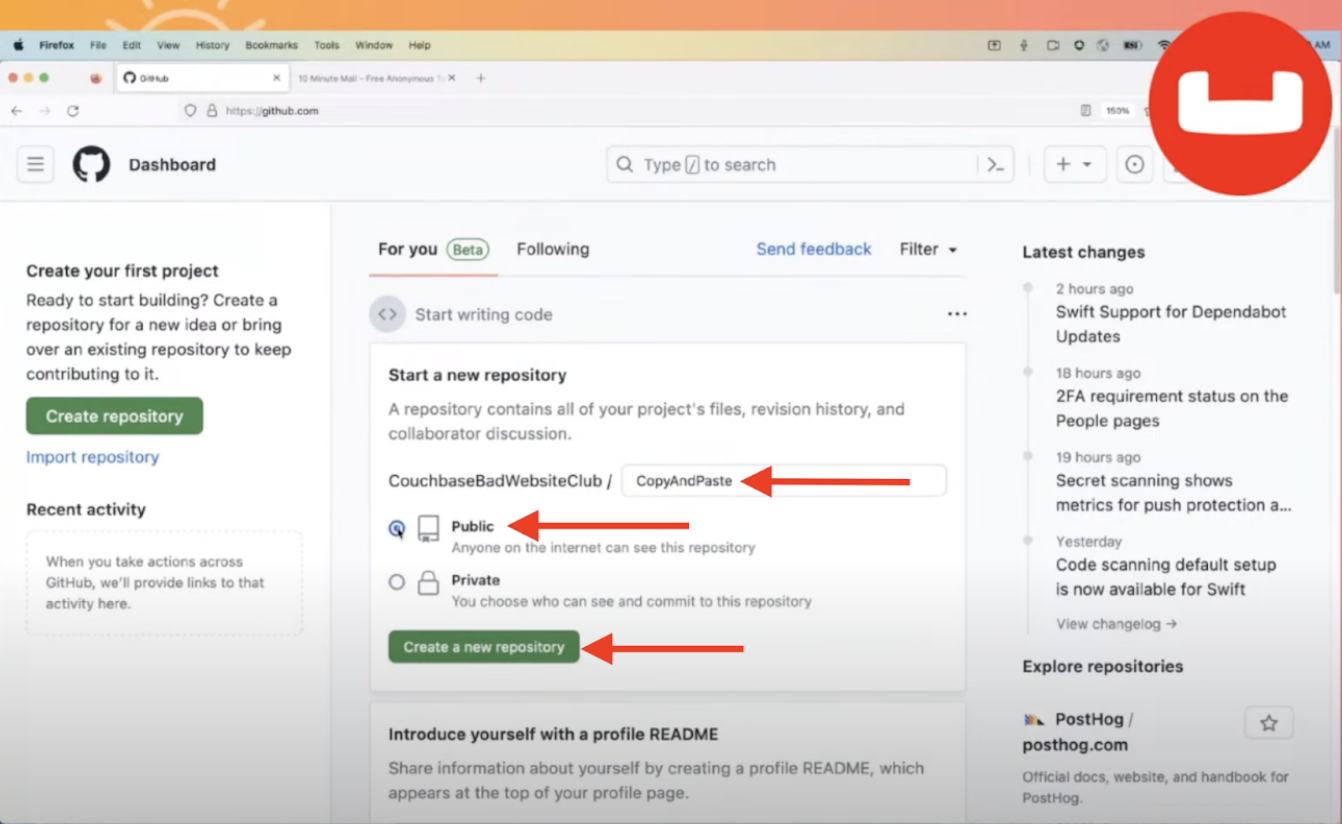
Once complete, you will be brought to your GitHub Dashboard:

How to Create a Repository (Repo)?
Now we can start creating a snapshot of code that I can share for other people to see on GitHub.
We’ll start by creating a repository, which is just another way of saying, create this home for my code to live online. We created a small home for your project that we built in our last post, and this home will be called CopyAndPaste (but you should call your repository, the home for this programming project, whatever you want, preferably the name of your coding project. This repository will also be made public for everyone to see, and we will press Create a new repository.
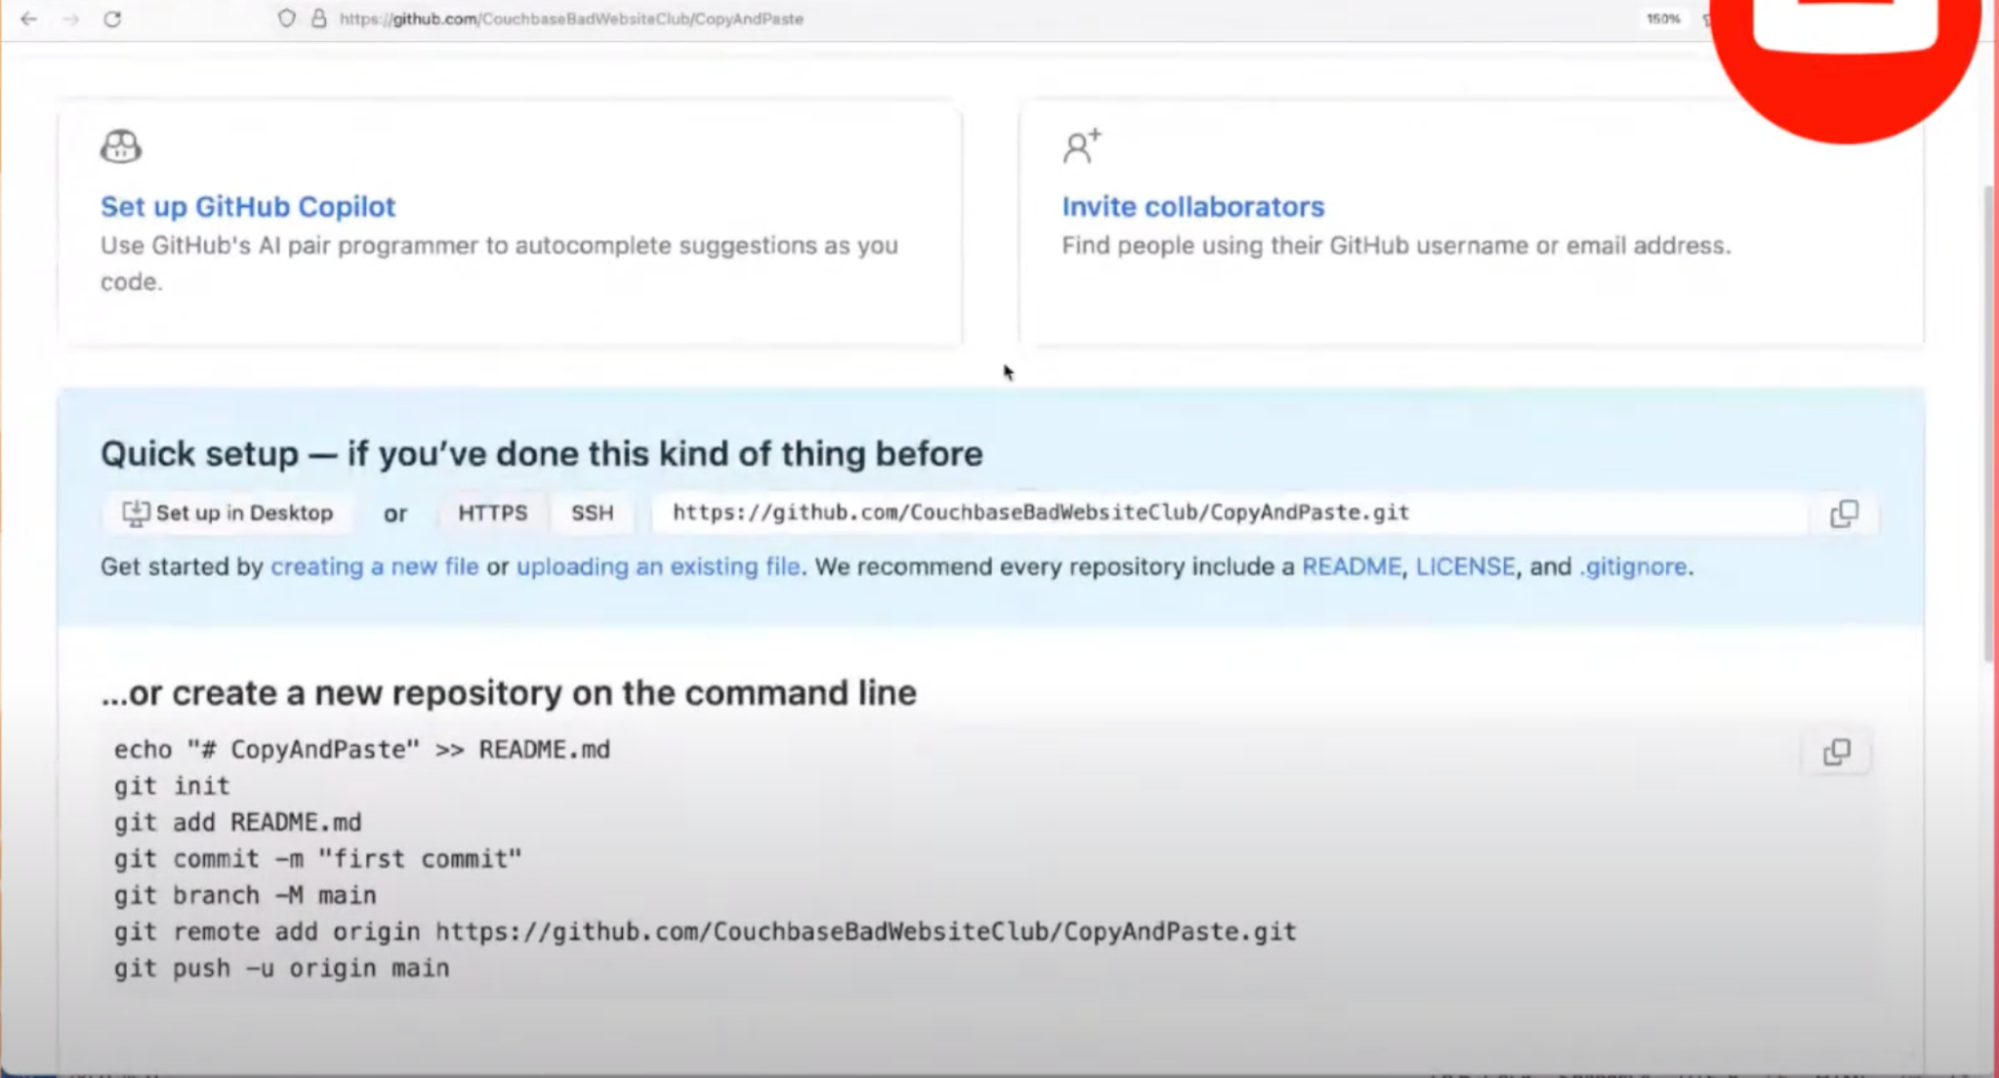
Now you will see a screen with a lot of instructions on it. In the video, we followed one specific instruction, and that is to Get started by creating a new file (which is in the blue box, the third line of text down). This method skips using git and the terminal and just copy and pastes code into GitHub.
However, in this post we will use the terminal method to get our code into GitHub since we set Git up and since more practice will always improve our skills as a developer. Look down to the … or create a new repository on the command line section.
First, we want this code to have a home on our computer somewhere, so if we don’t already have a folder with code in it that we want to push to GitHub, we will have to make one. Let’s make a new folder called CopyAndPaste on our computer. In your terminal, type: mkdir CopyAndPaste – or whatever name you want to use.
Then type: cd CopyAndPaste. Cd stands for change directory. You can learn more about different terminal commands like cd here.
If you already have a folder with the code you want to push to GitHub, you’ll need the name of that folder. And then you will want to navigate in your terminal to that folder, and then: cd insertNameofFolderhere – where you replace insertNameofFolderhere with the folder name.
Now we are inside CopyAndPaste (or whatever your folder’s name is).
Add Code to the Repo
We can now execute the commands GitHub establishes, one after another, pressing enter after each line of text.
If you do not have Visual Studio Code installed, or you just want a quick way to connect Git and GitHub together, execute the following lines of code in your terminal as is:
|
1 2 3 4 5 6 7 8 |
echo “# CopyAndPaste” >> README.me git init git add README.md git commit –m “first commit” git branch –M main git remote add origin https://github.com/<Username>/<RepositoryName>.git (For this line, replace the Username and repository name with your respective values.) git push –u origin main |
If you do have Visual Studio Code installed and would like to practice getting the code from your code editor into Git and then into GitHub, skip this line of code: echo “# CopyAndPaste” >> README.me
And instead, jump to and execute git init. Next, go into VSCode and open the folder you just created in the terminal using the mkdir command to make a new directory. Then create a new file called README.md and input the same code # <name of your Repository>, then save the file. Continue with the rest of the commands in the terminal beginning with: git add README.md.
Check GitHub, you should see a new file called README.md that has some text in it. Now, your first file has been pushed using Git into GitHub.
Congratulations – you’re all set with Git & GitHub!
Remember, every engineer was once new to these concepts. The first steps are always the hardest, but you’ve just conquered yet another! In our next post, we’ll learn about how to build and share websites with the code we write.
Keep going! We’re all here to learn together.
<3 Couchbase
#LearningOnTheCouch
Leave a comment
You must be logged in to post a comment.