Software Development as a field can be very overwhelming. There seems to be an endless stream of new tools, languages, frameworks and we often have no idea where to start. Among those various tools is a code editor. We’re going to demystify code editors and dive into one of the most popular code editors: Visual Studio Code.
What is a Code Editor?
You might have heard of a text editor, like Microsoft Word, Google Docs, or the Apple Notes app. With these tools, a user can edit text. A code editor is very similar. It is a tool specifically designed for writing and editing code (instead of plain text). We might choose to use a code-specific editor instead of a text editor to avoid automatic formatting issues, to use features that help make programming easier, or to use the same programs our teammates are using for maintaining processes.
There are many different code editors that one can use such as Sublime Text, Webstorm, and Visual Studio Code (VS Code). However, when choosing one over another, it usually comes down to personal preference and the coding languages someone wants to code in. Usually, a text editor works for any language but Webstorm, for example, is marketed to developers who code in the JavaScript programming language. So the choice of one editor over another comes down to the individual’s needs and preferences.
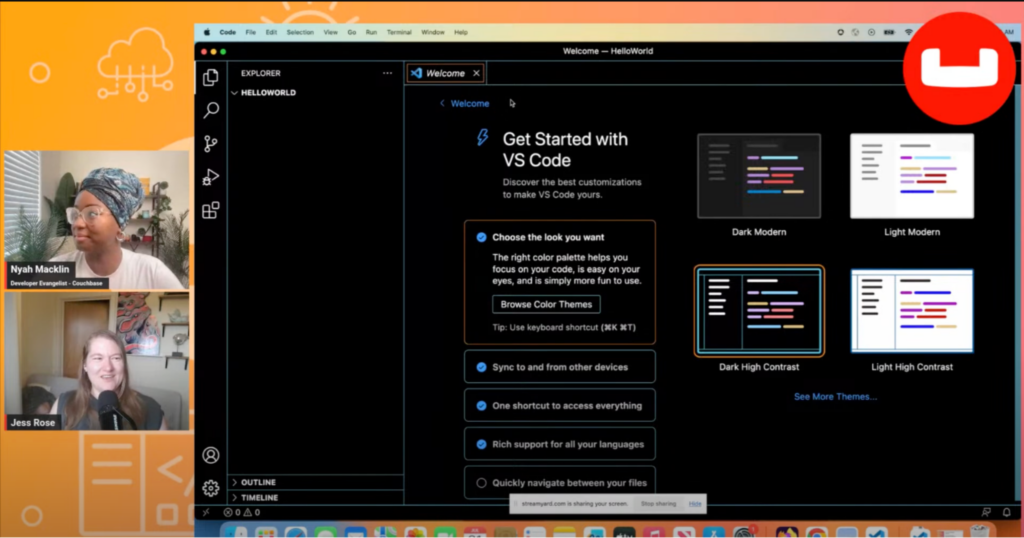
If you’d like to watch this blog live, here is a video of Nyah Macklin & Jessica Rose walking through the process of installing Visual Studio Code.
Why use Visual Studio Code?
VSCode (developed by Microsoft) has soared in popularity due to its plethora of features, extensions, and user-friendly interface. It supports hundreds of programming languages including JavaScript, TypeScript, HTML, and CSS – at Couchbase we use it frequently for our development, so we will walk through how to download, install, and use VSCode today.
How to Download VSCode?
Visit the official VS Code setup website and navigate to your specific operating system link (Windows, MacOS, or Linux). (If you are unsure which operating system you are using, here is a cool resource to find out).
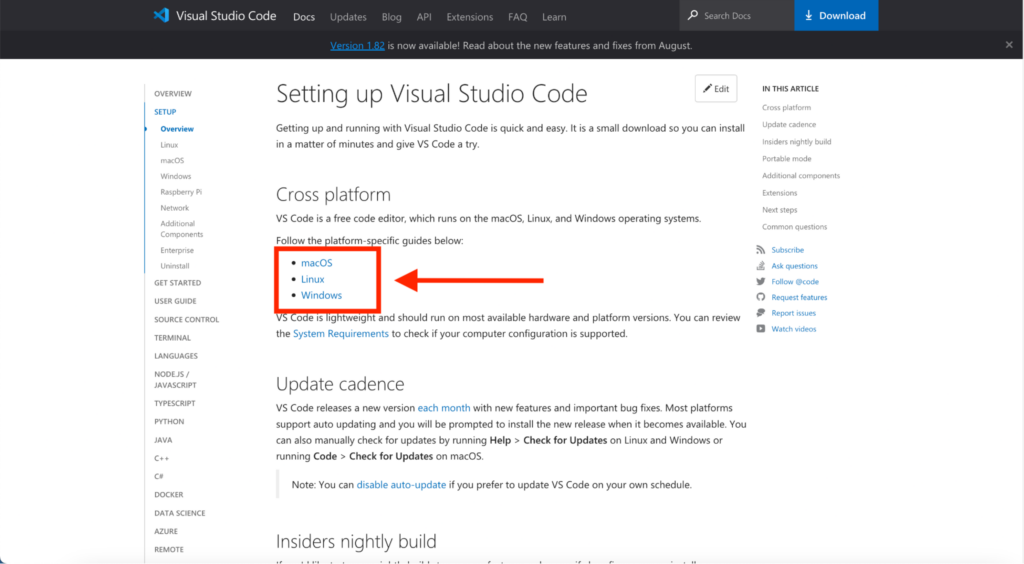
Once you click either link above, you should click another link that says Download Visual Studio Code or Visual Studio Code Installer. That will start the download process on your computer. (Watch)
Once it is downloaded, a popup should come up somewhere on your screen that signifies that your download has completed.
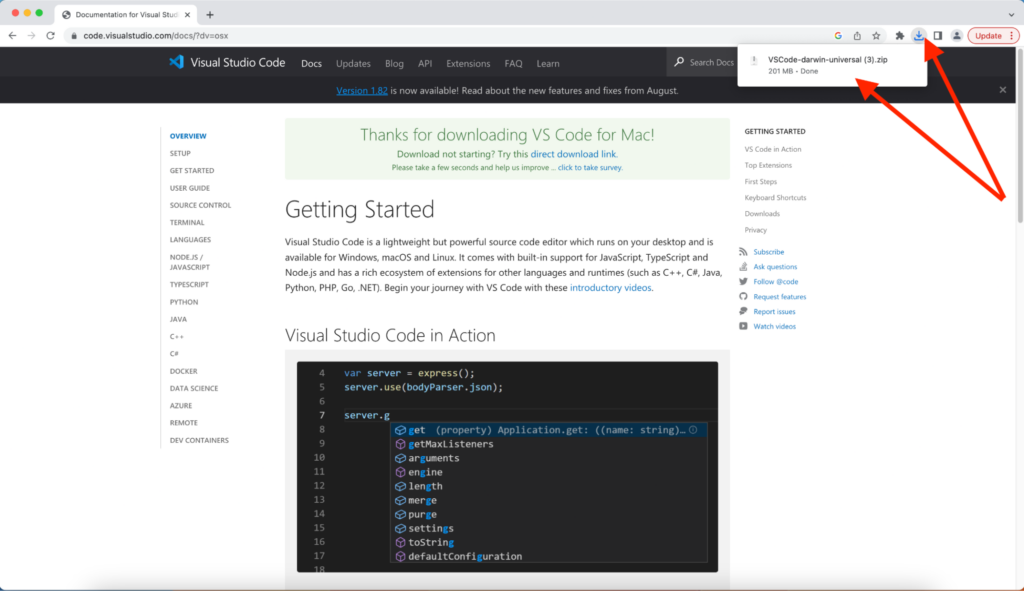
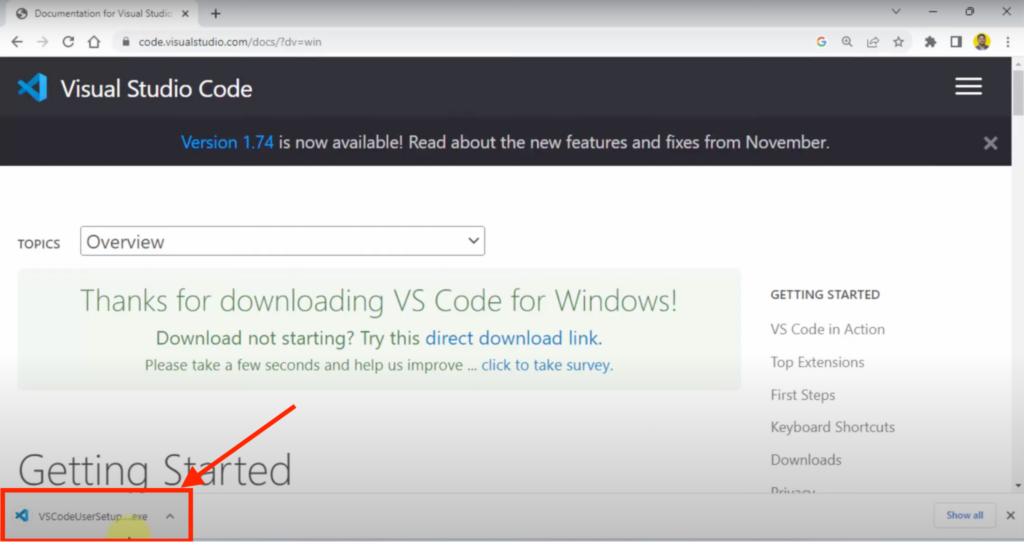
Double click on the box, which should start the VS Code installer instructions (or bring you into your Downloads folder, where you should again double click the VSCode icon). Click through the steps to complete the installation (if you are unsure about any questions, the defaults set are usually fine). Once finished, VS Code should automatically open, but if not, find VS Code in your Downloads folder, and couple click on the icon.
How to write code using VS Code?
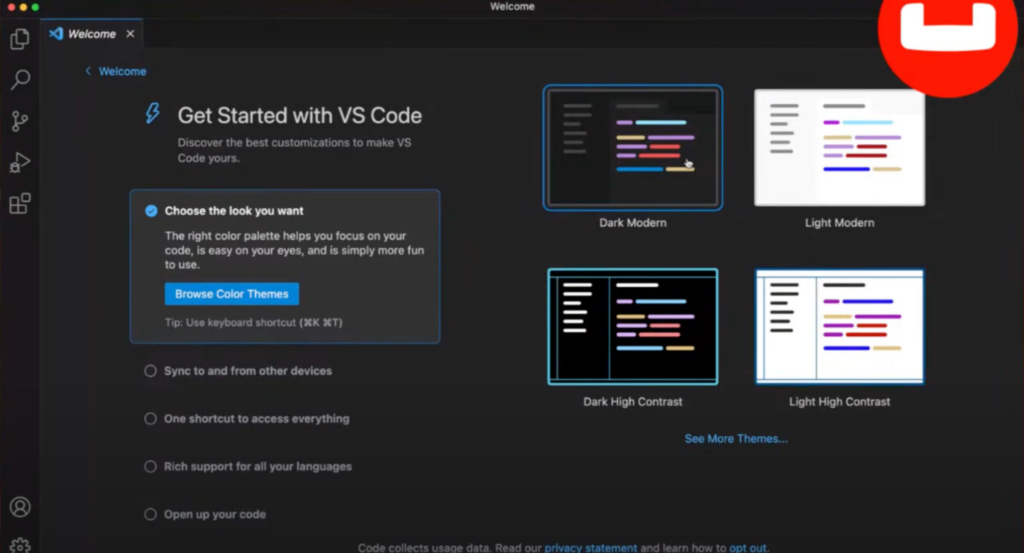
Once VS Code opens it will show the following which allows you to choose a theme (the way you want VS Code to look).
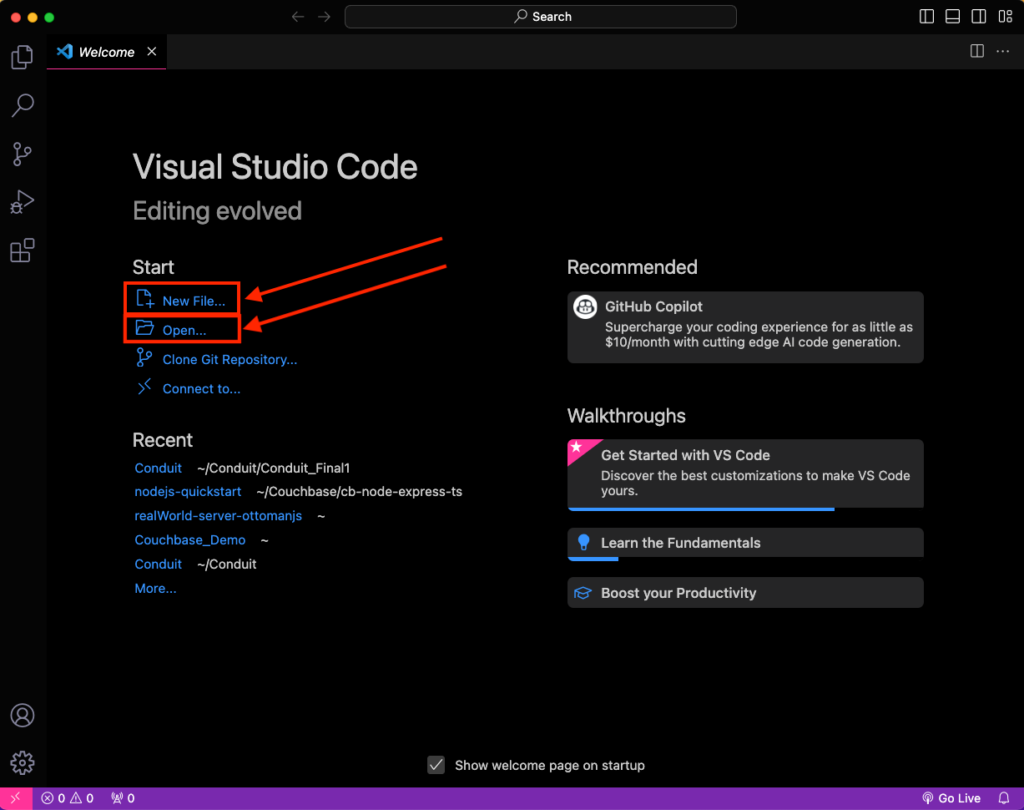
Now that you have the power of VS Code within your hands, you can now create a new file where you will write your code, or open a folder and then create a new folder to house all of your code files.
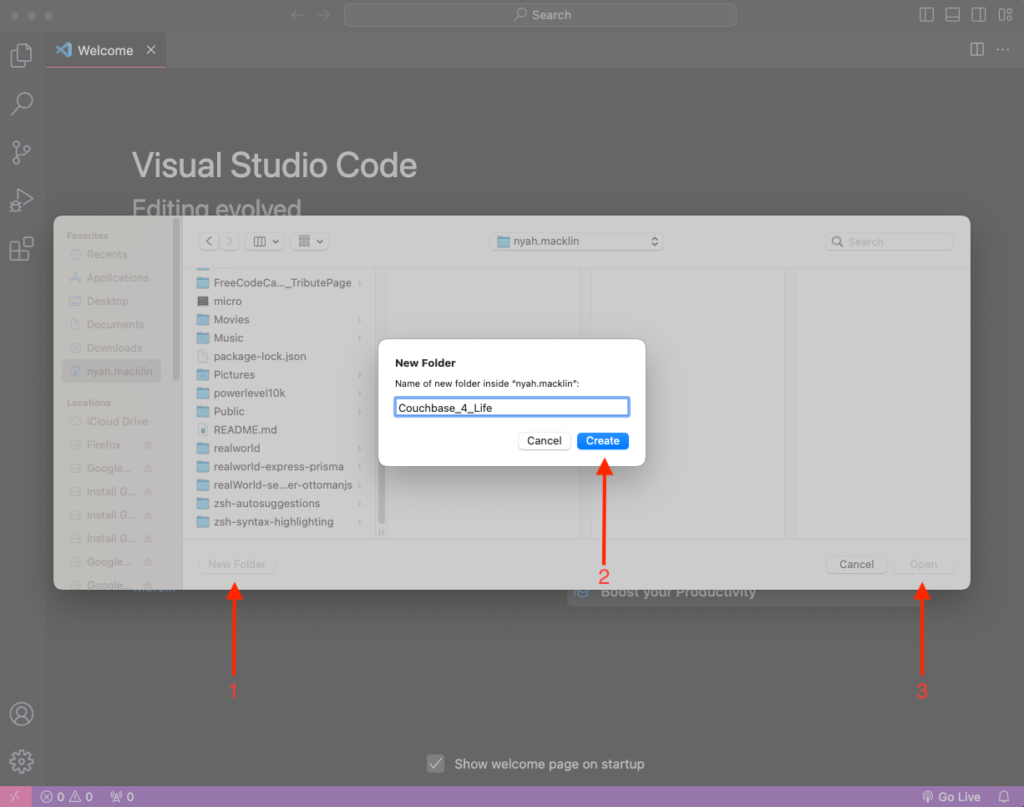
Here I created a folder called Couchbase_4_Life. (You can name your folder whatever you’d like, as this will be the name of your entire project. Note: you can always change this later).
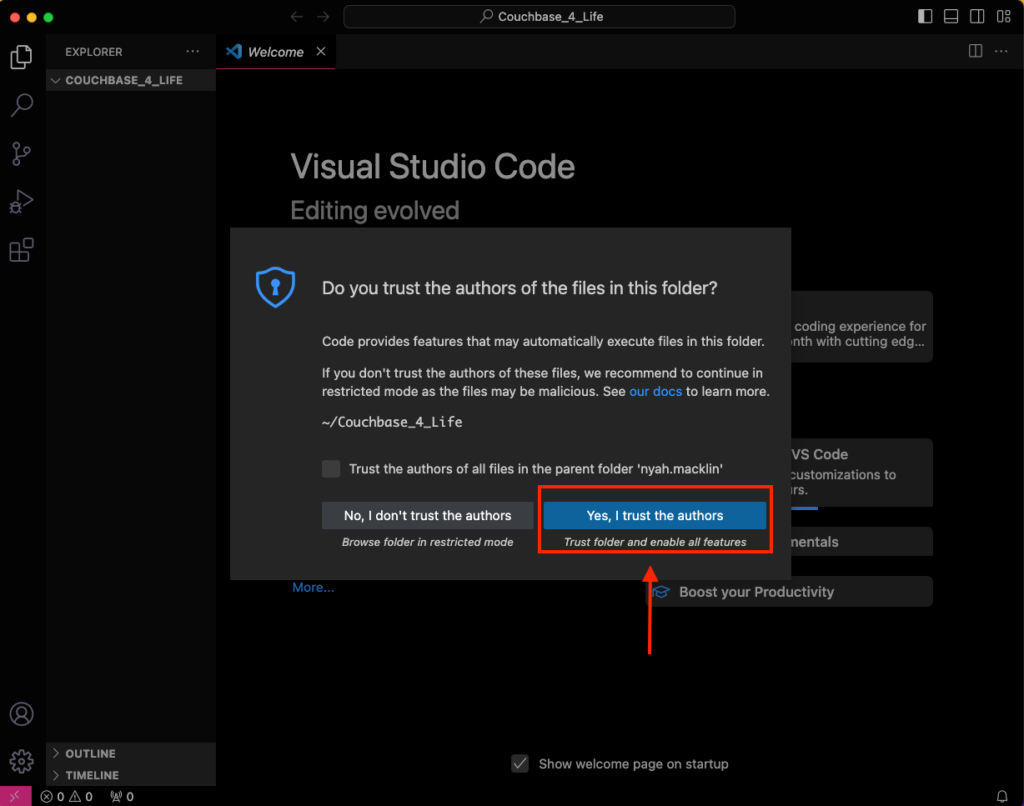
VS Code often likes to check if you trust the authors of files in a particular folder. Because you, yourself, will be the author (or the person writing the code we put into this folder), you can select the Yes I trust the authors button. If you ever do not trust the author you can open the folder in Restricted mode. You can learn more here.
Now you will see the title of the folder in the top left hand corner of your screen.
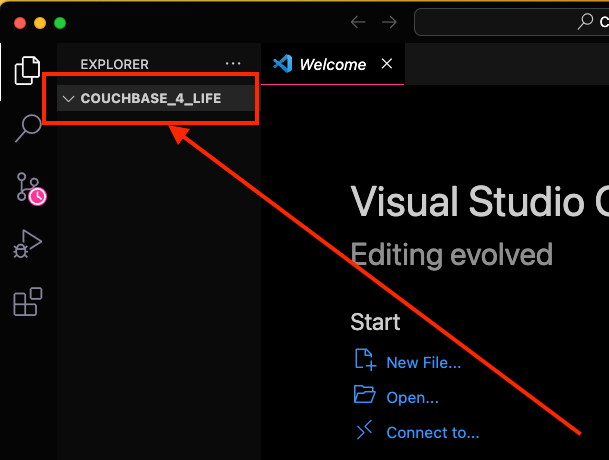
When you hover over the title, you’ll see 4 icons. From left to right they represent, New File, New Folder, Refresh Explorer, and Collapse Folders in Explorer. Explorer, by the way, just means File Explorer, a.k.a. the place in VS Code where you can see all your files. The explorer section is represented in the top left corner where two pieces of paper overlap, one with a fold in the corner.
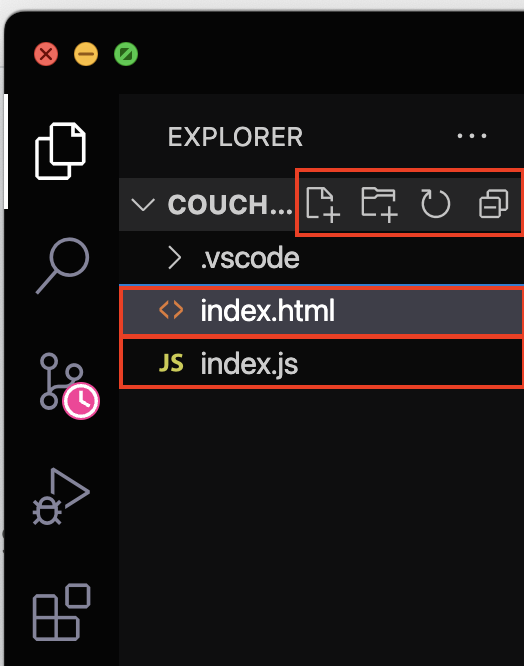
Next, we can select the first icon, New File and input the name of the specific file we want to create. In this screenshot, an index.js and an index.html file were created.
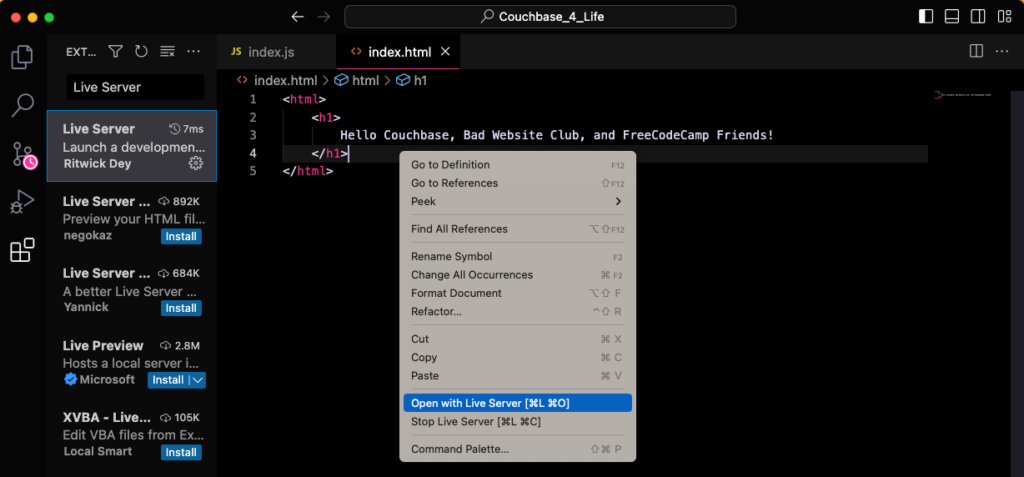
Click on the index.html file and an empty file should appear in the center of your screen with the cursor blinking on line number 1. Congratulations! This is where you will write your first lines of code for this project. Below I started my file with the html tag and a h1 tag inside that with the line, “Hello Couchbase, Bad Website Code and FreeCodeCamp Friends!” When I typed all this out, there is a white dot that is visible at the top near the file name.

This dot signifies that the file has not been saved yet. In order for any code you type to be “saved” you need to navigate to your desktop and navigate to File and then Save or Save As. Once you complete that, the dot will go away, letting you know that your code was successfully saved.

Next, it would be wonderful to view the website we were coding in VS Code. To do that, you can download a VSCode Extension called Live Server. VS Code extensions are tools and extra features that you can download for free from the Visual Studio Code marketplace which makes coding and software development easier. These extensions are made by everyday developers like you and me, and sometimes they are made by Microsoft themselves!
In VS Code on the left panel, navigate to the last icon that looks like 4 squares and one separated. Click that icon which will open up another panel where you can search for any extension that exists in the marketplace. Input the term, live server, and click one with the name Ritwick Dey.
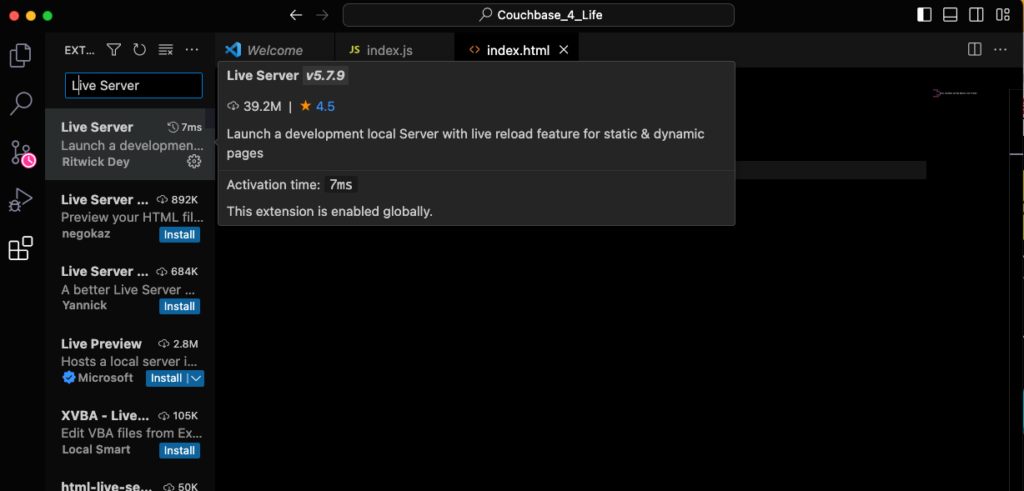
Once you click into it, you will see this extension has been installed almost 40 million times, and has close to a 5 star rating. These are good signs to know that this extension is reputable and worthy of installing on your computer. Press the blue Install button. Once that button turns into the word, Uninstall then press the small x on the Extension: Live Server tab in your top tab bar, and navigate to your index.html file.

Once on that file, right click on any area of the file which should bring a pop up with the phrase Open with Live Server down at the bottom. Click that button.
Your browser should have popped up somewhere on your computer with the code we wrote. This is your first website! As you can see, the URL looks strange, and does not have a “.com” or anything and that is because this “website” is only accessible from your personal computer. This website is not yet live on the internet for everyone to see, it is still in its draft phase.

In the next post, we will discuss how to share your code in its draft and final forms using version control and a tool called GitHub. See you over there!
<3 Couchbase
#LearningOnTheCouch

