In a world where data leaks are becoming increasingly common, the need to harden the database and web applications becomes ever so important. I, like many other developers, came from working with relational databases such as MySQL and Oracle, where access control permissions could be placed on databases and the tables within them. Now with Couchbase 5.0, this same fine grain control can be applied on clusters, buckets, and so much more.
We’re going to see some examples of how Couchbase Server’s role-based access control (RBAC) can be used to lock down the database and better protect it from the malicious users trying to exploit it.
Let’s be clear up front, having accounts with access control in your database is not going to be a fix-all when it comes to protecting your data. You must still follow best practices when it comes to designing your web application, but having the access control at a database level will significantly help your cause.
With Couchbase Server’s RBAC, you can have any number of accounts that can be used to access your database.
These accounts will have privileges such as read, write, execute, manage, and flush.
Let’s play around with creating an account, and finding out what happens when we do and don’t have the correct privileges to do certain tasks.
Creating a New User for Couchbase Server
Assuming you’ve already obtained a copy of Couchbase Server 5.0 or newer, sign into the cluster or instance using your administrator username and password.

The administrative username and password is not going away now that role-based access control is available. Think of it as your root user for the database cluster.
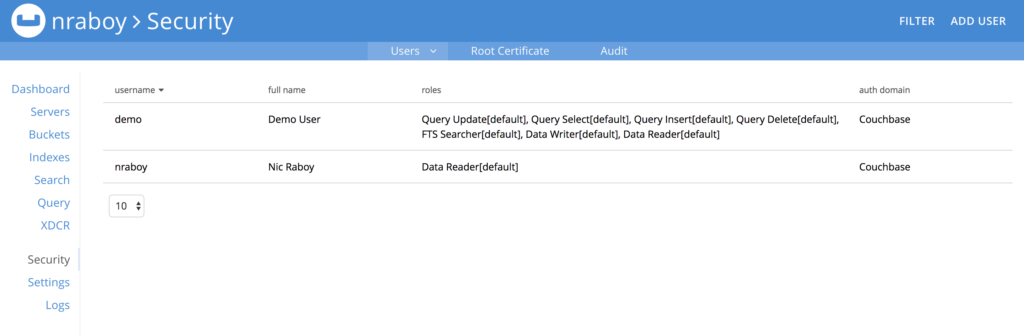
When you’ve signed in, find the Security tab and select ADD USER.
When adding a user, make sure to choose a strong username and password combination.
There are quite a few roles to choose from when creating a new user. For now, choose the Data Reader role from the Data Roles section. We’re doing this because we want to see what happens when we try to use a user account with too few permissions. For maximum security, make sure to only assign the Buckets you need to the user, and not use the all [*] option.
Now let’s take a look at trying to use this new account with Couchbase.
Performing Tasks with the Couchbase Shell
When installing Couchbase you are given the Couchbase Shell which is a CLI tool that can do quite a few things against the database.
If you’re using a Mac, execute the following command:
|
1 |
/Applications/Couchbase Server.app/Contents/Resources/couchbase-core/bin/cbq -u username -p password |
The above command will launch the Couchase Shell (CBQ) using the username and password specified. Make sure to use the username and password to the RBAC user that you had previously created.
If you’re using Microsoft Windows, CBQ should be located at the following:
|
1 |
C:\Program Files\Couchbase\Server\bin\cbq.exe -u username -p password |
Likewise, if you’re using Linux, check for CBQ here:
|
1 |
/opt/couchbase/bin/cbq -u username -p password |
If you’d like to learn more about the Couchbase Shell, check it out in the official documentation.
With a successful connection to Couchbase Server using CBQ, let’s try to execute a query:
|
1 |
SELECT * FROM `default`; |
Of course, we’re assuming that you have a Bucket called default and your user has access to it. Remember, we only have the Data Reader role on our user, not one of the Query Roles. This means that you’ll likely receive an error that looks like the following:
|
1 2 3 4 5 6 7 8 9 10 11 12 13 14 15 16 17 18 19 20 21 22 |
{ "requestID": "aca002c6-58d5-4754-9e33-325eef47f46b", "signature": { "*": "*" }, "results": [ ], "errors": [ { "code": 13014, "msg": "User does not have credentials to run SELECT queries on the default bucket. Add role query_select on default to allow the query to run." } ], "status": "stopped", "metrics": { "elapsedTime": "1.703462ms", "executionTime": "1.690334ms", "resultCount": 0, "resultSize": 0, "errorCount": 1 } } |
This is great because won’t don’t want our user to be able to execute queries. The Data Roles privileges are for key-value operations only, not N1QL.
Go back into the Couchbase Administrative Dashboard, and alter the roles for your user. This time give the user the Query Select role from Query Roles. If you try to run the query again from CBQ it should succeed.
Including Role-Based Access Controls in an Application
At some point you’re going to need to build a web application that communicates with Couchbase using one of the many Couchbase SDKs. As of Couchbase 5.0, an RBAC user must be available and the SDK must authenticate with it, otherwise there will be an error when trying to open a Bucket.
If you’re a Node.js developer, you might do something like this:
|
1 2 3 |
var cluster = new Couchbase.Cluster("couchbase://host"); cluster.authenticate("username", "password"); var bucket = cluster.openBucket("default"); |
Notice that the openBucket function no longer takes a Bucket password. Instead we’re relying on the authenticate method and our access controls.
Each of the SDKs follow a very similar approach to authentication. For more information, check out the SDK documentation in the Couchbase Developer Portal.
Conclusion
Being able to define privileges based on clusters, Buckets, and even services is a huge win when it comes to securing your NoSQL database. By giving users the bare minimum to what they need to function, you’re helping to remove the possibility of a data leak or some other malicious activity.