
Service


We started with a belief that a database should empower variety, agility, performance, scale, and innovation. That’s why we’re poised to be the leader in AI. Couchbase’s operational data platform for AI is a scalable foundation for enterprise operational, analytical, mobile, and AI workloads that replaces legacy infrastructure and data services.
Building a roadmap for AI is a major endeavor, one that comes with risks and costs without proper planning. Here’s how we help you stay ahead:

Users abandon slow experiences. Reduce churn by providing an experience that never stops.

Keep your teams ready to respond to new market changes and customer expectations.

Provide a shared source of truth that is accurate in real time.
AI needs more systems and more people. Plan for more complexity and higher TCO.
Partner with us to build and run a high-performance, scalable, efficient, and resilient data platform that makes AI a practical part of your mission-critical applications.
Match peak demand with peak performance across your digital experiences.
Outpace competitors and roll out changes faster with a unified data platform.
Replace complexity with enhanced visibility by consolidating legacy infrastructure and services.

Make your infrastructure spending more efficient with a unified database that reduces costs.

Make your customer experience seamless by making your data ready to travel – across regions and data centers, from cloud to edge.
Try Couchbase today. Our high-touch service and passion for your success means you’ll get a hands-on, personalized onboarding experience.

“Harnessing the power of the cloud through Capella has allowed us to successfully run applications across multiple regions in parallel quickly and seamlessly.”

“We selected Capella for ease of deployment and management. It lets us avoid infrastructure and helps us adapt faster to our clients’ needs while optimizing TCO.”

“Players are able to have a consistent experience without any disruptions. Since gamers have a low tolerance for delays, these capabilities are critical.”

“Capella’s price-performance and edge capabilities make our team more agile and allow applications to remain synced. Capella Analytics is impressive, too.”
Choose the pricing plan that fits your needs – from a free Database-as-a-Service tier to full enterprise readiness. Capella’s flexible pricing supports everything from startup launches to modernizing legacy systems.
For POCs, prototyping, and learning Couchbase. Start today!
Ideal for early design, development, and testing phases in a single AZ.
For non-mission-critical apps that still need great speed.
For premium-level performance, service, security, and support.


Get quick answers to questions about Couchbase’s operational data platform for AI.
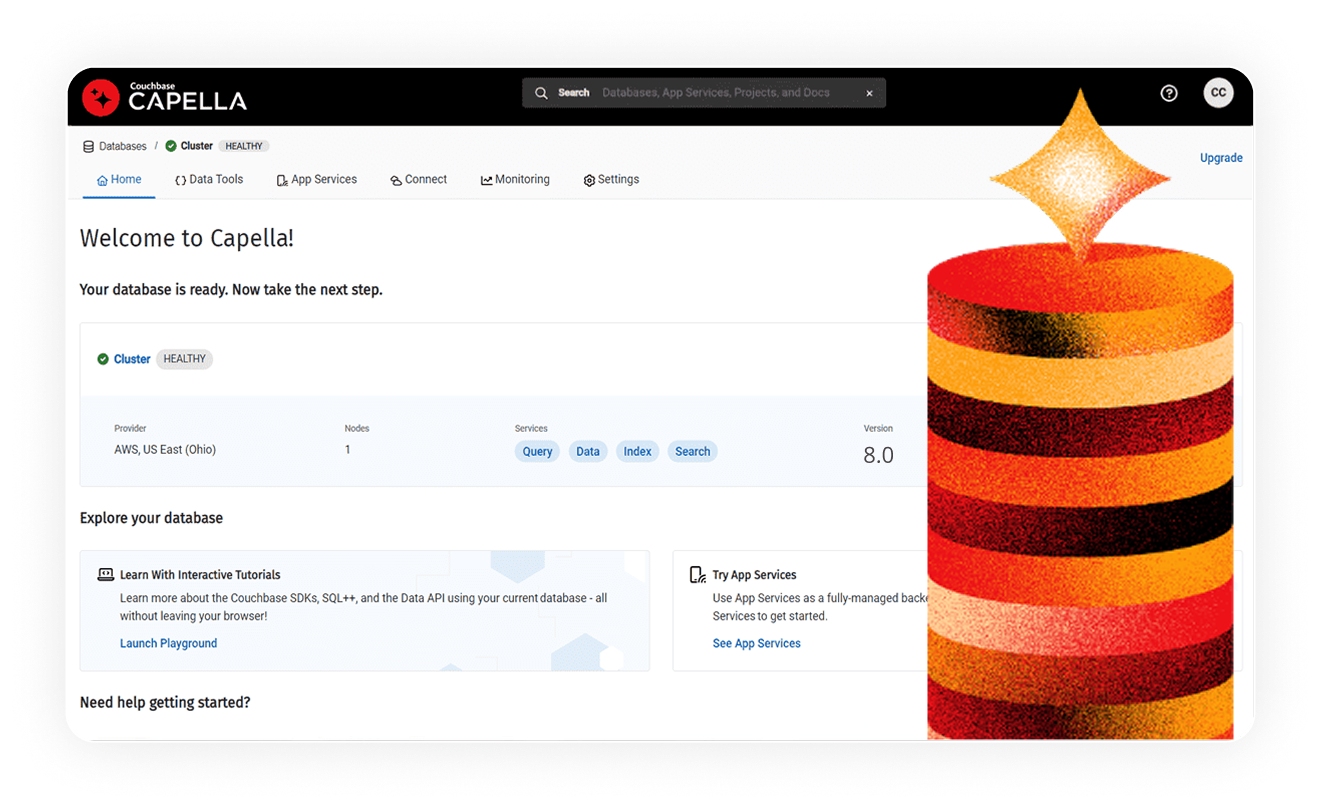
Couchbase Capella is a fully managed, multicloud NoSQL database-as-a-service (DBaaS) that provides high-performance key-value, SQL query, and search data access.
Capella uses a pricing model where teams pay for the specific compute, storage, and data transfer resources they utilize. Charges are calculated per node per hour across three distinct service tiers.
Couchbase Capella is a fully managed cloud service that automates setup, scaling, and backups. Couchbase Server is self-managed, with users handling deployment and maintenance.
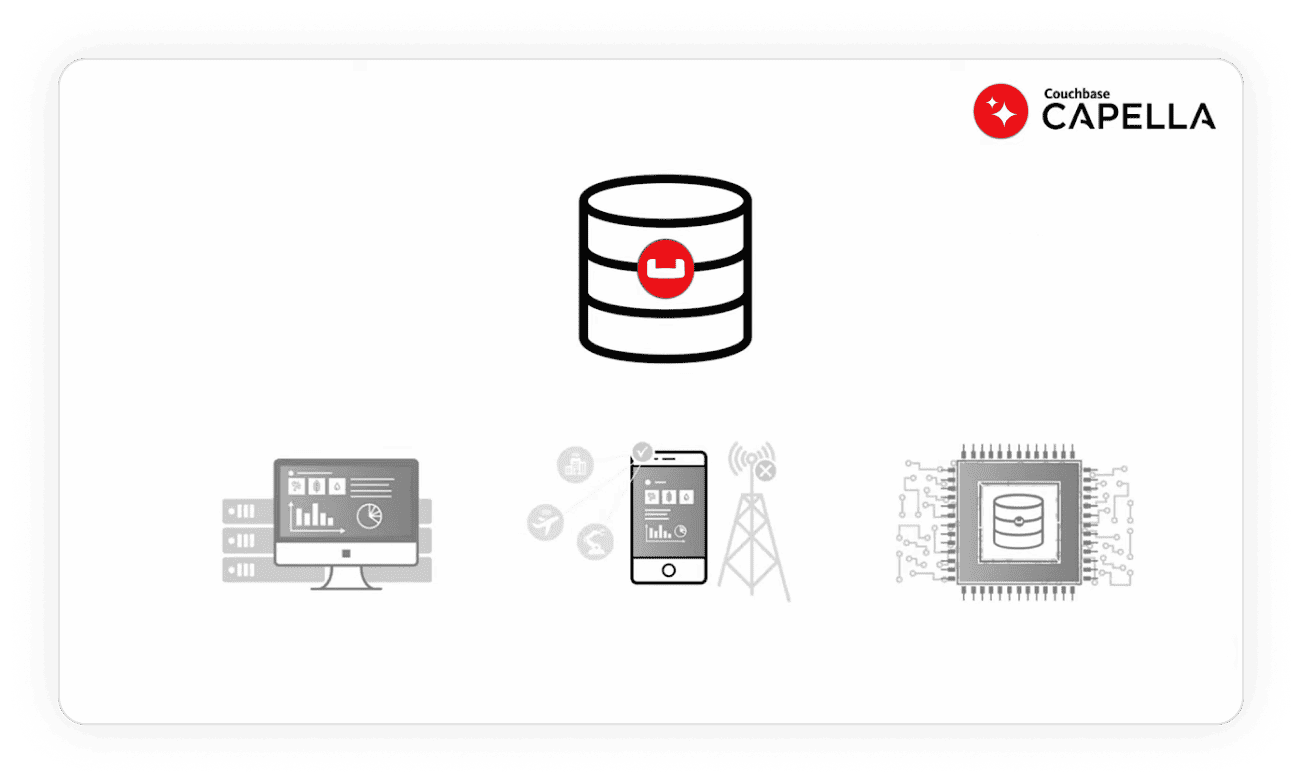
Yes. Capella supports mobile and edge deployments through Capella App Services, which provides a managed gateway for data synchronization.
Capella supports AI with vector search and automated data vectorization. Its AI Data Plane adds model hosting, RAG automation, semantic caching, and governance to streamline agent development.
Check out our developer portal to explore NoSQL, browse resources, and get started with tutorials.

Get hands-on with Couchbase in just a few clicks. Capella DBaaS is the easiest and fastest way to get started.
Want to learn more about Couchbase offerings? Let us help