
We see that a significant number of customers take advantage of Couchbase integration with Apache Kafka, by using Couchbase Kafka connector plugin that provides you capability to reliably stream data to and from Apache Kafka at scale.
Apache Kafka is an open-source platform for building real-time streaming data pipelines and applications. However, you need Apache Kafka infrastructure management expertise to architect, operate, and manage on your own. Amazon Managed Streaming for Apache Kafka (Amazon MSK) is a fully managed, highly available service that makes it easy for you to build and run applications that use Apache Kafka.
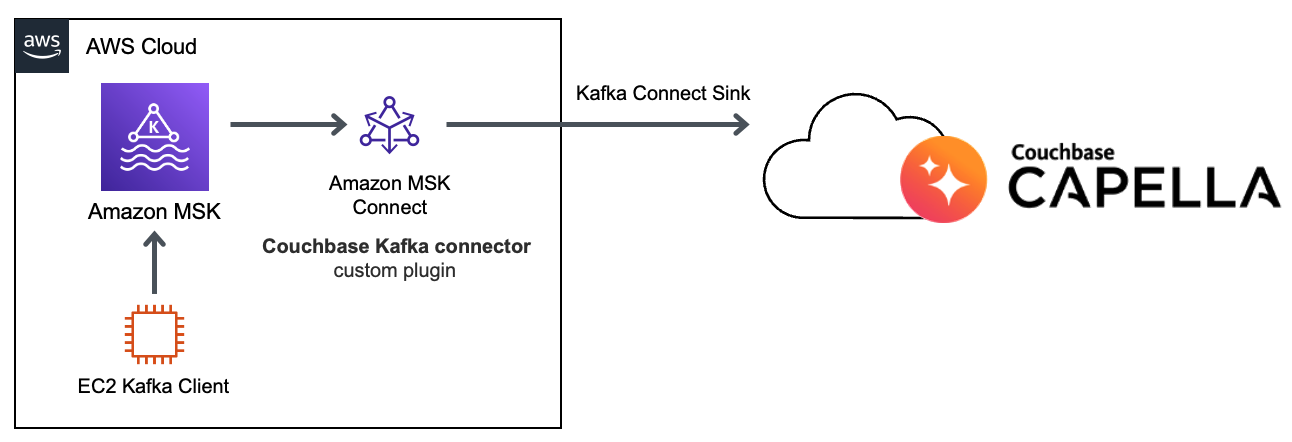
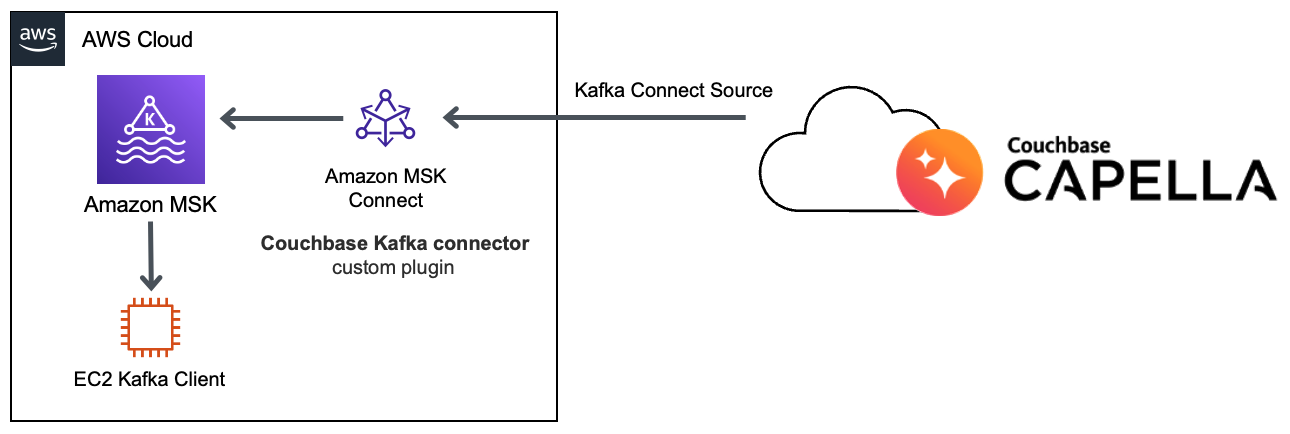
Amazon MSK supports integration with Couchbase with the Amazon MSK Connect feature and Couchbase Kafka connector plugin. Using this feature, you can easily deploy the Couchbase connector and scale to adjust for changes in load.
In this blog post, we will go through Amazon MSK cluster setup and use Couchbase Kafka Connector as “sink” and “source”. We will be using Couchbase Capella to get us started in minutes.
Step 1: Couchbase Capella cluster
- Get Started with Couchbase Capella free trial.
- Select your preferred AWS region and get started with the Couchbase Capella cluster in minutes.
- Next, configure Database Credentials.
- Setup private networking using VPC Peering or AWS PrivateLink for network connectivity with your AWS account. You can allow access from anywhere but it’s not recommended.
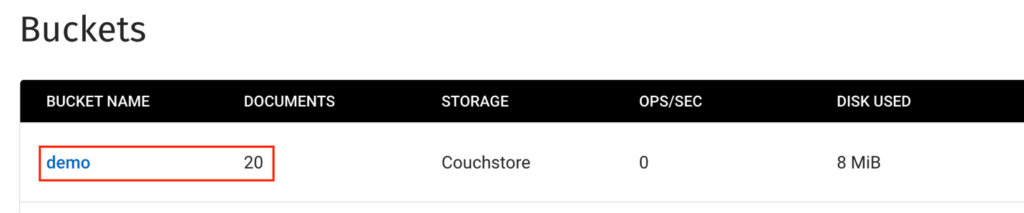
- Next, access the Data Tools section to create a new demo Bucket on the cluster.
Step 2: Amazon MSK cluster and Apache Kafka client
It’s recommended that you have your Amazon MSK cluster and Amazon MSK Connect connectors in the private subnet of your VPC. In case you are not using VPC Peering or AWS PrivateLink to connect to Couchbase Capella cluster you would need the NAT gateway to initiate connection from the private subnets.
To get started easily we can use CloudFormation template for Streaming Data Solutions for MSK which deploys an Amazon MSK cluster and Apache Kafka client on Amazon EC2 instance.
![]()
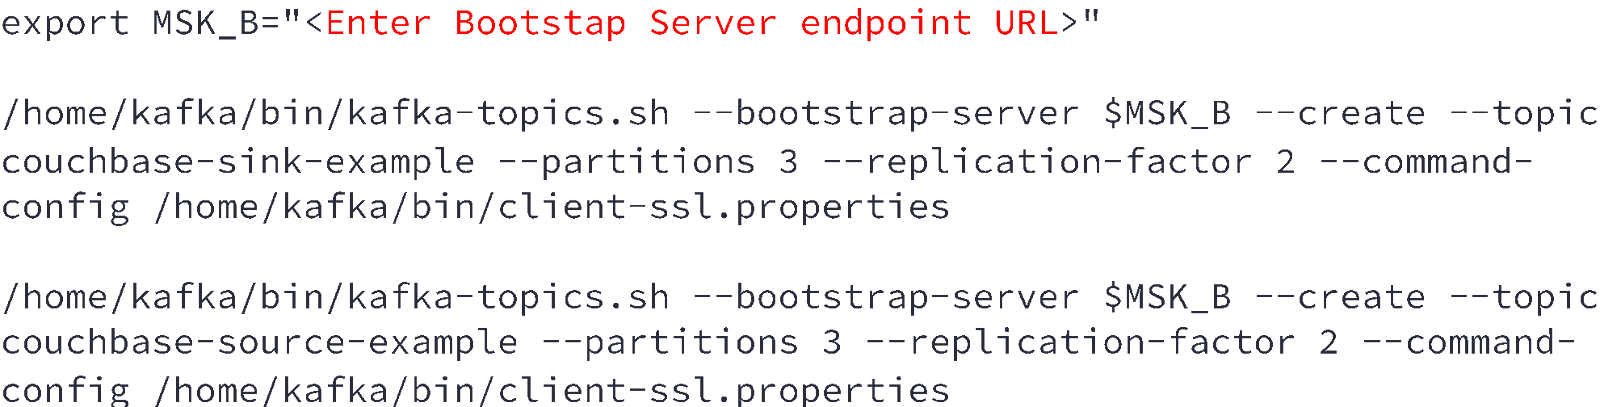
Let’s first create the sample sink and source topics on the MSK cluster:
Next, we will install few packages of the KafkaClient instance so that we can run a sample code that will publish a few messages on the couchbase-sink-example topic

We will follow the QuickStart guide for Couchbase Sink Connector to publish messages to the MSK cluster.

Open the file src/main/java/com/couchbase/connect/kafka/example/JsonProducerExample.java and update Kafka Cluster Bootstrap connection string.
Now you can build the maven project:
|
1 |
mvn compile exec:java |
The sample producer will send some messages to the kafka topic couchbase-sink-example and then terminate.
Step 3: Configure MSK Connect plugin
- Download the Couchbase Kafka Connect plugin ZIP.
- Upload the ZIP file to an S3 bucket to which you have access.
- Open the Amazon MSK console. In the left pane expand MSK Connect, then choose Custom plugins.
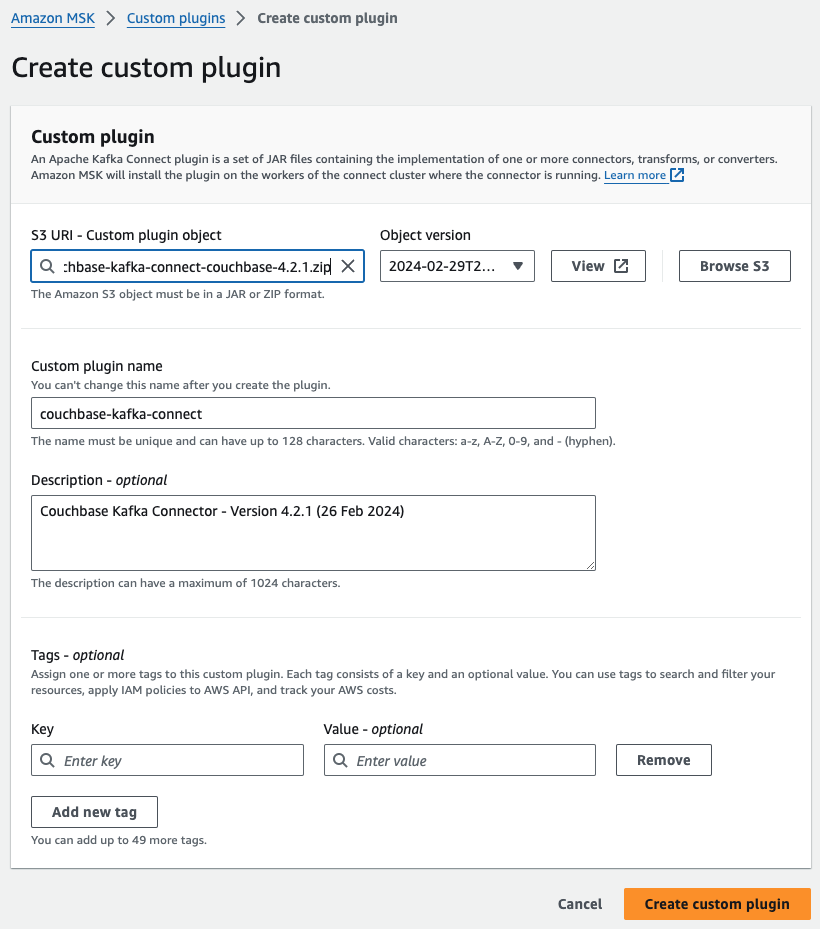
- Choose Create custom plugin
- Choose Browse S3. In the list of buckets find the bucket where you uploaded the ZIP file, and then in the list of objects select the ZIP file.
- Enter couchbase-kafka-connect as custom plugin name, then choose Create custom plugin.
Step 4: Create MSK Connector for Sink
- Using the custom plugin, we can now create a sink connector. Open the Amazon MSK console. In the left pane, under MSK Connect, choose Connectors. Choose Create connector.
- Choose the custom plugin couchbase-kafka-connect and choose Next.
- Enter couchbase-sink-example as Connector name.
- Select the MSK Cluster created in Step 2.
- Enter the connector configuration shown below:

- Select Provisioned or Autoscaled capacity based on your requirement.
- Create and select an IAM role with the required trust policy for MSK connect.
- Once the couchbase-sink-example connector starts you will see messages from the Kafka topic added to the Couchbase bucket as new documents.


Step 5: Create MSK Connector for Source
- Using the custom plugin, we can now create a source connector. Open the Amazon MSK console. In the left pane, under MSK Connect, choose Connectors. Choose Create connector.
- Choose the custom plugin couchbase-kafka-connect and choose Next.
- Enter couchbase-source-example as Connector name
- Select the MSK Cluster created in Step 2.
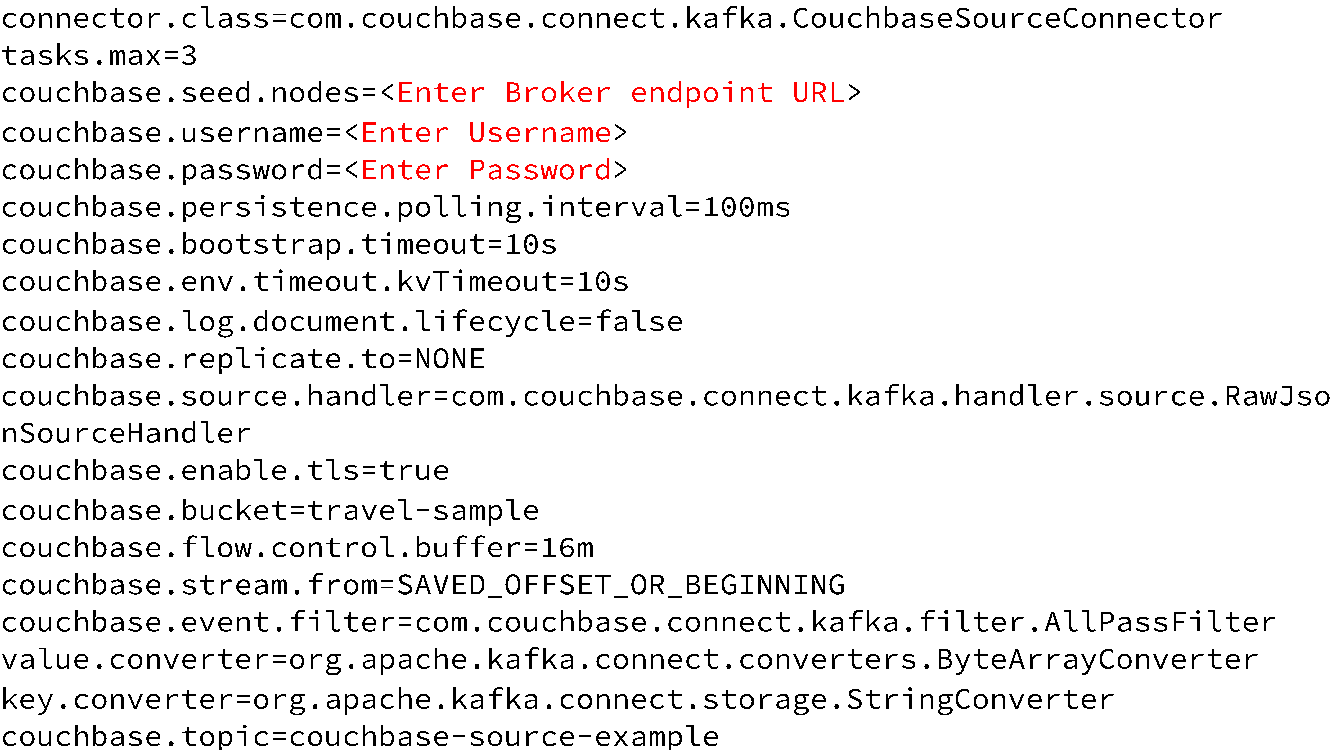
- Enter the connector configuration shown below:

- Select Provisioned or Autoscaled capacity based on your requirement.
- Create and select an IAM role with the required trust policy for MSK connect.
- Once the couchbase-source-example connector starts it will be listening to Couchbase Database Change Protocol (DCP).
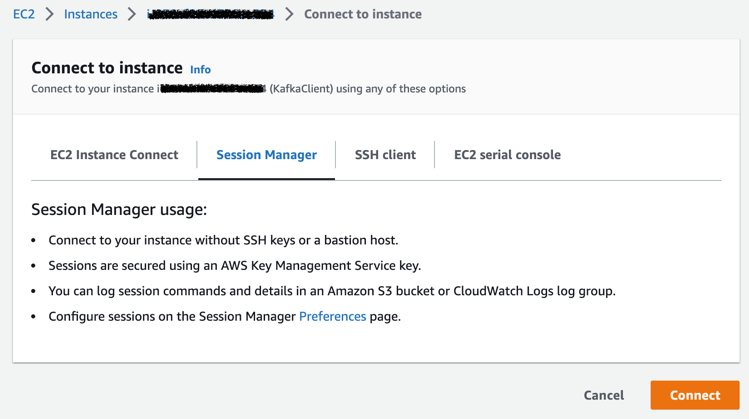
- Let’s start a console consumer on the KafkaClient instance to listen to the Kafka topic couchbase-source-example where the update messages will be published. For this I will again connect to the KafkaClient instance using the Session Manager option and run the following code:

- Now when we run UPDATE queries on the travel-sample bucket on Couchbase Capella using the Data Tools – Query option:

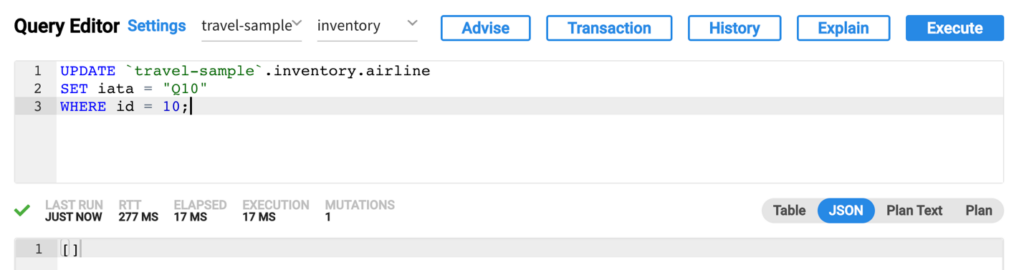
- We can see the updated document is received by the Kafka consumer running on the Kafka Client instance:


Conclusion
This post illustrates how you can use the Couchbase source connector for publishing document change notifications from Couchbase Capella to a Kafka topic, as well as a sink connector that subscribes to one or more Kafka topics and writes the messages to Couchbase Capella.
Author
1 Comment
-
I followed the tutorial, and could not make it work.
Maybe some information is missing?
Leave a comment
You must be logged in to post a comment.