O JavaFX e o Couchbase Mobile são uma excelente combinação para criar aplicativos de classe de desktop com interfaces de usuário avançadas e acesso rápido a dados. Neste tutorial, você aprenderá os seguintes conceitos básicos:
- Saiba mais sobre replicação, segurança e implementação usando a amostra do TodoLite
- Como iniciar um novo projeto JavaFX com o Couchbase Mobile como uma dependência
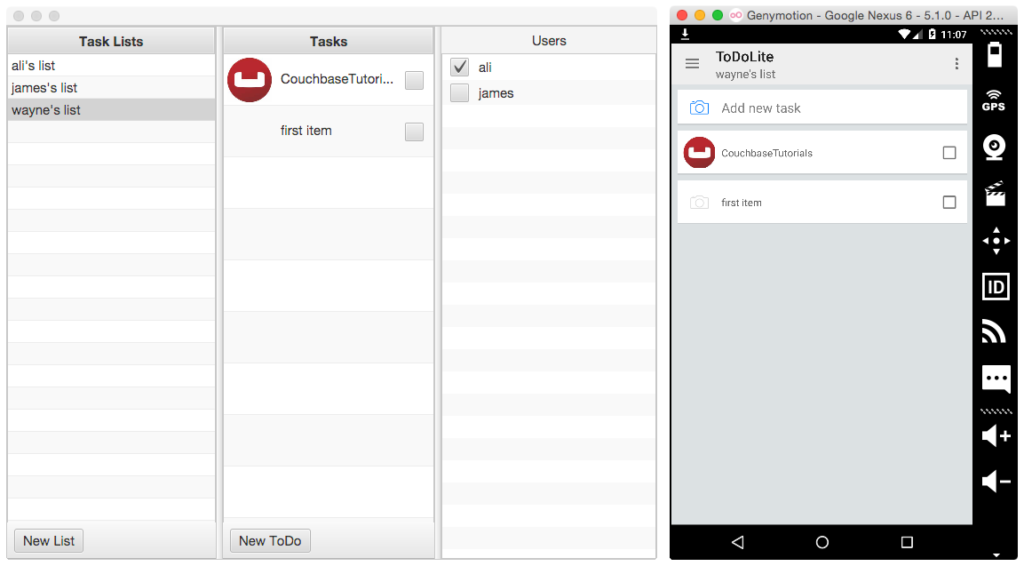
Não abordaremos o TodoLite para Android nesta publicação, mas você pode ter os dois aplicativos sendo executados lado a lado e replicando documentos e anexos por meio do Sync Gateway:
Você pode encontrar o código-fonte do TodoLite JavaFX em github.
TodoLite JavaFX
Para acelerar o processo, você clonará alguns códigos-fonte com o seguinte:
|
1 2 |
git clone git@github.com:CouchbaseTutorials/todolite-javafx.git cd todolite-javafx |
Abra essa pasta no IntelliJ e clique no botão Executar no canto superior direito. Uma nova janela deverá se abrir (é claro que a sua não terá nenhum dado nela :D):
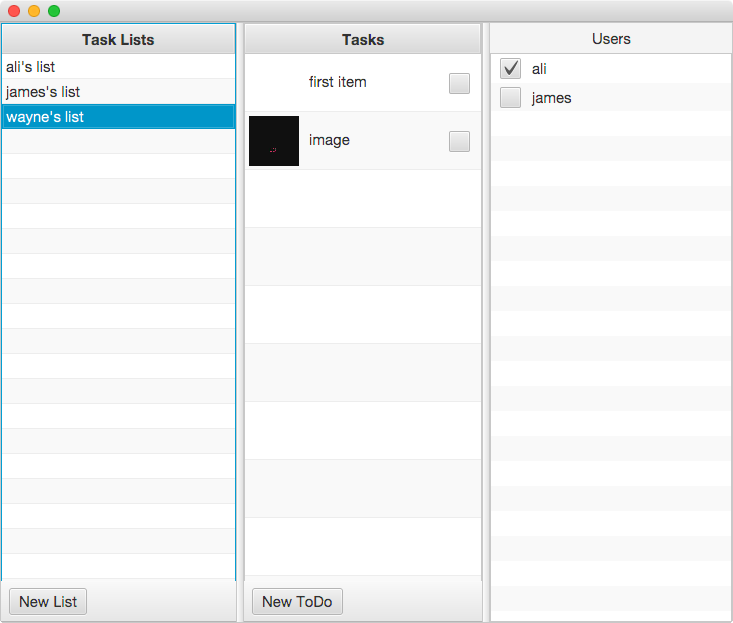
Vá em frente e crie uma nova lista e uma nova tarefa. No momento em que este artigo foi escrito, a versão JavaFX do TodoLite não implementava todos os recursos. No momento, você está conectado como usuário com o nome wayne e a senha é pass. Portanto, se você executar a versão Android do TodoLite, poderá fazer login com essas credenciais ou criar um novo usuário na página de inscrição e compartilhar listas com outros usuários. Ambos os aplicativos estariam sincronizando com uma instância do Sync Gateway em execução em https://9cec7a6e-jamiltz.node.tutum.io:4984.
Modelo de dados
O TodoLite tem o seguinte modelo de dados. Observe como os documentos são mantidos em tamanho pequeno e podem fazer referência a outros documentos. _id (você poderia pensar neles como chaves estrangeiras): 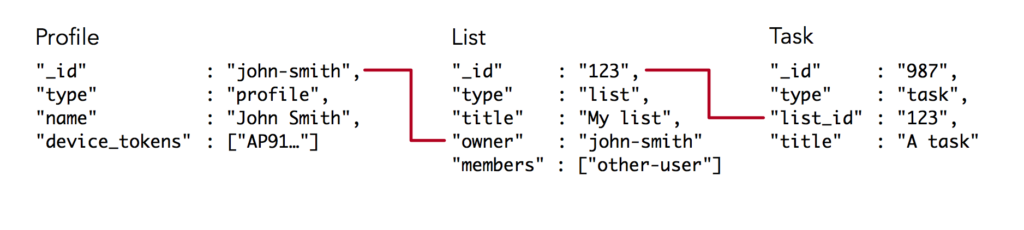
Implantação
O back-end do TodoLite é composto pelo Sync Gateway e um App Server para permitir que os usuários se inscrevam. Novamente, no momento em que este artigo foi escrito, as telas de Login e Inscrição não foram implementadas para a versão JavaFX do TodoLite. Você pode seguir o README no arquivo desenvolvimento de todolitos para que ambos os servidores sejam executados localmente.
Como fazer Criar um novo aplicativo JavaFX + Couchbase Mobile
Abra o IntelliJ IDEA e escolha a opção Criar novo projeto menu. No painel esquerdo, selecione a opção JavaFX e defina o SDK do projeto como 1.8. 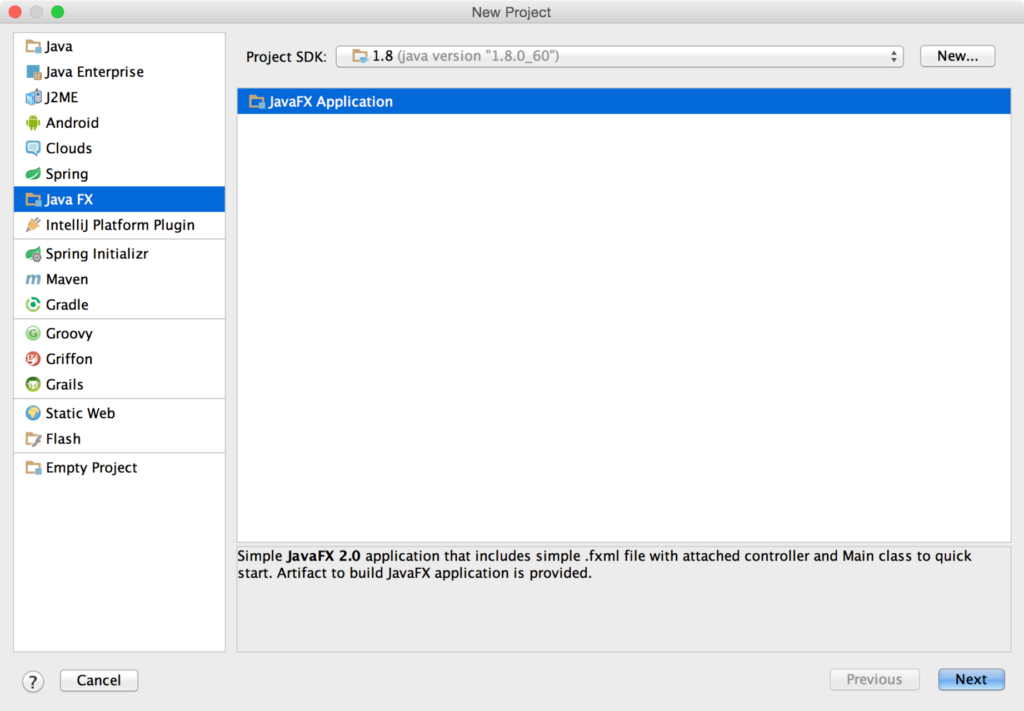 Dê o nome que desejar ao aplicativo e clique em AcabamentoIsso abrirá o projeto recém-criado em uma nova janela. Antes de começarmos a escrever o código, há algumas definições de configuração a serem alteradas. Selecione o botão Editar Configurações... no canto superior direito, o que abrirá uma nova janela. Verifique o Somente instância única para garantir que o IDE não inicie uma nova instância do aplicativo toda vez que você clicar no botão Executar.
 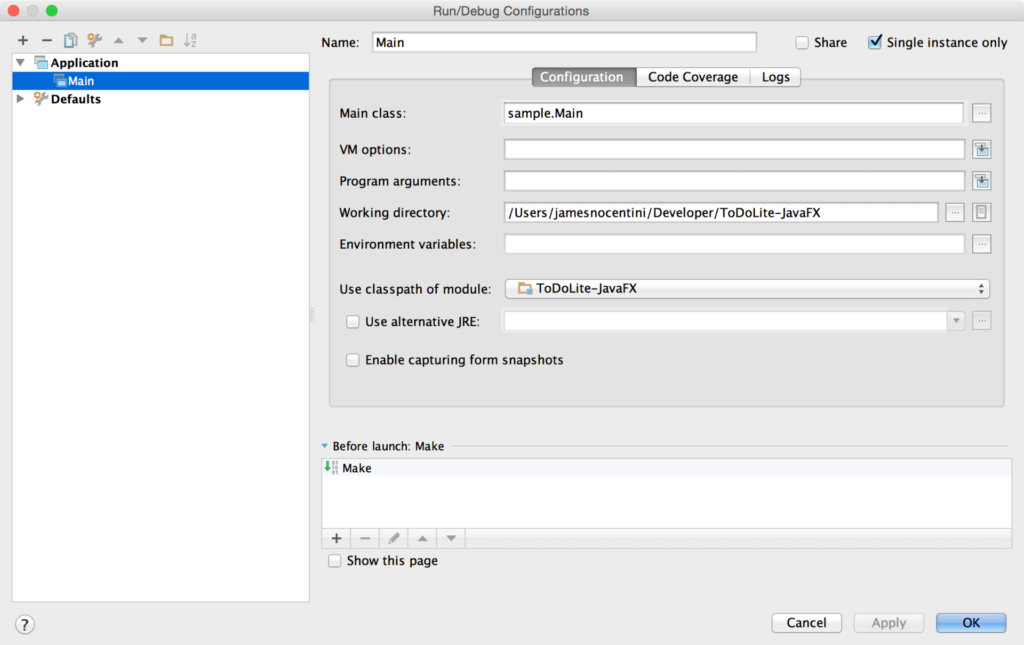 Com isso, vamos nos concentrar em adicionar o Couchbase Lite como uma dependência ao projeto. Selecione Arquivo\Estrutura do projeto... na barra de menu superior, uma nova janela será aberta e, no campo Módulos adicione uma nova biblioteca do Maven:
 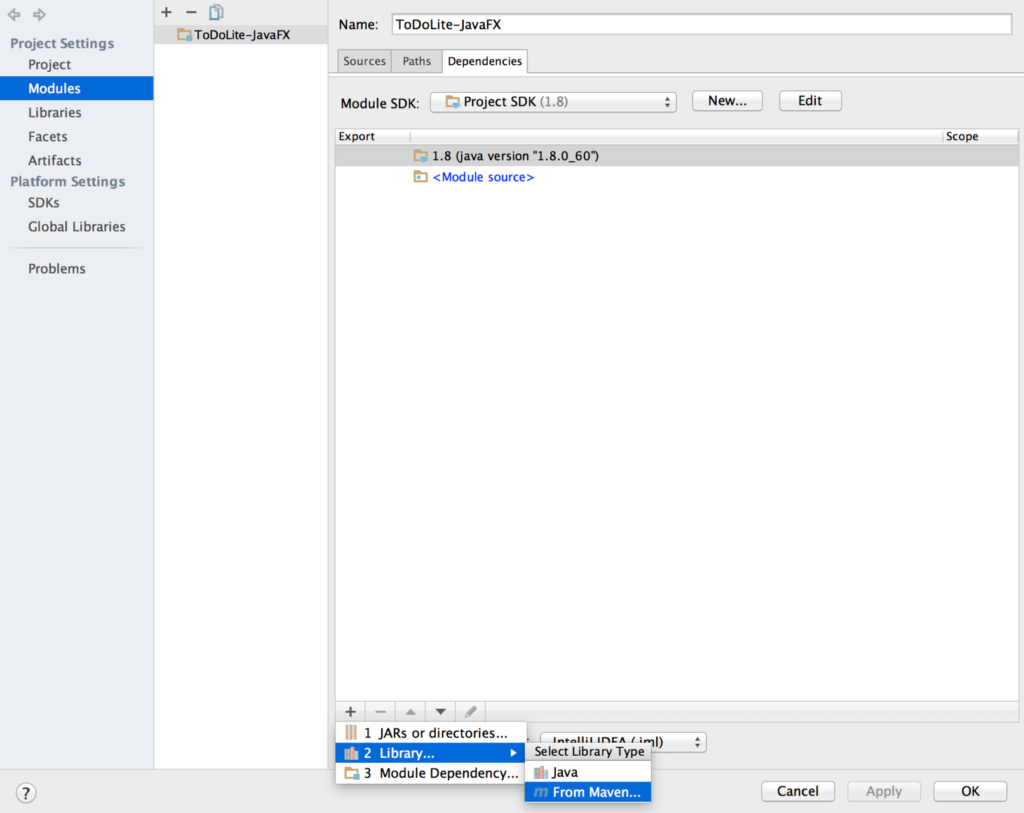 Um campo de pesquisa será exibido em uma janela pop-up, digite com.couchbase.lite:couchbase-lite-java:1.1.0 e clique em OK. Isso fará o download da biblioteca e a adicionará ao projeto. Em seguida, você adicionará um arquivo JAR que contém a biblioteca nativa para a plataforma em que está executando o aplicativo (Windows, Mac...). Para usuários do OS X, baixe esse arquivo JAR e adicione-o em um novo diretório chamado bibliotecas em seu projeto. Retornar o Módulos e adicione esse arquivo JAR da janela Adicionar > JARs ou diretórios... menu:
  Clique em OK e execute o aplicativo. Você verá uma janela em branco com a mensagem Olá mundo na barra de status:
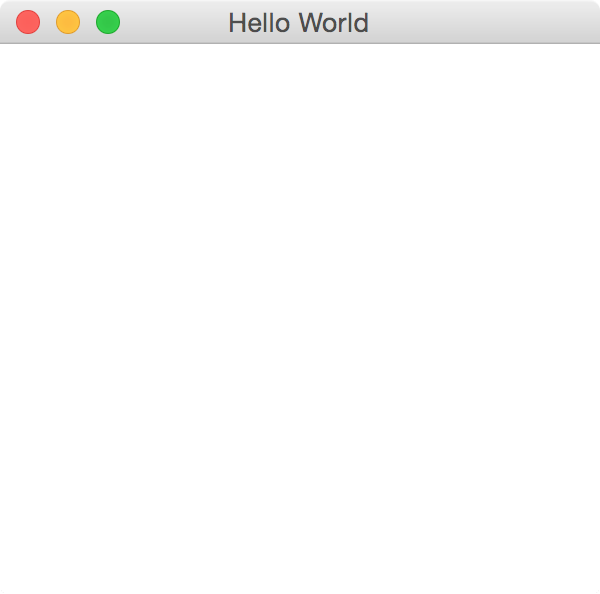
Abrir um novo banco de dados e salvar um documento
Em seu novo projeto, abra Main.java e criar um novo método chamado startCouchbase com o seguinte:
|
1 2 3 4 5 6 7 8 9 10 11 12 13 14 15 16 17 18 19 20 21 22 23 24 |
private void startCouchbase() { JavaContext context = new JavaContext(); Manager manager = null; try { manager = new Manager(context, Manager.DEFAULT_OPTIONS); } catch (IOException e) { e.printStackTrace(); } Database database = null; try { database = manager.getDatabase("myapp"); } catch (CouchbaseLiteException e) { e.printStackTrace(); } Map<String, Object> properties = new HashMap<String, Object>(); properties.put("session", "Couchbase Mobile"); properties.put("conference", "JavaOne"); Document document = database.createDocument(); try { document.putProperties(properties); } catch (CouchbaseLiteException e) { e.printStackTrace(); } } |
Aqui, você está abrindo um novo banco de dados chamado myapp e persistindo um novo documento com uma sessão e um campo de conferência. Você pode ler mais sobre as diferentes APIs na seção guias de documentação ou consulte o TodoLite-JavaFX aplicativo de amostra.
Ligue para o startCouchbase no método iniciar método de Main.java
Gateway de sincronização
A maneira mais rápida de começar a usar a replicação é fazer o download da versão mais recente do Sync Gateway:
https://www.couchbase.com/nosql-databases/downloads#Couchbase_Mobile
E use um dos modelos de configuração fornecidos como argumento de linha de comando ao iniciar o Sync Gateway:
|
1 |
$ ~/Downloads/couchbase-sync-gateway/bin/sync_gateway basic-walrus-bucket.json |
O arquivo de configuração especificado tem o seguinte:
|
1 2 3 4 5 6 7 8 9 |
{ "log": ["*"], "databases": { "db": { "server": "walrus:", "users": { "GUEST": { "disabled": false, "admin_channels": ["*"] } } } } } |
Aqui, você está criando um banco de dados chamado db e ativar o CONVIDADO o que significa que solicitações não autenticadas devem ser permitidas e processadas.
É isso aí! Agora você tem um banco de dados do Sync Gateway em execução em seu computador, que pode ser acessado em https://localhost:4984/db/.
Adição de sincronização
Volte para o aplicativo JavaFX e adicione um novo startReplications método:
|
1 2 3 4 5 6 7 8 9 10 11 12 13 14 15 16 17 18 19 |
public void startReplications() { URL remoteURL = null; try { remoteURL = new URL(remoteDatabase); } catch (MalformedURLException e) { e.printStackTrace(); } Replication pull = database.createPullReplication(remoteURL); Replication push = database.createPushReplication(remoteURL); pull.setContinuous(true); push.setContinuous(true); pull.start(); push.start(); } |
Ligue para o startReplications abaixo do startCouchbase e reinicie o aplicativo. Agora você deve ver o documento que criou anteriormente na interface de administração do Sync Gateway (https://localhost:4985/_admin/).
Para onde ir a partir de agora
Parabéns! Você criou seu primeiro aplicativo JavaFX + Couchbase Mobile com replicação. Agora você está pronto para aprender os seguintes conceitos:
- O Função de sincronização para definir regras de acesso
- Visualizações do Couchbase Lite para escrever consultas personalizadas
Sinta-se à vontade para compartilhar seus comentários, descobertas ou fazer perguntas nos comentários abaixo ou nos fóruns. Falamos com você em breve!