Couchbase en Amazon Marketplace mostró cómo configurar un único nodo Couchbase usando la Consola EC2. Pero normalmente se aprovisionan estos nodos en masa, y más comúnmente
crear un clúster de ellos. Los clústeres de Couchbase son homogéneos, escalan horizontalmente y, por tanto, garantizan que la base de datos no se convierta en un cuello de botella para tu aplicación de alto rendimiento.
En este blog se muestra cómo crear, escalar y reequilibrar un clúster de Couchbase mediante la interfaz de línea de comandos (CLI) de AWS.
Instalar AWS CLI
Instalar la CLI de AWS proporcionar detalles completos, pero esto es lo que funcionó en mi máquina:
|
1 2 3 4 5 6 7 8 9 10 11 12 13 14 15 16 17 18 19 20 21 22 23 24 25 26 27 28 29 30 31 32 33 34 35 36 |
tools > pip install awscli Collecting awscli Downloading awscli-1.10.27-py2.py3-none-any.whl (937kB) 100% |████████████████████████████████| 937kB 561kB/s Collecting rsa<=3.3.0,>=3.1.2 (from awscli) Downloading rsa-3.3-py2.py3-none-any.whl (44kB) 100% |████████████████████████████████| 45kB 7.7MB/s Collecting s3transfer==0.0.1 (from awscli) Downloading s3transfer-0.0.1-py2.py3-none-any.whl Collecting colorama<=0.3.3,>=0.2.5 (from awscli) Downloading colorama-0.3.3.tar.gz Collecting botocore==1.4.18 (from awscli) Downloading botocore-1.4.18-py2.py3-none-any.whl (2.3MB) 100% |████████████████████████████████| 2.3MB 221kB/s Collecting docutils>=0.10 (from awscli) Downloading docutils-0.12.tar.gz (1.6MB) 100% |████████████████████████████████| 1.6MB 328kB/s Collecting pyasn1>=0.1.3 (from rsa<=3.3.0,>=3.1.2->awscli) Using cached pyasn1-0.1.9-py2.py3-none-any.whl Collecting futures<4.0.0,>=2.2.0 (from s3transfer==0.0.1->awscli) Using cached futures-3.0.5-py2-none-any.whl Collecting jmespath<1.0.0,>=0.7.1 (from botocore==1.4.18->awscli) Downloading jmespath-0.9.0-py2.py3-none-any.whl Collecting python-dateutil<3.0.0,>=2.1 (from botocore==1.4.18->awscli) Downloading python_dateutil-2.5.3-py2.py3-none-any.whl (201kB) 100% |████████████████████████████████| 204kB 2.4MB/s Collecting six>=1.5 (from python-dateutil<3.0.0,>=2.1->botocore==1.4.18->awscli) Using cached six-1.10.0-py2.py3-none-any.whl Building wheels for collected packages: colorama, docutils Running setup.py bdist_wheel for colorama ... done Stored in directory: /Users/arungupta/Library/Caches/pip/wheels/21/c5/cf/63fb92293f3ad402644ccaf882903cacdb8fe87c80b62c84df Running setup.py bdist_wheel for docutils ... done Stored in directory: /Users/arungupta/Library/Caches/pip/wheels/db/de/bd/b99b1e12d321fbc950766c58894c6576b1a73ae3131b29a151 Successfully built colorama docutils Installing collected packages: pyasn1, rsa, futures, jmespath, six, python-dateutil, docutils, botocore, s3transfer, colorama, awscli Successfully installed awscli-1.10.27 botocore-1.4.18 colorama-0.3.3 docutils-0.12 futures-3.0.5 jmespath-0.9.0 pyasn1-0.1.9 python-dateutil-2.5.3 rsa-3.3 s3transfer-0.0.1 six-1.10.0 |
Configure la CLI:
|
1 2 3 4 5 |
aws configure AWS Access Key ID [****************Q5FQ]: YOUR ACCESS KEY ID AWS Secret Access Key [****************thBR]: YOUR SECRET ACCESS KEY Default region name [us-west-1]: Default output format [None]: |
Introduzca su identificador de clave de acceso y su clave de acceso secreta. Puede obtenerlas como se explica en Obtención del identificador y la clave secreta de acceso.
Crear grupo de seguridad de AWS
Si antes aprovisionó un servidor mediante Amazon 1-click entonces un grupo de seguridad con el nombre Couchbase Server Community Edition-4-0-0-AutogenByAWSMP- es
creado para usted. Este grupo de seguridad tiene todos los puertos autorizados requeridos para crear un cluster Couchbase y puede ser usado para crear la instancia. Alternativamente, puedes crear un nuevo grupo de seguridad y autorizar explícitamente los puertos.
Crear un grupo de seguridad:
|
1 2 3 4 |
aws ec2 create-security-group --group-name my-couchbase-sg --description "My Couchbase Security Group" { "GroupId": "sg-c9bb19ad" } |
Autorizar puertos en el grupo de seguridad:
|
1 2 3 4 |
aws ec2 authorize-security-group-ingress --group-name my-couchbase-sg --port 8091-8093 --protocol tcp --cidr 0.0.0.0/0 aws ec2 authorize-security-group-ingress --group-name my-couchbase-sg --port 11209-11211 --protocol tcp --cidr 0.0.0.0/0 aws ec2 authorize-security-group-ingress --group-name my-couchbase-sg --port 21100-21299 --protocol tcp --cidr 0.0.0.0/0 aws ec2 authorize-security-group-ingress --group-name my-couchbase-sg --port 4369 --protocol tcp --cidr 0.0.0.0/0 |
Crear un par de claves de AWS
Más información sobre la creación par de llaves. Crea un par de claves:
|
1 |
aws ec2 create-key-pair --key-name my-couchbase-key > my-couchbase-key.pem |
Anote el nombre de la clave, ya que se utilizará más adelante.
Crear nodos Couchbase en Amazon
Crear dos instancias utilizando el grupo de seguridad recién creado como:
|
1 |
aws ec2 run-instances --image-id ami-db95ffbb --count 2 --instance-type m3.large --key-name my-couchbase-key --security-groups my-couchbase-sg |
Tenga en cuenta que el número de instancias se especifica mediante --cuenta 2. El ID de la AMI se puede obtener utilizando la consola de EC2: https://us-west-1.console.aws.amazon.com/ec2/v2/home?region=us-west-1#Images:visibility=public-images;search=couchbase;sort=desc:name.
O crear dos instancias utilizando el grupo de seguridad pre-creado como:
|
1 |
aws ec2 run-instances --image-id ami-db95ffbb --count 2 --instance-type m3.large --key-name my-couchbase-key --security-groups "Couchbase Server Community Edition-4-0-0-AutogenByAWSMP-" |
Esto mostrará la salida como:
|
1 2 3 4 5 6 7 8 9 10 11 12 13 14 15 16 17 18 19 20 21 22 23 24 25 26 27 28 29 30 31 32 33 34 35 36 37 38 39 40 41 42 43 44 45 46 47 48 49 50 51 52 53 54 55 56 57 58 59 60 61 62 63 64 65 66 67 68 69 70 71 72 73 74 75 76 77 78 79 80 81 82 83 84 85 86 87 88 89 90 91 92 93 94 95 96 97 98 99 100 101 102 103 104 105 106 107 108 109 110 111 112 113 114 115 116 117 118 119 120 121 122 123 124 125 126 127 128 129 130 131 132 133 134 135 136 137 138 139 140 141 142 143 144 145 146 147 148 149 150 151 152 153 154 155 156 157 158 159 160 161 162 163 164 165 166 167 |
{ "OwnerId": "598307997273", "ReservationId": "r-cb952179", "Groups": [], "Instances": [ { "Monitoring": { "State": "disabled" }, "PublicDnsName": "", "RootDeviceType": "ebs", "State": { "Code": 0, "Name": "pending" }, "EbsOptimized": false, "LaunchTime": "2016-05-16T16:11:59.000Z", "PrivateIpAddress": "172.31.15.200", "ProductCodes": [], "VpcId": "vpc-c561f9a0", "StateTransitionReason": "", "InstanceId": "i-90199025", "ImageId": "ami-db95ffbb", "PrivateDnsName": "ip-172-31-15-200.us-west-1.compute.internal", "KeyName": "my-couchbase-key", "SecurityGroups": [ { "GroupName": "my-couchbase-sg", "GroupId": "sg-6172dd05" } ], "ClientToken": "", "SubnetId": "subnet-625bd23b", "InstanceType": "m3.large", "NetworkInterfaces": [ { "Status": "in-use", "MacAddress": "06:b1:52:a6:87:f7", "SourceDestCheck": true, "VpcId": "vpc-c561f9a0", "Description": "", "NetworkInterfaceId": "eni-86ac6fdb", "PrivateIpAddresses": [ { "PrivateDnsName": "ip-172-31-15-200.us-west-1.compute.internal", "Primary": true, "PrivateIpAddress": "172.31.15.200" } ], "PrivateDnsName": "ip-172-31-15-200.us-west-1.compute.internal", "Attachment": { "Status": "attaching", "DeviceIndex": 0, "DeleteOnTermination": true, "AttachmentId": "eni-attach-530b7293", "AttachTime": "2016-05-16T16:11:59.000Z" }, "Groups": [ { "GroupName": "my-couchbase-sg", "GroupId": "sg-6172dd05" } ], "SubnetId": "subnet-625bd23b", "OwnerId": "598307997273", "PrivateIpAddress": "172.31.15.200" } ], "SourceDestCheck": true, "Placement": { "Tenancy": "default", "GroupName": "", "AvailabilityZone": "us-west-1c" }, "Hypervisor": "xen", "BlockDeviceMappings": [], "Architecture": "x86_64", "StateReason": { "Message": "pending", "Code": "pending" }, "RootDeviceName": "/dev/xvda", "VirtualizationType": "hvm", "AmiLaunchIndex": 0 }, { "Monitoring": { "State": "disabled" }, "PublicDnsName": "", "RootDeviceType": "ebs", "State": { "Code": 0, "Name": "pending" }, "EbsOptimized": false, "LaunchTime": "2016-05-16T16:11:59.000Z", "PrivateIpAddress": "172.31.15.201", "ProductCodes": [], "VpcId": "vpc-c561f9a0", "StateTransitionReason": "", "InstanceId": "i-93199026", "ImageId": "ami-db95ffbb", "PrivateDnsName": "ip-172-31-15-201.us-west-1.compute.internal", "KeyName": "my-couchbase-key", "SecurityGroups": [ { "GroupName": "my-couchbase-sg", "GroupId": "sg-6172dd05" } ], "ClientToken": "", "SubnetId": "subnet-625bd23b", "InstanceType": "m3.large", "NetworkInterfaces": [ { "Status": "in-use", "MacAddress": "06:83:e8:06:2a:f1", "SourceDestCheck": true, "VpcId": "vpc-c561f9a0", "Description": "", "NetworkInterfaceId": "eni-81ac6fdc", "PrivateIpAddresses": [ { "PrivateDnsName": "ip-172-31-15-201.us-west-1.compute.internal", "Primary": true, "PrivateIpAddress": "172.31.15.201" } ], "PrivateDnsName": "ip-172-31-15-201.us-west-1.compute.internal", "Attachment": { "Status": "attaching", "DeviceIndex": 0, "DeleteOnTermination": true, "AttachmentId": "eni-attach-680b72a8", "AttachTime": "2016-05-16T16:11:59.000Z" }, "Groups": [ { "GroupName": "my-couchbase-sg", "GroupId": "sg-6172dd05" } ], "SubnetId": "subnet-625bd23b", "OwnerId": "598307997273", "PrivateIpAddress": "172.31.15.201" } ], "SourceDestCheck": true, "Placement": { "Tenancy": "default", "GroupName": "", "AvailabilityZone": "us-west-1c" }, "Hypervisor": "xen", "BlockDeviceMappings": [], "Architecture": "x86_64", "StateReason": { "Message": "pending", "Code": "pending" }, "RootDeviceName": "/dev/xvda", "VirtualizationType": "hvm", "AmiLaunchIndex": 1 } ] } |
El estado de las instancias puede comprobarse como:
|
1 |
aws ec2 describe-instance-status --instance-ids `aws ec2 describe-instances --query 'Reservations[*].Instances[*].[InstanceId]' --filters Name=instance-state-name,Values=running --output text` |
Y muestra la salida como:
|
1 2 3 4 5 6 7 8 9 10 11 12 13 14 15 16 17 18 19 20 21 22 23 24 25 26 27 28 29 30 31 32 33 34 35 36 37 38 39 40 41 42 43 44 45 46 47 48 49 50 51 52 53 54 55 56 |
{ "InstanceStatuses": [ { "InstanceId": "i-90199025", "InstanceState": { "Code": 16, "Name": "running" }, "AvailabilityZone": "us-west-1c", "SystemStatus": { "Status": "initializing", "Details": [ { "Status": "initializing", "Name": "reachability" } ] }, "InstanceStatus": { "Status": "initializing", "Details": [ { "Status": "initializing", "Name": "reachability" } ] } }, { "InstanceId": "i-93199026", "InstanceState": { "Code": 16, "Name": "running" }, "AvailabilityZone": "us-west-1c", "SystemStatus": { "Status": "initializing", "Details": [ { "Status": "initializing", "Name": "reachability" } ] }, "InstanceStatus": { "Status": "initializing", "Details": [ { "Status": "initializing", "Name": "reachability" } ] } } ] } |
Aquí el estado se muestra como inicializando. Las instancias tardan unos minutos en aprovisionarse. Las instancias que han superado todas las comprobaciones pueden verificarse como:
|
1 |
aws ec2 describe-instance-status --filters Name=instance-status.reachability,Values=passed --instance-ids `aws ec2 describe-instances --query 'Reservations[*].Instances[*].[InstanceId]' --filters Name=instance-state-name,Values=running --output text` |
Al principio, muestra el resultado como:
|
1 2 3 |
{ "InstanceStatuses": [] } |
Pero una vez que todas las instancias pasan la comprobación, entonces los resultados se ven así:
|
1 2 3 4 5 6 7 8 9 10 11 12 13 14 15 16 17 18 19 20 21 22 23 24 25 26 27 28 29 30 31 32 33 34 35 36 37 38 39 40 41 42 43 44 45 46 47 48 49 50 51 52 53 54 55 56 |
{ "InstanceStatuses": [ { "InstanceId": "i-90199025", "InstanceState": { "Code": 16, "Name": "running" }, "AvailabilityZone": "us-west-1c", "SystemStatus": { "Status": "ok", "Details": [ { "Status": "passed", "Name": "reachability" } ] }, "InstanceStatus": { "Status": "ok", "Details": [ { "Status": "passed", "Name": "reachability" } ] } }, { "InstanceId": "i-93199026", "InstanceState": { "Code": 16, "Name": "running" }, "AvailabilityZone": "us-west-1c", "SystemStatus": { "Status": "ok", "Details": [ { "Status": "passed", "Name": "reachability" } ] }, "InstanceStatus": { "Status": "ok", "Details": [ { "Status": "passed", "Name": "reachability" } ] } } ] } |
Aquí el estado se muestra como aprobado.
Configurar nodos Couchbase
Cada nodo Couchbase necesita ser aprovisionado con los siguientes detalles:
- Memoria
- Servicios (índice, datos y consulta)
- Credenciales de autenticación (nombre de usuario:
Administradorcontraseña:contraseña) - Cargas
viaje-muestracubo
Esto puede hacerse utilizando el script:
|
1 2 3 4 5 6 7 |
for ip in "$@" do curl -v -X POST https://$ip:8091/pools/default -d memoryQuota=300 -d indexMemoryQuota=300 curl -v https://$ip:8091/node/controller/setupServices -d services=kv%2Cn1ql%2Cindex curl -v https://$ip:8091/settings/web -d port=8091 -d username=Administrator -d password=password curl -v -u Administrator:password -X POST https://$ip:8091/sampleBuckets/install -d '["travel-sample"]' done |
Está disponible en: https://github.com/arun-gupta/couchbase-amazon/blob/master/configure-instance.sh. Se puede invocar como:
|
1 |
./configure-instance.sh `aws ec2 describe-instances --query 'Reservations[*].Instances[*].[PublicDnsName]' --filters Name=instance-state-name,Values=running --output text` |
Y muestra la salida como:
|
1 2 3 4 5 6 7 8 9 10 11 12 13 14 15 16 17 18 19 20 21 22 23 24 25 26 27 28 29 30 31 32 33 34 35 36 37 38 39 40 41 42 43 44 45 46 47 48 49 50 51 52 53 54 55 56 57 58 59 60 61 62 63 64 65 66 67 68 69 70 71 72 73 74 75 76 77 78 79 80 81 82 83 84 85 86 87 88 89 90 91 92 93 94 95 96 97 98 99 100 101 102 103 104 105 106 107 108 109 110 111 112 113 114 115 116 117 118 119 120 121 122 123 |
* Trying 52.53.171.49... * Connected to ec2-52-53-171-49.us-west-1.compute.amazonaws.com (52.53.171.49) port 8091 (#0) > POST /pools/default HTTP/1.1 > Host: ec2-52-53-171-49.us-west-1.compute.amazonaws.com:8091 > User-Agent: curl/7.43.0 > Accept: */* > Content-Length: 36 > Content-Type: application/x-www-form-urlencoded > * upload completely sent off: 36 out of 36 bytes < HTTP/1.1 200 OK < Server: Couchbase Server < Pragma: no-cache < Date: Mon, 16 May 2016 16:18:47 GMT < Content-Length: 0 < Cache-Control: no-cache < * Connection #0 to host ec2-52-53-171-49.us-west-1.compute.amazonaws.com left intact * Trying 52.53.171.49... * Connected to ec2-52-53-171-49.us-west-1.compute.amazonaws.com (52.53.171.49) port 8091 (#0) > POST /node/controller/setupServices HTTP/1.1 > Host: ec2-52-53-171-49.us-west-1.compute.amazonaws.com:8091 > User-Agent: curl/7.43.0 > Accept: */* > Content-Length: 26 > Content-Type: application/x-www-form-urlencoded > * upload completely sent off: 26 out of 26 bytes < HTTP/1.1 200 OK < Server: Couchbase Server < Pragma: no-cache < Date: Mon, 16 May 2016 16:18:47 GMT < Content-Length: 0 < Cache-Control: no-cache < * Connection #0 to host ec2-52-53-171-49.us-west-1.compute.amazonaws.com left intact * Trying 52.53.171.49... * Connected to ec2-52-53-171-49.us-west-1.compute.amazonaws.com (52.53.171.49) port 8091 (#0) > POST /settings/web HTTP/1.1 > Host: ec2-52-53-171-49.us-west-1.compute.amazonaws.com:8091 > User-Agent: curl/7.43.0 > Accept: */* > Content-Length: 50 > Content-Type: application/x-www-form-urlencoded > * upload completely sent off: 50 out of 50 bytes < HTTP/1.1 200 OK < Server: Couchbase Server < Pragma: no-cache < Date: Mon, 16 May 2016 16:18:47 GMT < Content-Type: application/json < Content-Length: 78 < Cache-Control: no-cache < * Connection #0 to host ec2-52-53-171-49.us-west-1.compute.amazonaws.com left intact {"newBaseUri":"https://ec2-52-53-171-49.us-west-1.compute.amazonaws.com:8091/"}* Trying 52.53.171.49... * Connected to ec2-52-53-171-49.us-west-1.compute.amazonaws.com (52.53.171.49) port 8091 (#0) * Server auth using Basic with user 'Administrator' > POST /sampleBuckets/install HTTP/1.1 > Host: ec2-52-53-171-49.us-west-1.compute.amazonaws.com:8091 > Authorization: Basic QWRtaW5pc3RyYXRvcjpwYXNzd29yZA== > User-Agent: curl/7.43.0 > Accept: */* > Content-Length: 17 > Content-Type: application/x-www-form-urlencoded > * upload completely sent off: 17 out of 17 bytes < HTTP/1.1 202 Accepted < Server: Couchbase Server < Pragma: no-cache < Date: Mon, 16 May 2016 16:18:47 GMT < Content-Type: application/json < Content-Length: 2 < Cache-Control: no-cache < * Connection #0 to host ec2-52-53-171-49.us-west-1.compute.amazonaws.com left intact []* Trying 52.53.239.100... * Connected to ec2-52-53-239-100.us-west-1.compute.amazonaws.com (52.53.239.100) port 8091 (#0) > POST /pools/default HTTP/1.1 > Host: ec2-52-53-239-100.us-west-1.compute.amazonaws.com:8091 > User-Agent: curl/7.43.0 > Accept: */* > Content-Length: 36 > Content-Type: application/x-www-form-urlencoded > * upload completely sent off: 36 out of 36 bytes < HTTP/1.1 200 OK < Server: Couchbase Server < Pragma: no-cache < Date: Mon, 16 May 2016 16:18:48 GMT < Content-Length: 0 < Cache-Control: no-cache < * Connection #0 to host ec2-52-53-239-100.us-west-1.compute.amazonaws.com left intact * Trying 52.53.239.100... * Connected to ec2-52-53-239-100.us-west-1.compute.amazonaws.com (52.53.239.100) port 8091 (#0) > POST /node/controller/setupServices HTTP/1.1 > Host: ec2-52-53-239-100.us-west-1.compute.amazonaws.com:8091 > User-Agent: curl/7.43.0 > Accept: */* > Content-Length: 26 > Content-Type: application/x-www-form-urlencoded > * upload completely sent off: 26 out of 26 bytes < HTTP/1.1 200 OK < Server: Couchbase Server < Pragma: no-cache < Date: Mon, 16 May 2016 16:18:48 GMT < Content-Length: 0 < Cache-Control: no-cache < * Connection #0 to host ec2-52-53-239-100.us-west-1.compute.amazonaws.com left intact * Trying 52.53.239.100... * Connected to ec2-52-53-239-100.us-west-1.compute.amazonaws.com (52.53.239.100) port 8091 (#0) > POST /settings/web HTTP/1.1 > Host: ec2-52-53-239-100.us-west-1.compute.amazonaws.com:8091 > User-Agent: curl/7.43.0 > Accept: */* > Content-Length: 50 > Content-Type: application/x-www-form-urlencoded > * upload completely sent off: 50 out of 50 bytes < HTTP/1.1 200 OK < Server: Couchbase Server < Pragma: no-cache < Date: Mon, 16 May 2016 16:18:48 GMT < Content-Type: application/json < Content-Length: 79 < Cache-Control: no-cache < * Connection #0 to host ec2-52-53-239-100.us-west-1.compute.amazonaws.com left intact {"newBaseUri":"https://ec2-52-53-239-100.us-west-1.compute.amazonaws.com:8091/"}* Trying 52.53.239.100... * Connected to ec2-52-53-239-100.us-west-1.compute.amazonaws.com (52.53.239.100) port 8091 (#0) * Server auth using Basic with user 'Administrator' > POST /sampleBuckets/install HTTP/1.1 > Host: ec2-52-53-239-100.us-west-1.compute.amazonaws.com:8091 > Authorization: Basic QWRtaW5pc3RyYXRvcjpwYXNzd29yZA== > User-Agent: curl/7.43.0 > Accept: */* > Content-Length: 17 > Content-Type: application/x-www-form-urlencoded > * upload completely sent off: 17 out of 17 bytes < HTTP/1.1 202 Accepted < Server: Couchbase Server < Pragma: no-cache < Date: Mon, 16 May 2016 16:18:48 GMT < Content-Type: application/json < Content-Length: 2 < Cache-Control: no-cache < * Connection #0 to host ec2-52-53-239-100.us-west-1.compute.amazonaws.com left intact [] |
Esto es invocar API REST de Couchbase para configurar cada nodo Couchbase. Ahora que cada nodo Couchbase está configurado, vamos a acceder a ellos. Buscar public
Dirección IP de las instancias:
|
1 |
aws ec2 describe-instances --query 'Reservations[*].Instances[*].[PublicDnsName]' --filters Name=instance-state-name,Values=running --output text |
Muestra la salida como:
|
1 2 |
ec2-52-53-171-49.us-west-1.compute.amazonaws.com ec2-52-53-239-100.us-west-1.compute.amazonaws.com |
Elige una de las direcciones IP y accede a ella en :8091 para ver la salida:
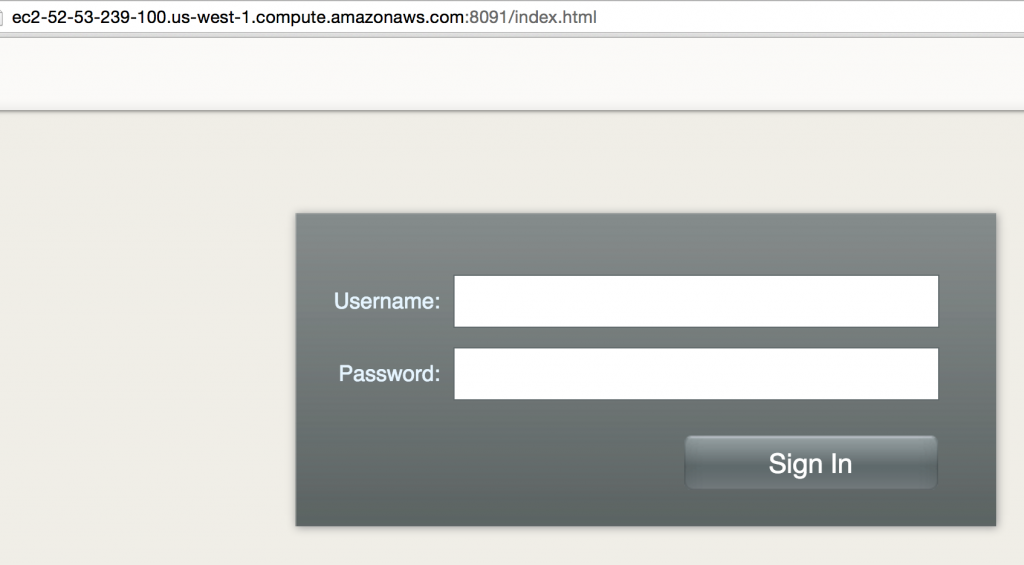
Cada Couchbase
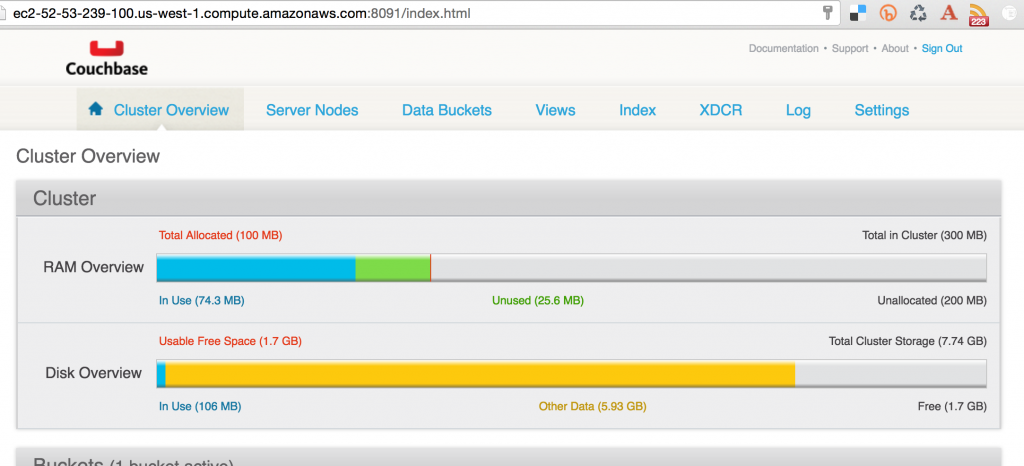
está configurado con el nombre de usuario Administrator y la contraseña Password. Al introducir las credenciales se muestra la consola web de Couchbase:
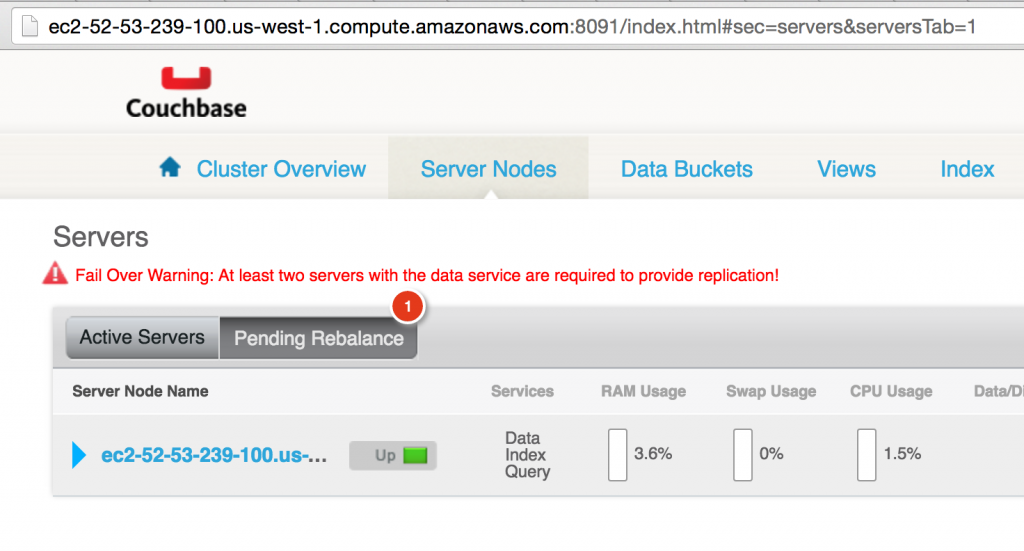
Haga clic en
Nodos Servidor para ver que sólo hay un nodo en el cluster:

Crear y reequilibrar el clúster de Couchbase
Todos los nodos del servidor Couchbase son iguales. Esto permite al cluster de Couchbase escalar horizontalmente para satisfacer las crecientes demandas de tu aplicación. Se pueden añadir nodos Couchbase independientes a un cluster invocando el comando servidor-add comando CLI. Normalmente, este proceso consta de dos pasos. El primer paso es añadir uno o más nodos. El segundo paso es reequilibrar el clúster, en el que los datos de los nodos existentes se reequilibran en el clúster actualizado.
En nuestro caso, un nodo Couchbase se está ejecutando en cada AMI. Escojamos la dirección IP de cualquier nodo Couchbase y añadamos la dirección IP del otro nodo. Esto se puede hacer usando el script:
|
1 2 3 4 5 6 7 8 9 10 11 12 13 |
export primary=$1 shift for ip in "$@" do $COUCHBASE_CLI server-add --cluster=$primary:8091 --user Administrator --password password --server-add=$ip --server-add-username=Administrator --server-add-password=password done |
Este guión está disponible en https://github.com/arun-gupta/couchbase-amazon/blob/master/create-cluster.sh y puede invocarse como:
|
1 |
./create-cluster.sh `aws ec2 describe-instances --query 'Reservations[*].Instances[*].[PublicDnsName]' --filters Name=instance-state-name,Values=running --output text` |
Y muestra la salida como:
|
1 |
SUCCESS: server-add ec2-52-53-239-100.us-west-1.compute.amazonaws.com:8091 |
Couchbase Web Console se actualiza para mostrar:
Por último, reequilibre el clúster utilizando el script:
|
1 2 3 4 5 6 7 8 9 10 11 12 |
export primary=$1 shift for ip in "$@" do $COUCHBASE_CLI rebalance --cluster=$primary:8091 --user Administrator --password password --server-add-username=Administrator --server-add-password=password done |
Esto muestra la salida como:
|
1 2 |
INFO: rebalancing . . . . . . . . . . . . . . . . . . . . . . . . . . . . . . . . . . . . . . . . . . . . . . . . . . . . . . . . . . . . . . . . . . . . . . . . . . . . . . . . . . . . . . . . . . . . . . . . . . . . . . . . . . . . . . . . . . . . . . . . . . . . . . . . . . . . . . . . . . . . . . . . . . . . . . . . . . . . . . . . . . . . . . . . . . . . . . . . . . . . . . . . . . SUCCESS: rebalanced cluster |
La Consola Web de Couchbase ya está actualizada:

Una vez que el clúster esté en funcionamiento, prueba Hola Couchbase Ejemplo.
Terminar Nodos Couchbase
Por último, matar el clúster es bastante sencillo:
|
1 |
aws ec2 terminate-instances --instance-ids `aws ec2 describe-instances --query 'Reservations[*].Instances[*].[InstanceId]' --filters Name=instance-state-name,Values=running --output text` |
Este blog muestra cómo crear, escalar y reequilibrar un clúster de Couchbase utilizando AWS CLI. Todos los scripts están disponibles en https://github.com/arun-gupta/couchbase-amazon.
Otras referencias ...
- Portal para desarrolladores de Couchbase Server
- Hola Couchbase Ejemplo
- Preguntas sobre StackOverflow, Foros o Canal Slack
- Síguenos en @couchbasedev
- Couchbase 4.5 Beta