This is the first post in a series of blog posts that will cover the topic of hosting Couchbase Server in Windows Azure.
Running Windows is not required to follow this guide, you can use Windows, Mac or any other operating system that understands remote desktop or has a remote desktop app that supports Remote Desktop to Windows.
The goal of this series is to help you understand all the steps involved in setting up Windows Azure and Couchbase, starting from a single node developer set-up to a production ready set-up with multiple nodes and failover.
In this first post we will set up a single node Couchbase Server for testing and development purposes. In the next blog post it will become clear why it makes sense to start with a single node and how that can speed up set-up time for the next nodes.
To follow along you will need an Azure Subscription. If you don’t have one you can get a free trial from Microsoft (worth €150 in usage):
azure.microsoft.com/en-us/pricing/free-trial
With the Azure subscription you are ready
Before we log in to Azure let’s take a quick overview of what the goal of this series is and what we’re going to cover in this blog post.
This illustration shows a complete overview of how the setup will look by the end of the series of posts.
The blue servers represent Couchbase nodes, and the red servers represent other cloud services. The Red servers inside the Virtual Network represent application servers that will handle all client requests to the Couchbase Cluster.
In this first blog post we will create one blue Couchbase node and set up all the security settings required by Azure to allow a client outside the Cloud and Virtual network to directly connect to the node.

Create a Virtual Machine
The first step is to create a Virtual Machine and install Couchbase Server.
Log in to Azure Management Portal:
manage.windowsazure.com
and select Virtual Machines in the left menu.

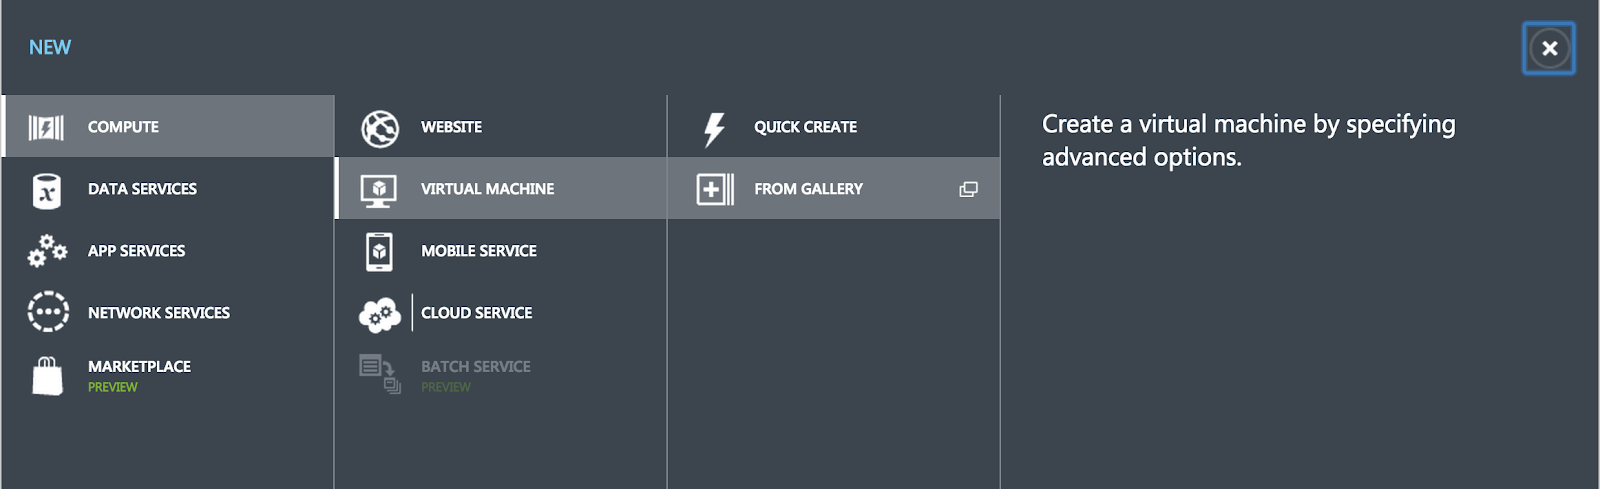
Create a new Virtual Machine by pressing the “+” symbol in the lower left corner:

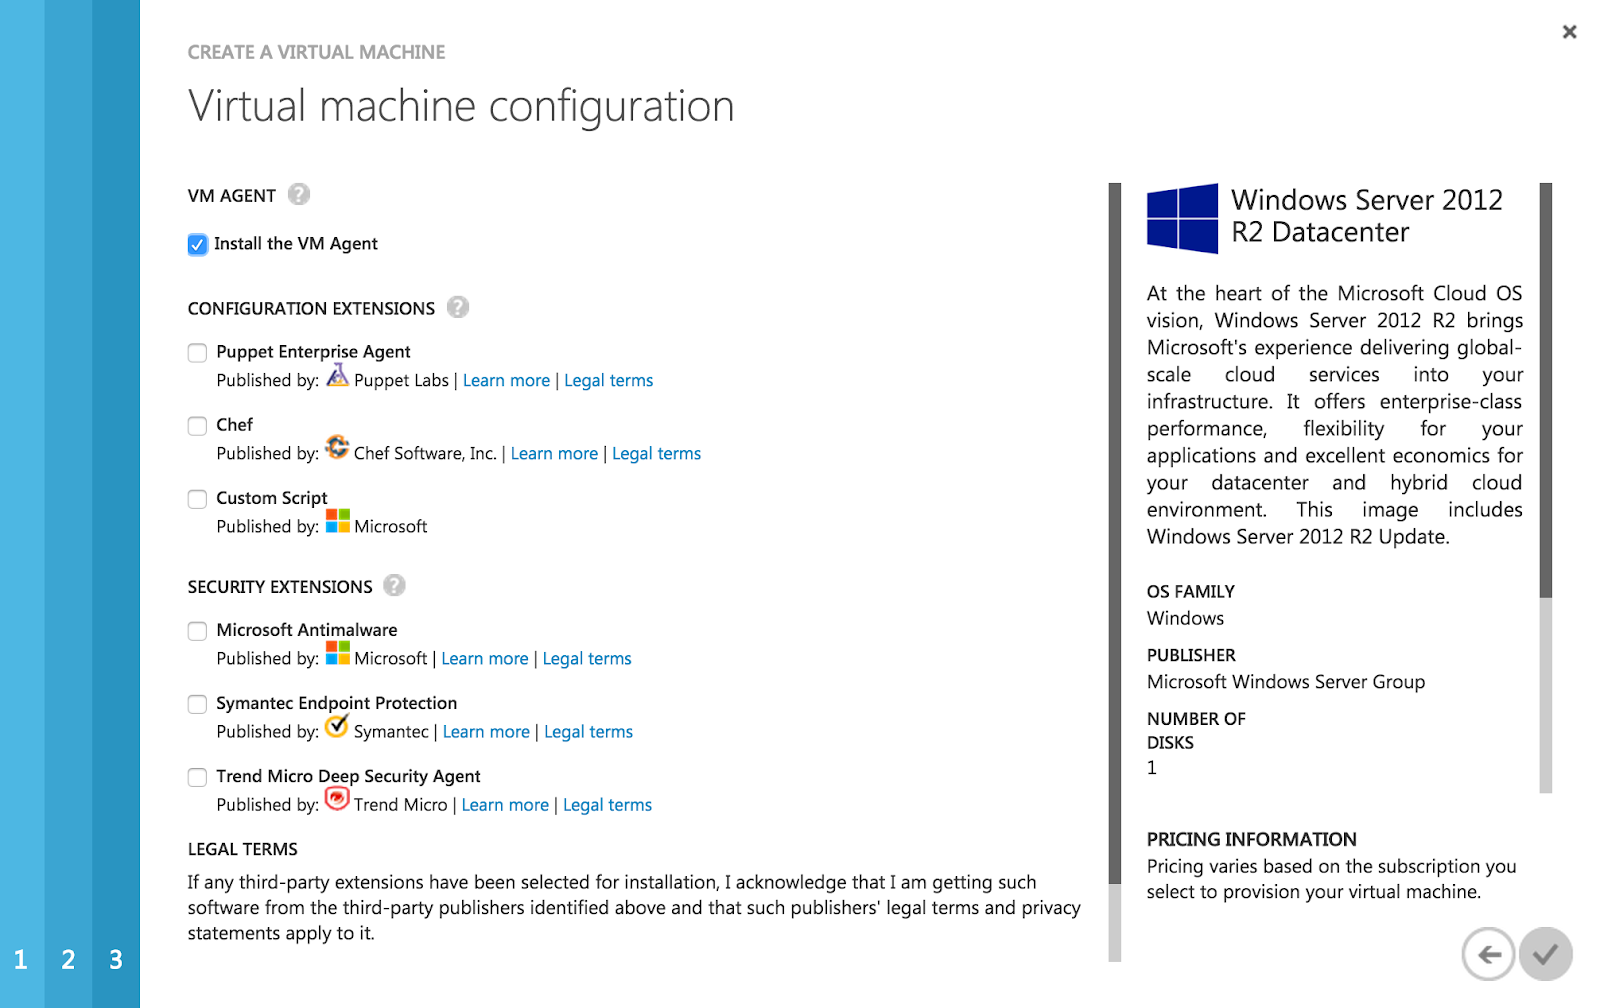
Follow the wizard to create a Virtual Machine “From Gallery” pre-installed with “Windows Server 2012 R2 Datacenter”.
In the second part of the Virtual machine configuration wizard fill in the
Virtual Machine Name. This is the display name that will be used by Windows Azure inside the Portal.
Username & password: Used to Remote Desktop to the VM, this is important as we need to install Couchbase on the VM using Remote Desktop.
Lastly pick the VM machine “size”. For this blogpost I will use the default “A1”.
Please note that there is a different price for each “Size”.
You can use the Azure Price Calculator to understand the price levels:
azure.microsoft.com/en-us/pricing/calculator/?scenario=virtual-machines
Here is a list showing a subset of the available “Sizes”.
The biggest VM (as the time of writing) is G5 with 32 Cores and 448GB RAM.

In the third part of the configuration wizard, we need to pick a DNS name and Region.
Region: To lower network latency chose an area close to your location.
DNS: Please note that the DNS name needs to be unique for all Azure instances.
Please leave all other options unchanged, as we will look at them in more detail in a later post.
In the fourth and last step leave all settings with their defaults and select done/checkmark.
The moment the wizard is complete Azure begins the process to start the new VM:
Loading, Provisioning, Start, Running.
The time until the VM is available can vary but will typically take a couple of minutes.
When the VM is ready and “Running”, select it and in the “overview” select the “Dashboard” tab, like this:

The “Dashboard” shows a detailed usage summary for the VM including: Network traffic, Disk IO, CPU load, etc. This is also the place where you can find details for the VM like IP, DNS and Public IP. We’ll use those in a later blog post, when setting up a node cluster.
Right now the VM is pretty much empty and has nothing installed.
Install Couchbase Server on new VM
Press “Connect” in the lower left in the Dashboard tab for the newly created WM. This will start a download of a preconfigured Remote Desktop file. Open the file and follow the steps in “Remote Desktop” to log in to the VM.
Configure the VM
When you are logged in to the VM there are some basic set-up steps that needs to be done before installing Couchbase Server.
The first thing is to disable “Enhanced IE Security” and next disable “Windows Firewall”Disabling the Windows Firewall is only recommended for test and developer environments and it should be enabled in a production setup.
The reason we disable the firewall is to allow the client to connect to the node and not be blocked by the firewall. Later, when the connection has been tested we can enable the firewall and configure it to open the ports needed for the client to successfully connect to the node.
The list of ports needed can be found here: https://docs.couchbase.com/admin/admin/Install/install-networkPorts.html
Windows Server Manager
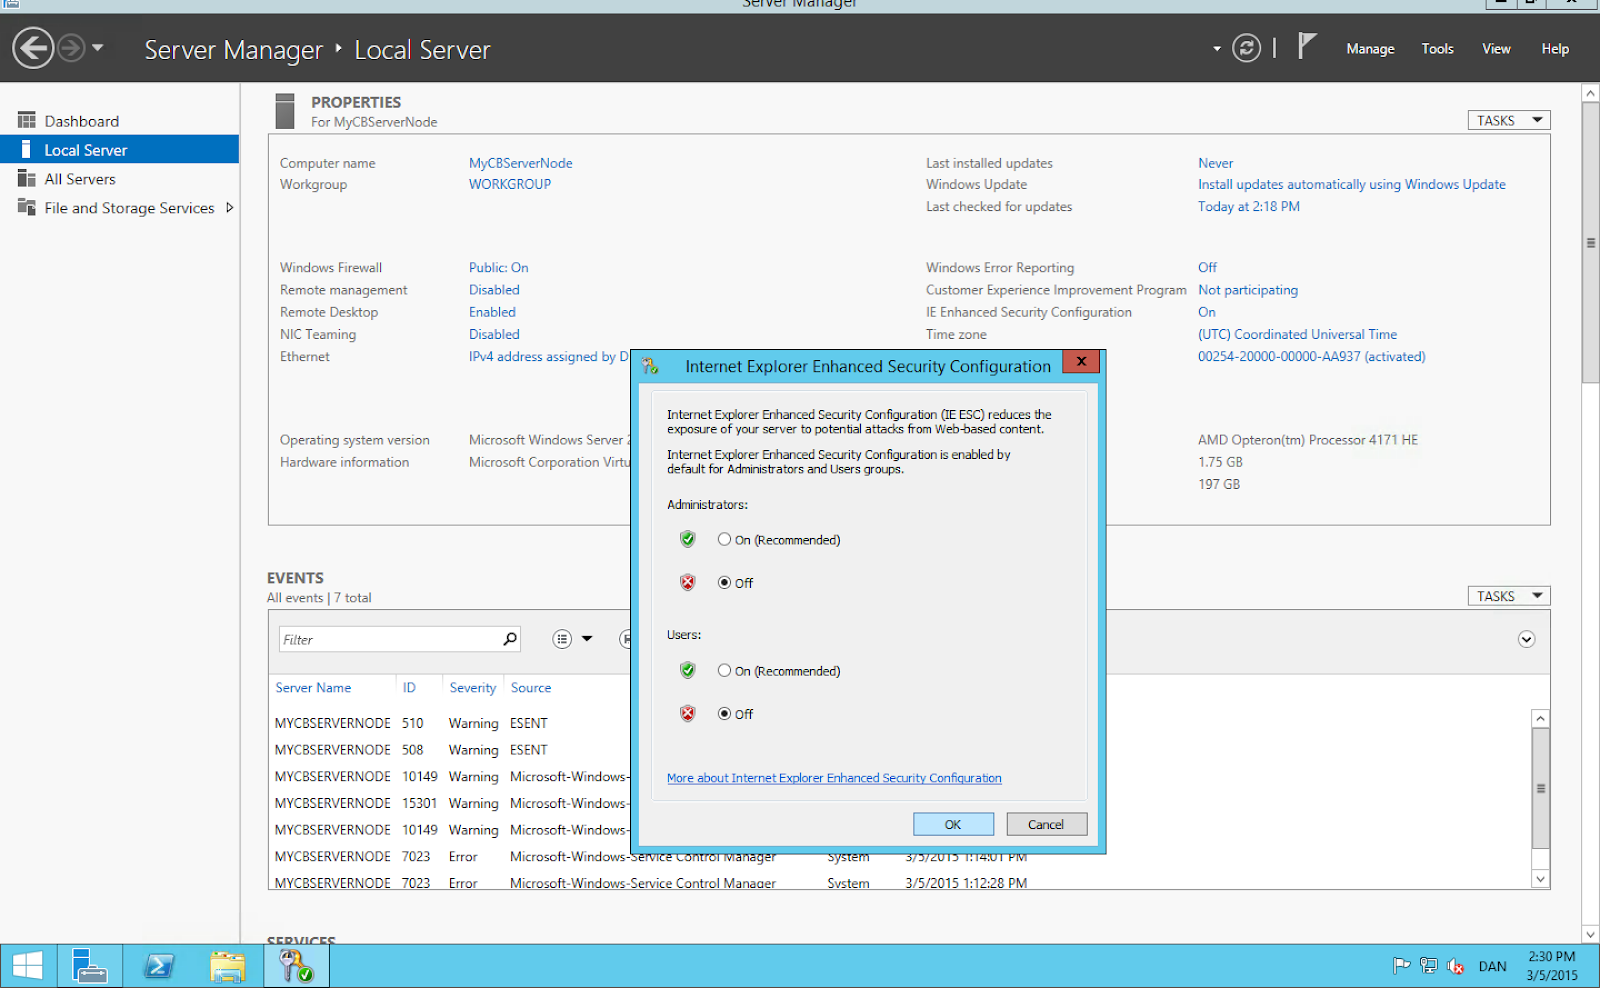
Open “Server Manager” if it did not open automatically when you logged in to Windows Server and select “Local Server” in the left menu.
To disable IE Enhanced Security, select “IE Enhanced Security” option and Disable for both “User” and “Admin”.
Disabling IE Enhanced Security will remove the security restrictions from IE and more easily allow us to download Couchbase Server from the Couchbase website.
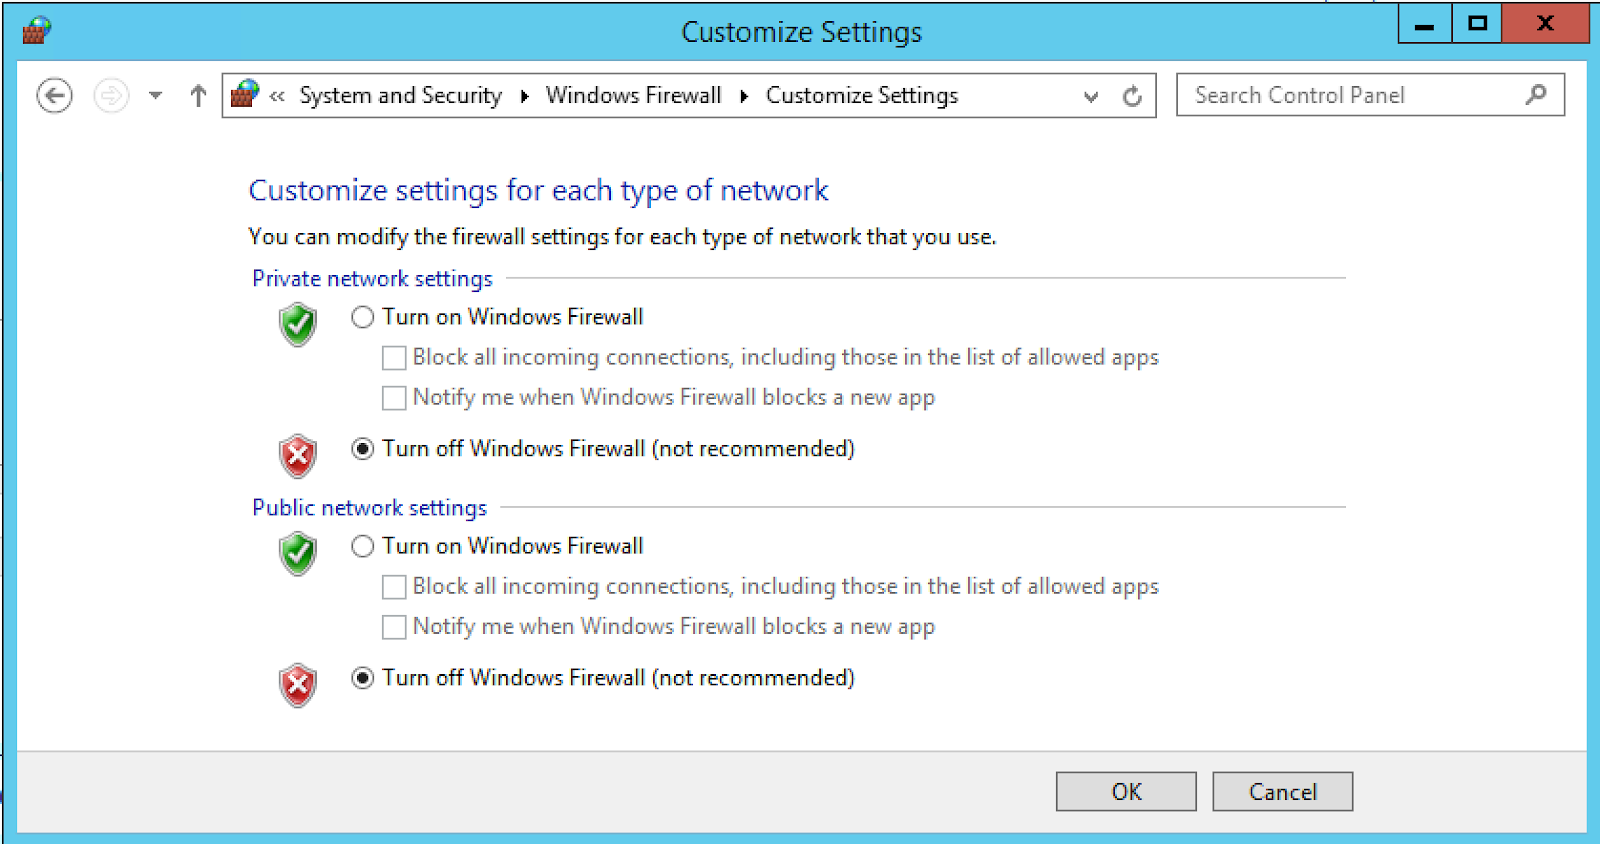
Next Disable Windows Firewall, by selecting the Windows Firewall option -> “Turn Windows Firewall on or off” and select “off” for both public and private networks.
We are now ready to open Internet Explorer and navigate to the Couchbase website to download the Couchbase Server installer for Windows.
1) Open IE and navigate to https://www.couchbase.com/nosql-databases/downloads
2) Download the 64bit Windows Installer.
3) When the download completes, start the installation.
4) Please select the defaults for install path etc. in the install Wizard.
Please note the install wizard informs you that 4 cores is the recommended minimum for Couchbase Server and the VM only has 1 core. This is something we will address in a later blog post. For the current set-up one core is acceptable.
Windows Host file
While the Couchbase Installer is finishing the setup, open File Explorer and navigate to:
C:WindowsSystem32driversetc
Open the “hosts” file in Notepad and add a line to map the VM’s “Private IP” to “Public DNS Name”. All information can be found on the VM’s desktop background image:
In my case i have added the following line to the “hosts” file (will be different for every VM):
100.73.56.137 MYCBSERVERNODE.cloudapp.net
Save the file and close Notepad.
Configure Couchbase Server
When the Couchbase installer finishes, open the “Couchbase Console”.
In the “Hostename” field insert your DNS name followed “.cloudapp.net” (MYCBSERVERNODE.cloudapp.net)
Leave the all other fields unchanged and click next.

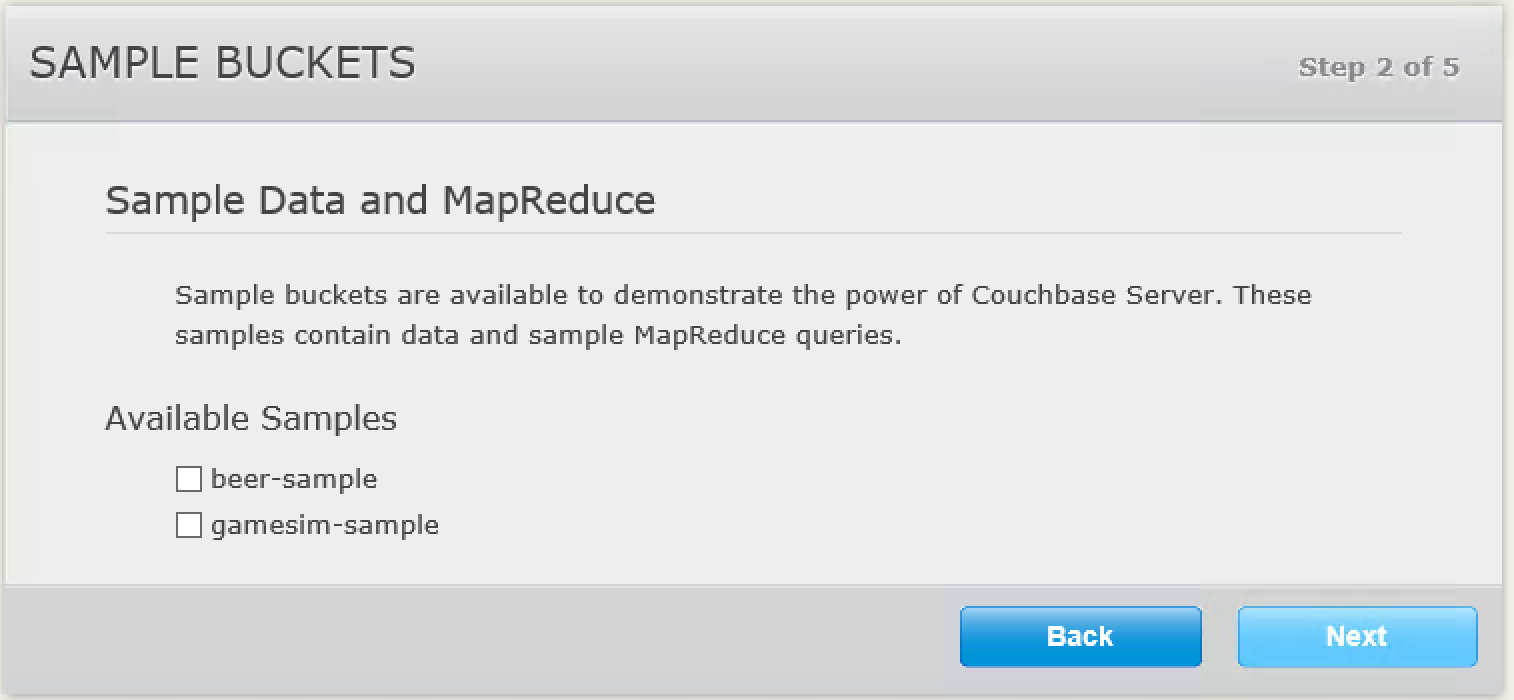
If you would like to install sample data to the Node, please do so now.
This can also be done later. For the current setup I will skip installing any sample data.
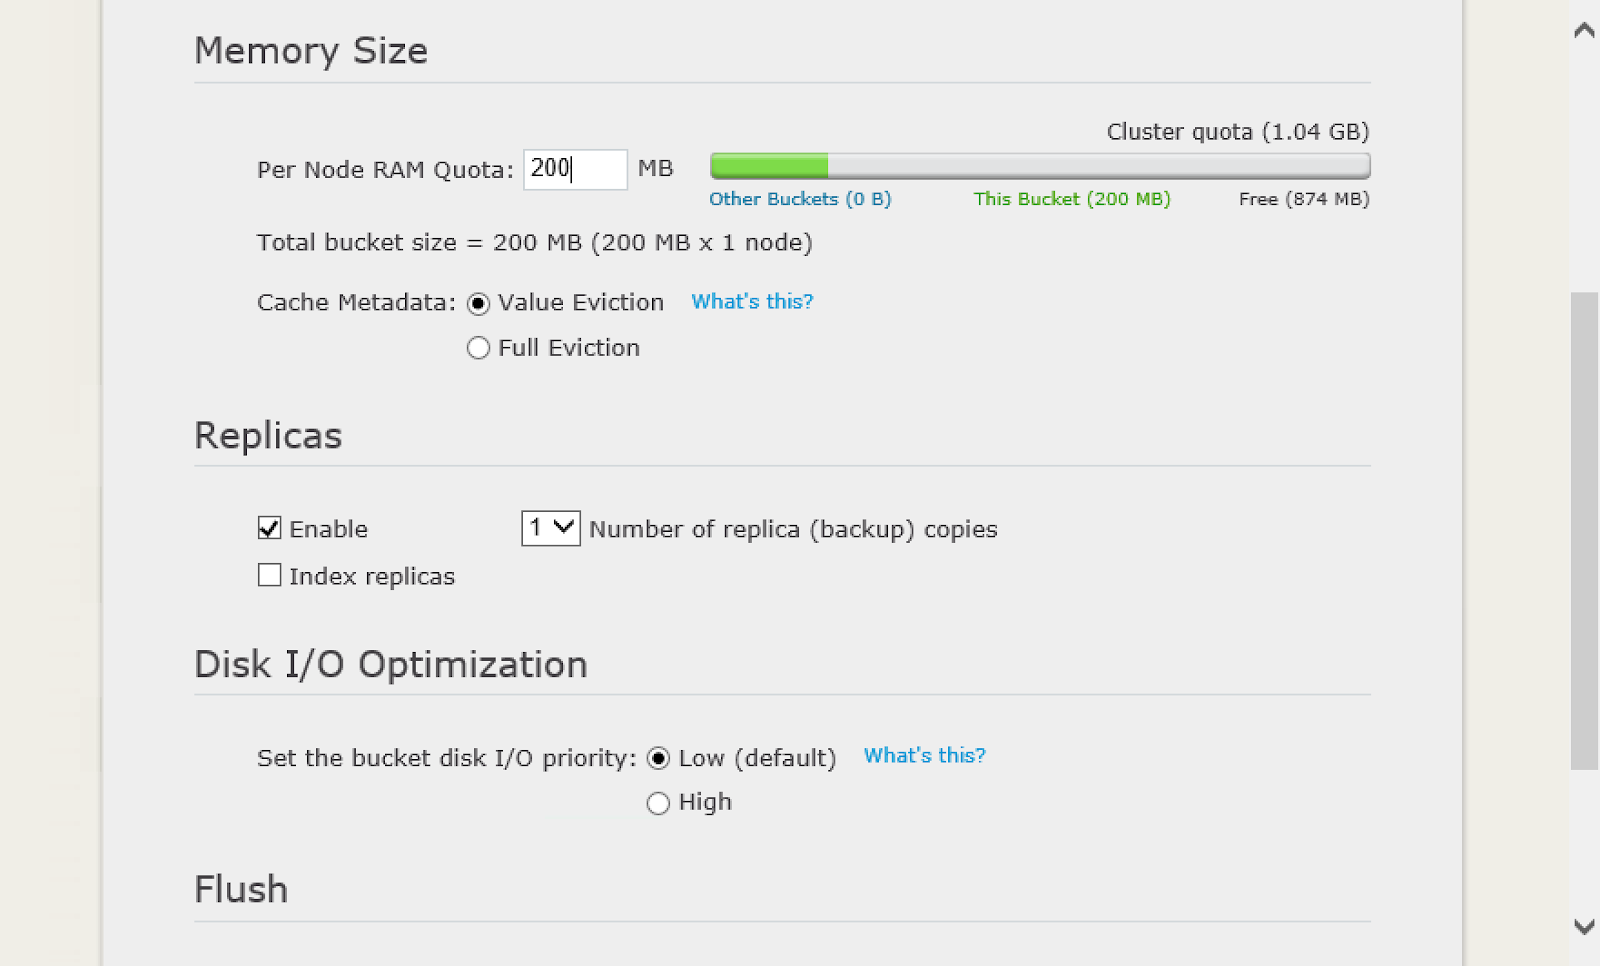
In the next setup page set “Per Node RAM Quota” = 200MB. We will change this later and discuss in more detail what this value represents and its influence to the performance.
Leave all other values unchanged and click next.
In the notifications tab fill in the required fields and select Next.
The last Configuration sets the Administrator password and username. For this setup I have used “Administrator” as username and password. This is not recommended, you should use a more safe password and use a different username to strengthen the security.
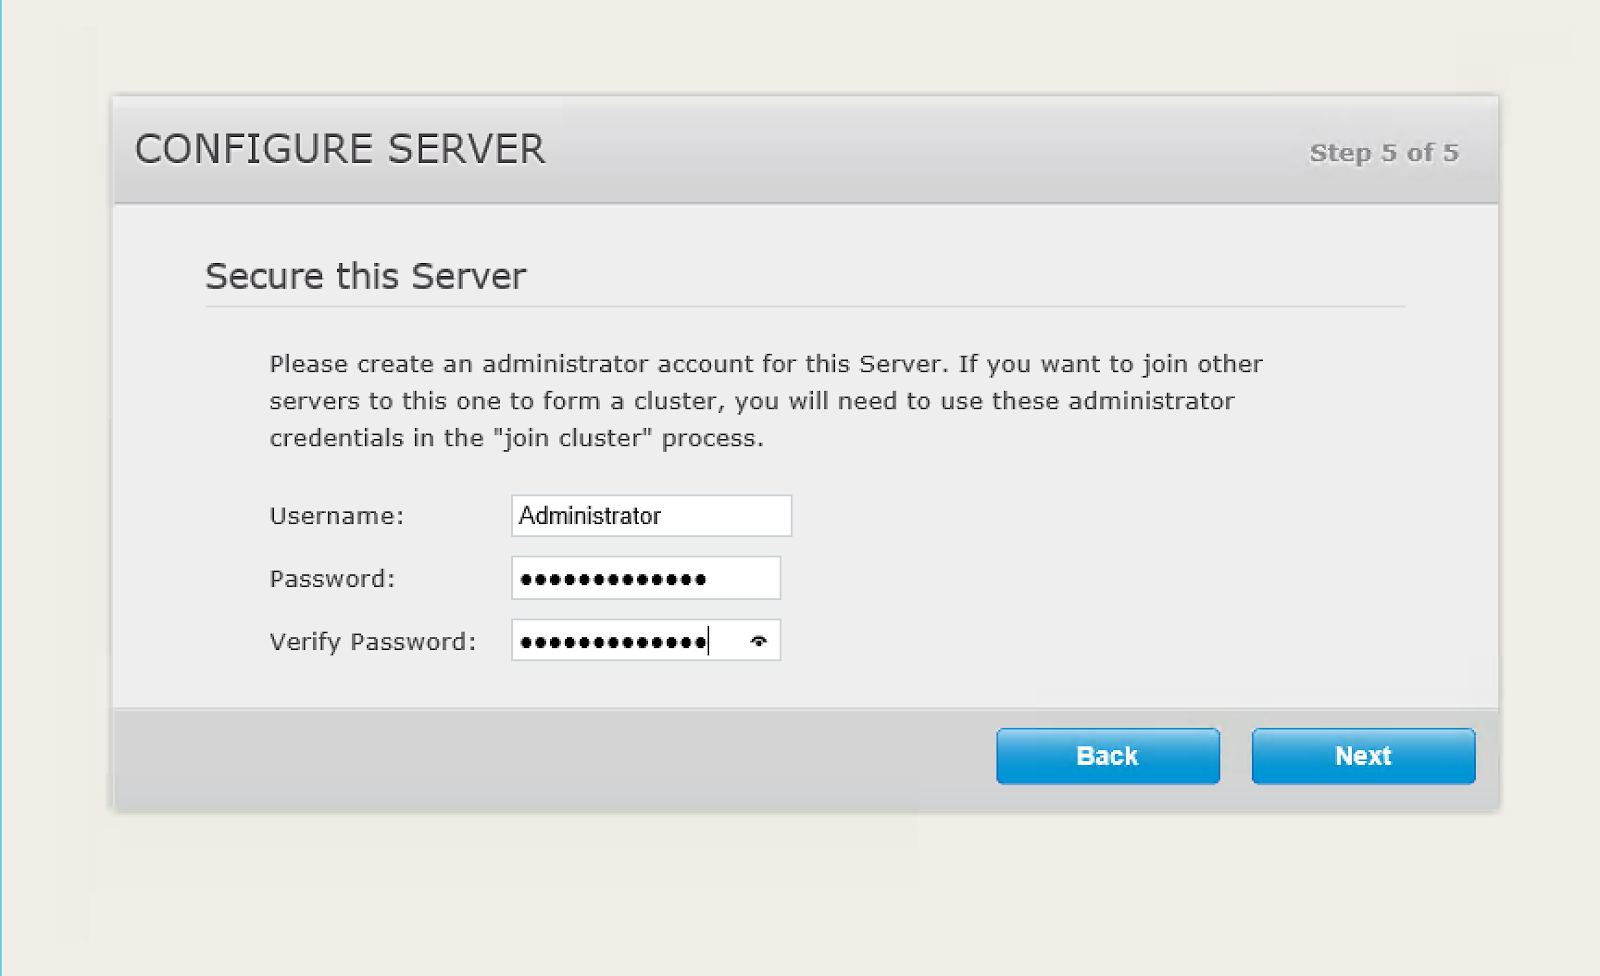
Congratulations! With this last set up done, we have successfully installed Couchbase Server in Azure.
In the next blog post we will configure Azure Endpoint protection (Cloud Firewall) to allow connections directly to the node from the public internet. To test that the connection is open we will create a small test app with .NET and the Couchbase .NET SDK.
Thanks for reading and I hope you visit soon for the next blog post where we’ll continue the journey towards a production ready set-up for Couchbase in Azure.
Martin
My couchbase cluster setup is using 2 A1 Ubuntu VM and each has a seperate data disk. However I can only get 10-20 ops max.
Do you mind sharing how much ops you get from your setup?
Please let me know if you need more information about the test and the Azure Setup i have
Hi Zev23,
I will run some tests against the 1 x A1 Windows Machine and share the results with you. While I\’m setting up a test could you tell me a bit more about your current setup?
Are the WM\’s in the same Virtual Network?
Have you setup a DNS/Host file (Windows term, not sure what that translates to in Linux world)?
Did you use public or private IP\’s while configuring the Cluster?
Is the Application Server on the same Virtual Network as the Cluster?
Also, the recommended hardware for Couchbase is 4 cores and a fair RAM size. The only reason that I chose the A1, was that this is a cheep WM for setup and configuration. In other words, this was not the intended WM size for a production environment.
Hi Zev23,
I have now run some simple tests:
500 worker threads (1000 Writes pr. thread) = test duration 10 min.
Result: Min ops. 75, Max ops 125.
Please note, this is full writes! no reads or gets only write ops.
Test is run from my local PC against the Azure Hosted Single Node Couchbase Server (A1 VM)
The network latency could be minimised if running from Application Server on same Virtual Network.
[…] up from the first blog post, let’s continue with Endpoint configuration and some .NET code to test the connection to the […]