
JavaFX and Couchbase Mobile is a great combo for creating desktop class applications with rich user interfaces and fast data access. In this tutorial, you will learn the following core concepts:
- Learn about replication, security and deployment using the TodoLite sample
- How to start a new JavaFX project with Couchbase Mobile as a dependency
We won’t cover TodoLite for Android in this post but you could have both applications running side by side and replicating documents and attachments via Sync Gateway:
You can find the source code of TodoLite JavaFX on github.
TodoLite JavaFX
To speed things up, you will clone some source code with the following:
|
1 2 |
git clone git@github.com:CouchbaseTutorials/todolite–javafx.git cd todolite–javafx |
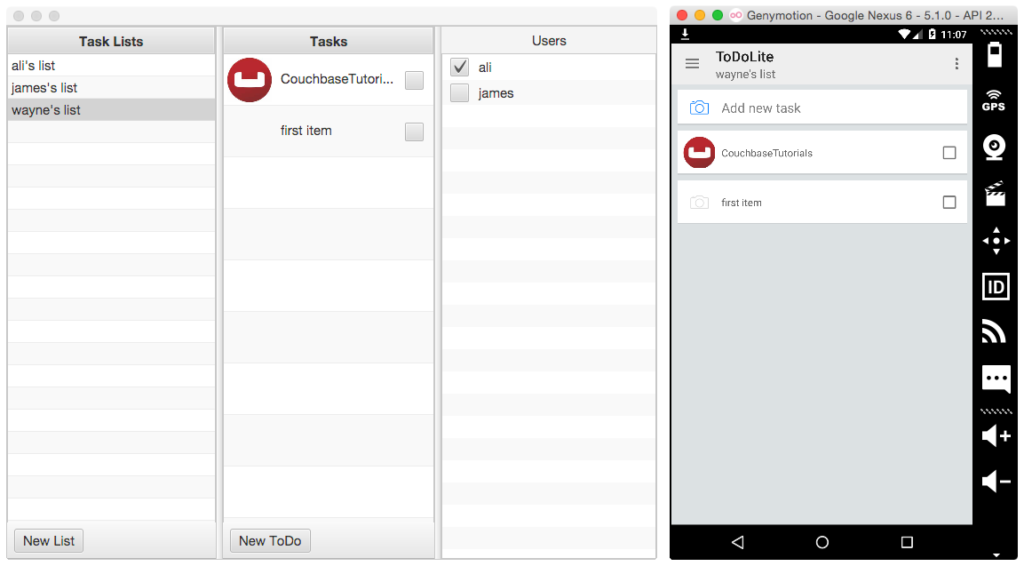
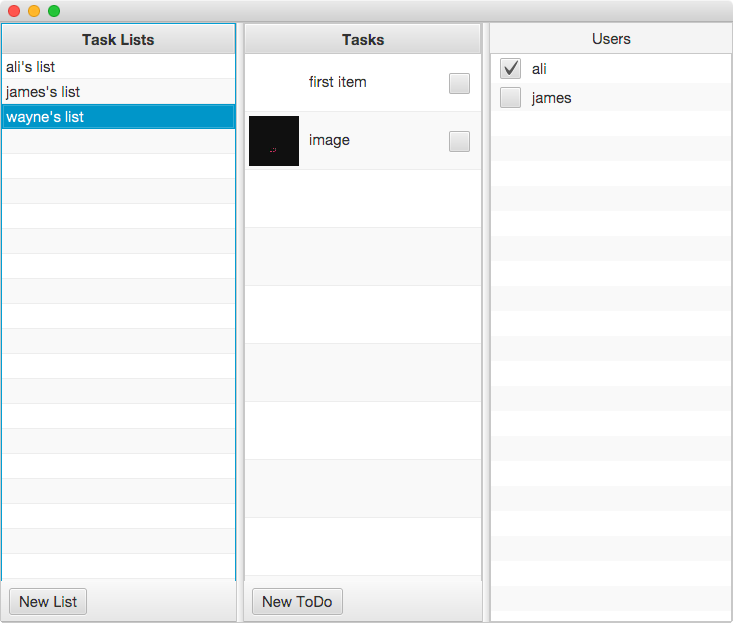
Open this folder in IntelliJ and click the Run button in the upper right corner. A new window should open (of course your’s won’t have any data in it :D):
Go ahead and create a new List and Task. At the time of this writing, the JavaFX version of TodoLite doesn’t implement all of the features. Right now, you’re logged in as the user with name wayne and the password is pass. So if you run the TodoLite Android version, you can login with those credentials or create a new user on the Sign Up page and share Lists with other Users. Both applications would be syncing to a Sync Gateway instance running at https://9cec7a6e-jamiltz.node.tutum.io:4984.
Data Model
TodoLite has the following data model. Notice how documents are kept small in size and can reference other documents’ _id field (you could think of them as foreign keys): 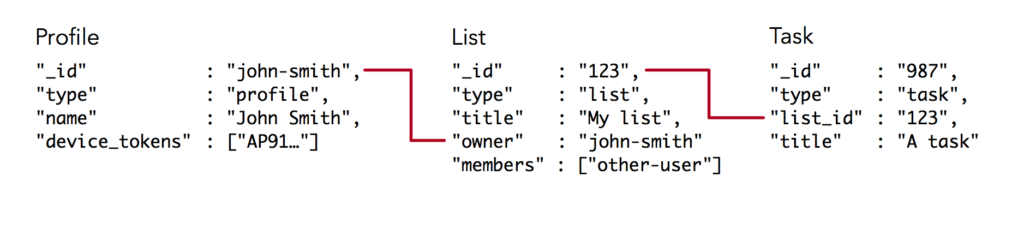
Deployment
The back-end for TodoLite is composed of Sync Gateway and an App Server to allow users to Sign Up. Again, at the time of this writing, the Login and Sign Up screens have not been implemented for the JavaFX version of TodoLite. You can follow the README in the todolite-development repository to get both servers running locally.
How-To Creating a new JavaFX + Couchbase Mobile application
Open IntelliJ IDEA and choose the Create New Project menu. On the left pane, select the JavaFX application template and set the Project SDK to 1.8. 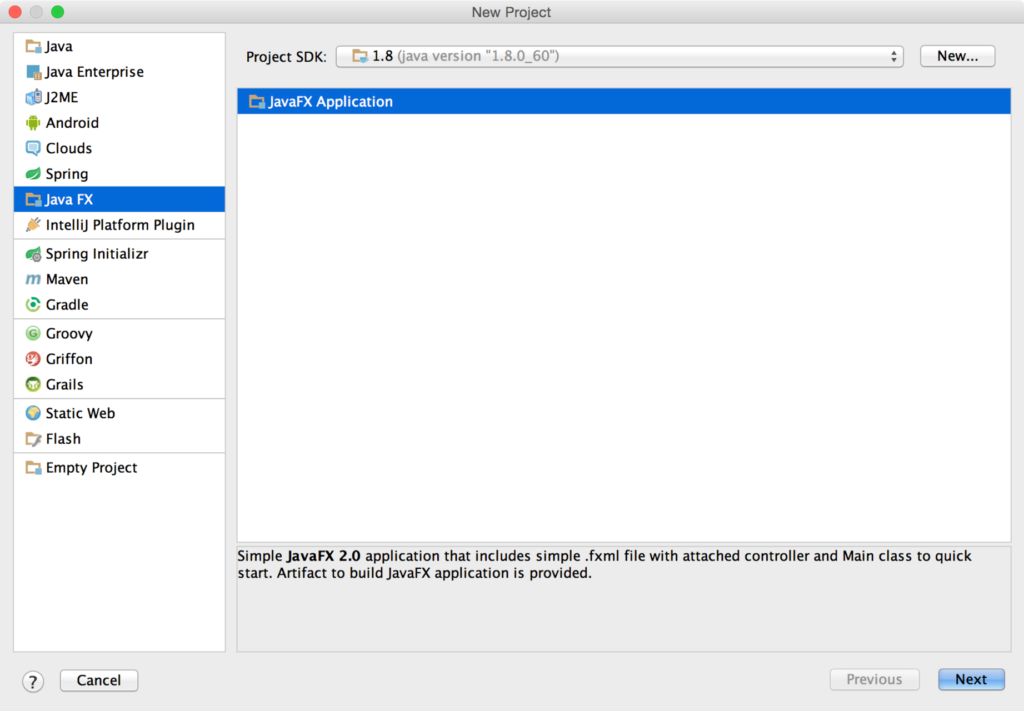 Name the application as you wish and click Finish, this will open your newly created project in a new window. Before we begin writing code, there are a couple of configuration settings to change. Select the Edit Configurations… menu in the top right corner which will open a new window. Check the Single instance only box to ensure that the IDE doesn’t start a new instance of the application every time you click the Run button.
  With that, let’s turn our attention to adding Couchbase Lite as a dependency to the project. Select FileProject Structure… from the top menu bar, a new window will open and on the Modules tab, add a new Library from Maven:
 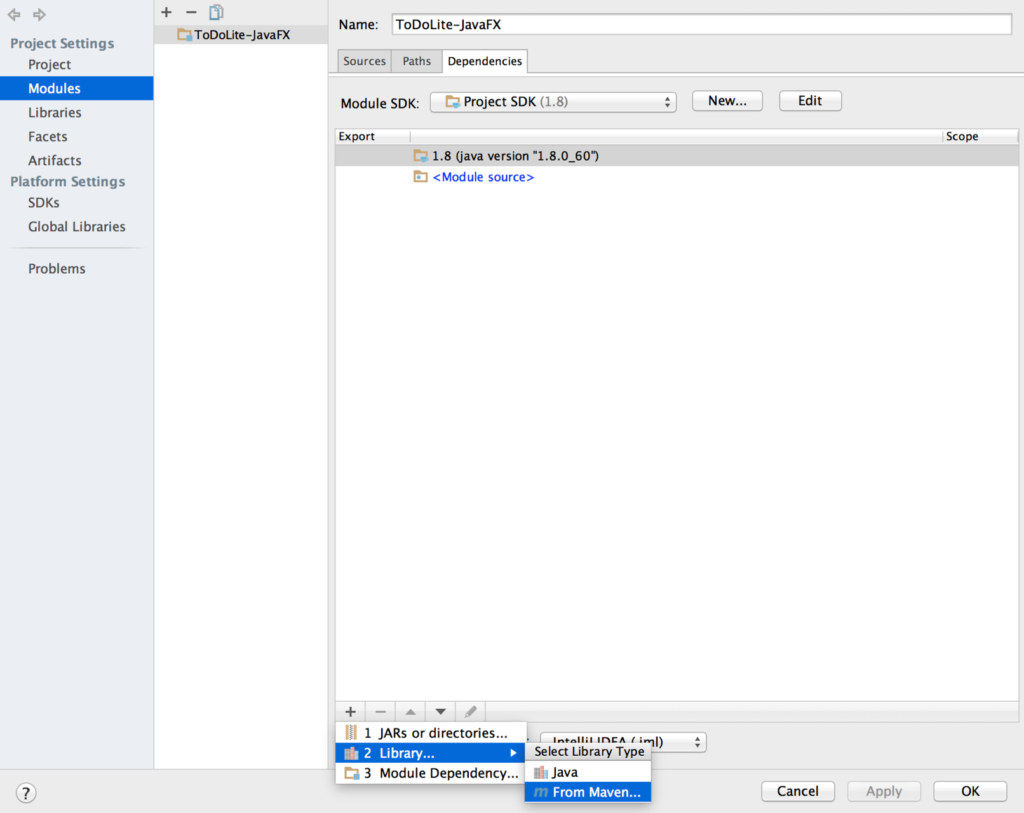 A search field will appear in a popup window, type com.couchbase.lite:couchbase-lite-java:1.1.0 and click OK. This will download the library and add it to the project. Next, you will add a JAR file that contains the native library for the platform you’re running the application on (Windows, Mac…). For OS X users, download this JAR file and add it in a new directory called libraries in your project. Return the Modules window and add this JAR file from the Add > JARs or directories… menu:
  Click OK and run the application. You should see a blank window with the message Hello World in the status bar:
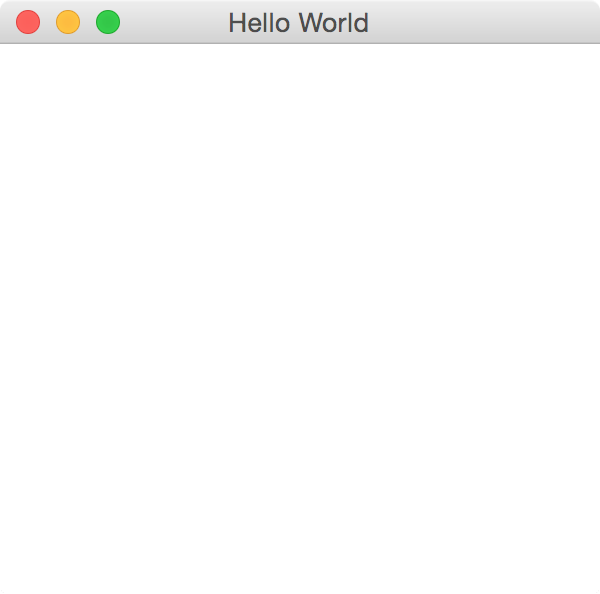
Open a new Database and save a Document
In your new project, open Main.java and create a new method called startCouchbase with the following:
|
1 2 3 4 5 6 7 8 9 10 11 12 13 14 15 16 17 18 19 20 21 22 23 24 |
private void startCouchbase() { JavaContext context = new JavaContext(); Manager manager = null; try { manager = new Manager(context, Manager.DEFAULT_OPTIONS); } catch (IOException e) { e.printStackTrace(); } Database database = null; try { database = manager.getDatabase(“myapp”); } catch (CouchbaseLiteException e) { e.printStackTrace(); } Map<String, Object> properties = new HashMap<String, Object>(); properties.put(“session”, “Couchbase Mobile”); properties.put(“conference”, “JavaOne”); Document document = database.createDocument(); try { document.putProperties(properties); } catch (CouchbaseLiteException e) { e.printStackTrace(); } } |
Here, you’re opening a new database called myapp and persisting a new document with a session and conference field. You can read more about the different APIs in the documentation guides or refer to the TodoLite-JavaFX sample app.
Call the startCouchbase method in the start method of Main.java
Sync Gateway
The quickiest way to get started with replication is to download the latest version of Sync Gateway:
https://www.couchbase.com/nosql-databases/downloads#Couchbase_Mobile
And use one of the provided configuration template as the command line argument when starting Sync Gateway:
|
1 |
$ ~/Downloads/couchbase–sync–gateway/bin/sync_gateway basic–walrus–bucket.json |
The specified configuration file has the following:
|
1 2 3 4 5 6 7 8 9 |
{ “log”: [“*”], “databases”: { “db”: { “server”: “walrus:”, “users”: { “GUEST”: { “disabled”: false, “admin_channels”: [“*”] } } } } } |
Here, you’re creating a database called db and enable the GUEST which means that unauthenticated requests should be allowed and processed.
That’s it! You now have a Sync Gateway database running on your machine that can be reached at https://localhost:4984/db/.
Adding Sync
Head back to the JavaFX application and add a new startReplications method:
|
1 2 3 4 5 6 7 8 9 10 11 12 13 14 15 16 17 18 19 |
public void startReplications() { URL remoteURL = null; try { remoteURL = new URL(remoteDatabase); } catch (MalformedURLException e) { e.printStackTrace(); } Replication pull = database.createPullReplication(remoteURL); Replication push = database.createPushReplication(remoteURL); pull.setContinuous(true); push.setContinuous(true); pull.start(); push.start(); } |
Call the startReplications below the startCouchbase method and restart the application. You should now see the document you created previously in the Sync Gateway Admin UI (https://localhost:4985/_admin/).
Where To Go From Here
Congratulations! You’ve built your first JavaFX + Couchbase Mobile application with replication. You’re now ready to learn the following concepts:
- The Sync Function to define access rules
- Couchbase Lite Views to write custom queries
Feel free to share your feedback, findings or ask any questions in the comments below or in the forums. Talk to you soon!
댓글 남기기
댓글을 달기 위해서는 로그인해야합니다.