아마존 마켓플레이스의 카우치베이스 에서 EC2 콘솔을 사용하여 단일 Couchbase 노드를 설정하는 방법을 보여드렸습니다. 하지만 일반적으로 이러한 노드를 한꺼번에 프로비저닝하며, 더 일반적으로는 다음과 같이 프로비저닝합니다.
클러스터를 생성하세요. 카우치베이스 클러스터는 균질하고 수평적으로 확장되므로 데이터베이스가 고성능 애플리케이션의 병목 현상이 되지 않도록 보장합니다.
이 블로그에서는 AWS CLI(명령줄 인터페이스)를 사용하여 Couchbase 클러스터를 생성, 확장 및 재조정하는 방법을 설명합니다.
AWS CLI 설치
AWS CLI 설치 에서 자세한 내용을 확인할 수 있지만, 제 컴퓨터에서 작동한 방식은 다음과 같습니다:
|
1 2 3 4 5 6 7 8 9 10 11 12 13 14 15 16 17 18 19 20 21 22 23 24 25 26 27 28 29 30 31 32 33 34 35 36 |
tools > pip install awscli Collecting awscli Downloading awscli-1.10.27-py2.py3-none-any.whl (937kB) 100% |████████████████████████████████| 937kB 561kB/s Collecting rsa<=3.3.0,>=3.1.2 (from awscli) Downloading rsa-3.3-py2.py3-none-any.whl (44kB) 100% |████████████████████████████████| 45kB 7.7MB/s Collecting s3transfer==0.0.1 (from awscli) Downloading s3transfer-0.0.1-py2.py3-none-any.whl Collecting colorama<=0.3.3,>=0.2.5 (from awscli) Downloading colorama-0.3.3.tar.gz Collecting botocore==1.4.18 (from awscli) Downloading botocore-1.4.18-py2.py3-none-any.whl (2.3MB) 100% |████████████████████████████████| 2.3MB 221kB/s Collecting docutils>=0.10 (from awscli) Downloading docutils-0.12.tar.gz (1.6MB) 100% |████████████████████████████████| 1.6MB 328kB/s Collecting pyasn1>=0.1.3 (from rsa<=3.3.0,>=3.1.2->awscli) Using cached pyasn1-0.1.9-py2.py3-none-any.whl Collecting futures<4.0.0,>=2.2.0 (from s3transfer==0.0.1->awscli) Using cached futures-3.0.5-py2-none-any.whl Collecting jmespath<1.0.0,>=0.7.1 (from botocore==1.4.18->awscli) Downloading jmespath-0.9.0-py2.py3-none-any.whl Collecting python-dateutil<3.0.0,>=2.1 (from botocore==1.4.18->awscli) Downloading python_dateutil-2.5.3-py2.py3-none-any.whl (201kB) 100% |████████████████████████████████| 204kB 2.4MB/s Collecting six>=1.5 (from python-dateutil<3.0.0,>=2.1->botocore==1.4.18->awscli) Using cached six-1.10.0-py2.py3-none-any.whl Building wheels for collected packages: colorama, docutils Running setup.py bdist_wheel for colorama ... done Stored in directory: /Users/arungupta/Library/Caches/pip/wheels/21/c5/cf/63fb92293f3ad402644ccaf882903cacdb8fe87c80b62c84df Running setup.py bdist_wheel for docutils ... done Stored in directory: /Users/arungupta/Library/Caches/pip/wheels/db/de/bd/b99b1e12d321fbc950766c58894c6576b1a73ae3131b29a151 Successfully built colorama docutils Installing collected packages: pyasn1, rsa, futures, jmespath, six, python-dateutil, docutils, botocore, s3transfer, colorama, awscli Successfully installed awscli-1.10.27 botocore-1.4.18 colorama-0.3.3 docutils-0.12 futures-3.0.5 jmespath-0.9.0 pyasn1-0.1.9 python-dateutil-2.5.3 rsa-3.3 s3transfer-0.0.1 six-1.10.0 |
CLI를 구성합니다:
|
1 2 3 4 5 |
aws configure AWS Access Key ID [****************Q5FQ]: YOUR ACCESS KEY ID AWS Secret Access Key [****************thBR]: YOUR SECRET ACCESS KEY Default region name [us-west-1]: Default output format [None]: |
액세스 키 ID와 비밀 액세스 키를 입력합니다. 이 키는 다음 설명에 따라 얻을 수 있습니다. 액세스 키 ID와 비밀 액세스 키 받기.
AWS 보안 그룹 생성
이전에 다음을 사용하여 서버를 프로비저닝한 경우 Amazon 원클릭 라는 이름의 보안 그룹 카우치베이스 서버 커뮤니티 에디션 -4-0-0-AutogenByAWSMP- 는
를 생성합니다. 이 보안 그룹에는 Couchbase 클러스터를 만드는 데 필요한 모든 포트가 승인되어 있으며 인스턴스를 만드는 데 사용할 수 있습니다. 또는 새 보안 그룹을 만들고 포트에 명시적으로 권한을 부여할 수 있습니다.
보안 그룹을 만듭니다:
|
1 2 3 4 |
aws ec2 create-security-group --group-name my-couchbase-sg --description "My Couchbase Security Group" { "GroupId": "sg-c9bb19ad" } |
보안 그룹에서 포트를 승인합니다:
|
1 2 3 4 |
aws ec2 authorize-security-group-ingress --group-name my-couchbase-sg --port 8091-8093 --protocol tcp --cidr 0.0.0.0/0 aws ec2 authorize-security-group-ingress --group-name my-couchbase-sg --port 11209-11211 --protocol tcp --cidr 0.0.0.0/0 aws ec2 authorize-security-group-ingress --group-name my-couchbase-sg --port 21100-21299 --protocol tcp --cidr 0.0.0.0/0 aws ec2 authorize-security-group-ingress --group-name my-couchbase-sg --port 4369 --protocol tcp --cidr 0.0.0.0/0 |
AWS 키 쌍 생성
생성에 대해 자세히 알아보기 키 쌍. 키 쌍을 만듭니다:
|
1 |
aws ec2 create-key-pair --key-name my-couchbase-key > my-couchbase-key.pem |
나중에 사용되므로 키 이름을 기록해 두세요.
아마존에서 카우치베이스 노드 생성
새로 만든 보안 그룹을 다음과 같이 사용하여 두 개의 인스턴스를 만듭니다:
|
1 |
aws ec2 run-instances --image-id ami-db95ffbb --count 2 --instance-type m3.large --key-name my-couchbase-key --security-groups my-couchbase-sg |
인스턴스 수는 다음을 사용하여 지정합니다. --카운트 2. AMI ID는 EC2 콘솔을 사용하여 얻을 수 있습니다: https://us-west-1.console.aws.amazon.com/ec2/v2/home?region=us-west-1#Images:visibility=public-images;search=couchbase;sort=desc:name.
또는 미리 만든 보안 그룹을 다음과 같이 사용하여 두 개의 인스턴스를 만듭니다:
|
1 |
aws ec2 run-instances --image-id ami-db95ffbb --count 2 --instance-type m3.large --key-name my-couchbase-key --security-groups "Couchbase Server Community Edition-4-0-0-AutogenByAWSMP-" |
출력은 다음과 같이 표시됩니다:
|
1 2 3 4 5 6 7 8 9 10 11 12 13 14 15 16 17 18 19 20 21 22 23 24 25 26 27 28 29 30 31 32 33 34 35 36 37 38 39 40 41 42 43 44 45 46 47 48 49 50 51 52 53 54 55 56 57 58 59 60 61 62 63 64 65 66 67 68 69 70 71 72 73 74 75 76 77 78 79 80 81 82 83 84 85 86 87 88 89 90 91 92 93 94 95 96 97 98 99 100 101 102 103 104 105 106 107 108 109 110 111 112 113 114 115 116 117 118 119 120 121 122 123 124 125 126 127 128 129 130 131 132 133 134 135 136 137 138 139 140 141 142 143 144 145 146 147 148 149 150 151 152 153 154 155 156 157 158 159 160 161 162 163 164 165 166 167 |
{ "OwnerId": "598307997273", "ReservationId": "r-cb952179", "Groups": [], "Instances": [ { "Monitoring": { "State": "disabled" }, "PublicDnsName": "", "RootDeviceType": "ebs", "State": { "Code": 0, "Name": "pending" }, "EbsOptimized": false, "LaunchTime": "2016-05-16T16:11:59.000Z", "PrivateIpAddress": "172.31.15.200", "ProductCodes": [], "VpcId": "vpc-c561f9a0", "StateTransitionReason": "", "InstanceId": "i-90199025", "ImageId": "ami-db95ffbb", "PrivateDnsName": "ip-172-31-15-200.us-west-1.compute.internal", "KeyName": "my-couchbase-key", "SecurityGroups": [ { "GroupName": "my-couchbase-sg", "GroupId": "sg-6172dd05" } ], "ClientToken": "", "SubnetId": "subnet-625bd23b", "InstanceType": "m3.large", "NetworkInterfaces": [ { "Status": "in-use", "MacAddress": "06:b1:52:a6:87:f7", "SourceDestCheck": true, "VpcId": "vpc-c561f9a0", "Description": "", "NetworkInterfaceId": "eni-86ac6fdb", "PrivateIpAddresses": [ { "PrivateDnsName": "ip-172-31-15-200.us-west-1.compute.internal", "Primary": true, "PrivateIpAddress": "172.31.15.200" } ], "PrivateDnsName": "ip-172-31-15-200.us-west-1.compute.internal", "Attachment": { "Status": "attaching", "DeviceIndex": 0, "DeleteOnTermination": true, "AttachmentId": "eni-attach-530b7293", "AttachTime": "2016-05-16T16:11:59.000Z" }, "Groups": [ { "GroupName": "my-couchbase-sg", "GroupId": "sg-6172dd05" } ], "SubnetId": "subnet-625bd23b", "OwnerId": "598307997273", "PrivateIpAddress": "172.31.15.200" } ], "SourceDestCheck": true, "Placement": { "Tenancy": "default", "GroupName": "", "AvailabilityZone": "us-west-1c" }, "Hypervisor": "xen", "BlockDeviceMappings": [], "Architecture": "x86_64", "StateReason": { "Message": "pending", "Code": "pending" }, "RootDeviceName": "/dev/xvda", "VirtualizationType": "hvm", "AmiLaunchIndex": 0 }, { "Monitoring": { "State": "disabled" }, "PublicDnsName": "", "RootDeviceType": "ebs", "State": { "Code": 0, "Name": "pending" }, "EbsOptimized": false, "LaunchTime": "2016-05-16T16:11:59.000Z", "PrivateIpAddress": "172.31.15.201", "ProductCodes": [], "VpcId": "vpc-c561f9a0", "StateTransitionReason": "", "InstanceId": "i-93199026", "ImageId": "ami-db95ffbb", "PrivateDnsName": "ip-172-31-15-201.us-west-1.compute.internal", "KeyName": "my-couchbase-key", "SecurityGroups": [ { "GroupName": "my-couchbase-sg", "GroupId": "sg-6172dd05" } ], "ClientToken": "", "SubnetId": "subnet-625bd23b", "InstanceType": "m3.large", "NetworkInterfaces": [ { "Status": "in-use", "MacAddress": "06:83:e8:06:2a:f1", "SourceDestCheck": true, "VpcId": "vpc-c561f9a0", "Description": "", "NetworkInterfaceId": "eni-81ac6fdc", "PrivateIpAddresses": [ { "PrivateDnsName": "ip-172-31-15-201.us-west-1.compute.internal", "Primary": true, "PrivateIpAddress": "172.31.15.201" } ], "PrivateDnsName": "ip-172-31-15-201.us-west-1.compute.internal", "Attachment": { "Status": "attaching", "DeviceIndex": 0, "DeleteOnTermination": true, "AttachmentId": "eni-attach-680b72a8", "AttachTime": "2016-05-16T16:11:59.000Z" }, "Groups": [ { "GroupName": "my-couchbase-sg", "GroupId": "sg-6172dd05" } ], "SubnetId": "subnet-625bd23b", "OwnerId": "598307997273", "PrivateIpAddress": "172.31.15.201" } ], "SourceDestCheck": true, "Placement": { "Tenancy": "default", "GroupName": "", "AvailabilityZone": "us-west-1c" }, "Hypervisor": "xen", "BlockDeviceMappings": [], "Architecture": "x86_64", "StateReason": { "Message": "pending", "Code": "pending" }, "RootDeviceName": "/dev/xvda", "VirtualizationType": "hvm", "AmiLaunchIndex": 1 } ] } |
인스턴스 상태는 다음과 같이 확인할 수 있습니다:
|
1 |
aws ec2 describe-instance-status --instance-ids `aws ec2 describe-instances --query 'Reservations[*].Instances[*].[InstanceId]' --filters Name=instance-state-name,Values=running --output text` |
그리고 출력을 다음과 같이 표시합니다:
|
1 2 3 4 5 6 7 8 9 10 11 12 13 14 15 16 17 18 19 20 21 22 23 24 25 26 27 28 29 30 31 32 33 34 35 36 37 38 39 40 41 42 43 44 45 46 47 48 49 50 51 52 53 54 55 56 |
{ "InstanceStatuses": [ { "InstanceId": "i-90199025", "InstanceState": { "Code": 16, "Name": "running" }, "AvailabilityZone": "us-west-1c", "SystemStatus": { "Status": "initializing", "Details": [ { "Status": "initializing", "Name": "reachability" } ] }, "InstanceStatus": { "Status": "initializing", "Details": [ { "Status": "initializing", "Name": "reachability" } ] } }, { "InstanceId": "i-93199026", "InstanceState": { "Code": 16, "Name": "running" }, "AvailabilityZone": "us-west-1c", "SystemStatus": { "Status": "initializing", "Details": [ { "Status": "initializing", "Name": "reachability" } ] }, "InstanceStatus": { "Status": "initializing", "Details": [ { "Status": "initializing", "Name": "reachability" } ] } } ] } |
여기서 상태는 다음과 같이 표시됩니다. 초기화. 인스턴스가 프로비저닝되는 데는 몇 분 정도 걸립니다. 모든 검사를 통과한 인스턴스는 다음과 같이 확인할 수 있습니다:
|
1 |
aws ec2 describe-instance-status --filters Name=instance-status.reachability,Values=passed --instance-ids `aws ec2 describe-instances --query 'Reservations[*].Instances[*].[InstanceId]' --filters Name=instance-state-name,Values=running --output text` |
처음에는 결과가 다음과 같이 표시됩니다:
|
1 2 3 |
{ "InstanceStatuses": [] } |
그러나 모든 인스턴스가 검사를 통과하면 결과는 다음과 같습니다:
|
1 2 3 4 5 6 7 8 9 10 11 12 13 14 15 16 17 18 19 20 21 22 23 24 25 26 27 28 29 30 31 32 33 34 35 36 37 38 39 40 41 42 43 44 45 46 47 48 49 50 51 52 53 54 55 56 |
{ "InstanceStatuses": [ { "InstanceId": "i-90199025", "InstanceState": { "Code": 16, "Name": "running" }, "AvailabilityZone": "us-west-1c", "SystemStatus": { "Status": "ok", "Details": [ { "Status": "passed", "Name": "reachability" } ] }, "InstanceStatus": { "Status": "ok", "Details": [ { "Status": "passed", "Name": "reachability" } ] } }, { "InstanceId": "i-93199026", "InstanceState": { "Code": 16, "Name": "running" }, "AvailabilityZone": "us-west-1c", "SystemStatus": { "Status": "ok", "Details": [ { "Status": "passed", "Name": "reachability" } ] }, "InstanceStatus": { "Status": "ok", "Details": [ { "Status": "passed", "Name": "reachability" } ] } } ] } |
여기서 상태는 다음과 같이 표시됩니다. 통과.
카우치베이스 노드 구성
각 카우치베이스 노드는 다음 세부 정보로 프로비저닝해야 합니다:
- 메모리
- 서비스(인덱스, 데이터 및 쿼리)
- 인증 자격 증명(사용자 이름:
관리자비밀번호를 입력합니다:비밀번호) - 로드
여행 샘플버킷
스크립트를 사용하여 이 작업을 수행할 수 있습니다:
|
1 2 3 4 5 6 7 |
for ip in "$@" do curl -v -X POST https://$ip:8091/pools/default -d memoryQuota=300 -d indexMemoryQuota=300 curl -v https://$ip:8091/node/controller/setupServices -d services=kv%2Cn1ql%2Cindex curl -v https://$ip:8091/settings/web -d port=8091 -d username=Administrator -d password=password curl -v -u Administrator:password -X POST https://$ip:8091/sampleBuckets/install -d '["travel-sample"]' done |
이 정보는 다음에서 확인할 수 있습니다: https://github.com/arun-gupta/couchbase-amazon/blob/master/configure-instance.sh. 로 호출할 수 있습니다:
|
1 |
./configure-instance.sh `aws ec2 describe-instances --query 'Reservations[*].Instances[*].[PublicDnsName]' --filters Name=instance-state-name,Values=running --output text` |
그리고 출력을 다음과 같이 표시합니다:
|
1 2 3 4 5 6 7 8 9 10 11 12 13 14 15 16 17 18 19 20 21 22 23 24 25 26 27 28 29 30 31 32 33 34 35 36 37 38 39 40 41 42 43 44 45 46 47 48 49 50 51 52 53 54 55 56 57 58 59 60 61 62 63 64 65 66 67 68 69 70 71 72 73 74 75 76 77 78 79 80 81 82 83 84 85 86 87 88 89 90 91 92 93 94 95 96 97 98 99 100 101 102 103 104 105 106 107 108 109 110 111 112 113 114 115 116 117 118 119 120 121 122 123 |
* Trying 52.53.171.49... * Connected to ec2-52-53-171-49.us-west-1.compute.amazonaws.com (52.53.171.49) port 8091 (#0) > POST /pools/default HTTP/1.1 > Host: ec2-52-53-171-49.us-west-1.compute.amazonaws.com:8091 > User-Agent: curl/7.43.0 > Accept: */* > Content-Length: 36 > Content-Type: application/x-www-form-urlencoded > * upload completely sent off: 36 out of 36 bytes < HTTP/1.1 200 OK < Server: Couchbase Server < Pragma: no-cache < Date: Mon, 16 May 2016 16:18:47 GMT < Content-Length: 0 < Cache-Control: no-cache < * Connection #0 to host ec2-52-53-171-49.us-west-1.compute.amazonaws.com left intact * Trying 52.53.171.49... * Connected to ec2-52-53-171-49.us-west-1.compute.amazonaws.com (52.53.171.49) port 8091 (#0) > POST /node/controller/setupServices HTTP/1.1 > Host: ec2-52-53-171-49.us-west-1.compute.amazonaws.com:8091 > User-Agent: curl/7.43.0 > Accept: */* > Content-Length: 26 > Content-Type: application/x-www-form-urlencoded > * upload completely sent off: 26 out of 26 bytes < HTTP/1.1 200 OK < Server: Couchbase Server < Pragma: no-cache < Date: Mon, 16 May 2016 16:18:47 GMT < Content-Length: 0 < Cache-Control: no-cache < * Connection #0 to host ec2-52-53-171-49.us-west-1.compute.amazonaws.com left intact * Trying 52.53.171.49... * Connected to ec2-52-53-171-49.us-west-1.compute.amazonaws.com (52.53.171.49) port 8091 (#0) > POST /settings/web HTTP/1.1 > Host: ec2-52-53-171-49.us-west-1.compute.amazonaws.com:8091 > User-Agent: curl/7.43.0 > Accept: */* > Content-Length: 50 > Content-Type: application/x-www-form-urlencoded > * upload completely sent off: 50 out of 50 bytes < HTTP/1.1 200 OK < Server: Couchbase Server < Pragma: no-cache < Date: Mon, 16 May 2016 16:18:47 GMT < Content-Type: application/json < Content-Length: 78 < Cache-Control: no-cache < * Connection #0 to host ec2-52-53-171-49.us-west-1.compute.amazonaws.com left intact {"newBaseUri":"https://ec2-52-53-171-49.us-west-1.compute.amazonaws.com:8091/"}* Trying 52.53.171.49... * Connected to ec2-52-53-171-49.us-west-1.compute.amazonaws.com (52.53.171.49) port 8091 (#0) * Server auth using Basic with user 'Administrator' > POST /sampleBuckets/install HTTP/1.1 > Host: ec2-52-53-171-49.us-west-1.compute.amazonaws.com:8091 > Authorization: Basic QWRtaW5pc3RyYXRvcjpwYXNzd29yZA== > User-Agent: curl/7.43.0 > Accept: */* > Content-Length: 17 > Content-Type: application/x-www-form-urlencoded > * upload completely sent off: 17 out of 17 bytes < HTTP/1.1 202 Accepted < Server: Couchbase Server < Pragma: no-cache < Date: Mon, 16 May 2016 16:18:47 GMT < Content-Type: application/json < Content-Length: 2 < Cache-Control: no-cache < * Connection #0 to host ec2-52-53-171-49.us-west-1.compute.amazonaws.com left intact []* Trying 52.53.239.100... * Connected to ec2-52-53-239-100.us-west-1.compute.amazonaws.com (52.53.239.100) port 8091 (#0) > POST /pools/default HTTP/1.1 > Host: ec2-52-53-239-100.us-west-1.compute.amazonaws.com:8091 > User-Agent: curl/7.43.0 > Accept: */* > Content-Length: 36 > Content-Type: application/x-www-form-urlencoded > * upload completely sent off: 36 out of 36 bytes < HTTP/1.1 200 OK < Server: Couchbase Server < Pragma: no-cache < Date: Mon, 16 May 2016 16:18:48 GMT < Content-Length: 0 < Cache-Control: no-cache < * Connection #0 to host ec2-52-53-239-100.us-west-1.compute.amazonaws.com left intact * Trying 52.53.239.100... * Connected to ec2-52-53-239-100.us-west-1.compute.amazonaws.com (52.53.239.100) port 8091 (#0) > POST /node/controller/setupServices HTTP/1.1 > Host: ec2-52-53-239-100.us-west-1.compute.amazonaws.com:8091 > User-Agent: curl/7.43.0 > Accept: */* > Content-Length: 26 > Content-Type: application/x-www-form-urlencoded > * upload completely sent off: 26 out of 26 bytes < HTTP/1.1 200 OK < Server: Couchbase Server < Pragma: no-cache < Date: Mon, 16 May 2016 16:18:48 GMT < Content-Length: 0 < Cache-Control: no-cache < * Connection #0 to host ec2-52-53-239-100.us-west-1.compute.amazonaws.com left intact * Trying 52.53.239.100... * Connected to ec2-52-53-239-100.us-west-1.compute.amazonaws.com (52.53.239.100) port 8091 (#0) > POST /settings/web HTTP/1.1 > Host: ec2-52-53-239-100.us-west-1.compute.amazonaws.com:8091 > User-Agent: curl/7.43.0 > Accept: */* > Content-Length: 50 > Content-Type: application/x-www-form-urlencoded > * upload completely sent off: 50 out of 50 bytes < HTTP/1.1 200 OK < Server: Couchbase Server < Pragma: no-cache < Date: Mon, 16 May 2016 16:18:48 GMT < Content-Type: application/json < Content-Length: 79 < Cache-Control: no-cache < * Connection #0 to host ec2-52-53-239-100.us-west-1.compute.amazonaws.com left intact {"newBaseUri":"https://ec2-52-53-239-100.us-west-1.compute.amazonaws.com:8091/"}* Trying 52.53.239.100... * Connected to ec2-52-53-239-100.us-west-1.compute.amazonaws.com (52.53.239.100) port 8091 (#0) * Server auth using Basic with user 'Administrator' > POST /sampleBuckets/install HTTP/1.1 > Host: ec2-52-53-239-100.us-west-1.compute.amazonaws.com:8091 > Authorization: Basic QWRtaW5pc3RyYXRvcjpwYXNzd29yZA== > User-Agent: curl/7.43.0 > Accept: */* > Content-Length: 17 > Content-Type: application/x-www-form-urlencoded > * upload completely sent off: 17 out of 17 bytes < HTTP/1.1 202 Accepted < Server: Couchbase Server < Pragma: no-cache < Date: Mon, 16 May 2016 16:18:48 GMT < Content-Type: application/json < Content-Length: 2 < Cache-Control: no-cache < * Connection #0 to host ec2-52-53-239-100.us-west-1.compute.amazonaws.com left intact [] |
이것은 다음을 호출합니다. Couchbase REST API 를 클릭하여 각 Couchbase 노드를 구성합니다. 이제 각 Couchbase 노드가 구성되었으므로 해당 노드에 액세스해 보겠습니다. 공개 찾기
인스턴스의 IP 주소입니다:
|
1 |
aws ec2 describe-instances --query 'Reservations[*].Instances[*].[PublicDnsName]' --filters Name=instance-state-name,Values=running --output text |
출력은 다음과 같이 표시됩니다:
|
1 2 |
ec2-52-53-171-49.us-west-1.compute.amazonaws.com ec2-52-53-239-100.us-west-1.compute.amazonaws.com |
IP 주소 중 하나를 선택하고 :8091로 접속하여 출력을 확인합니다:
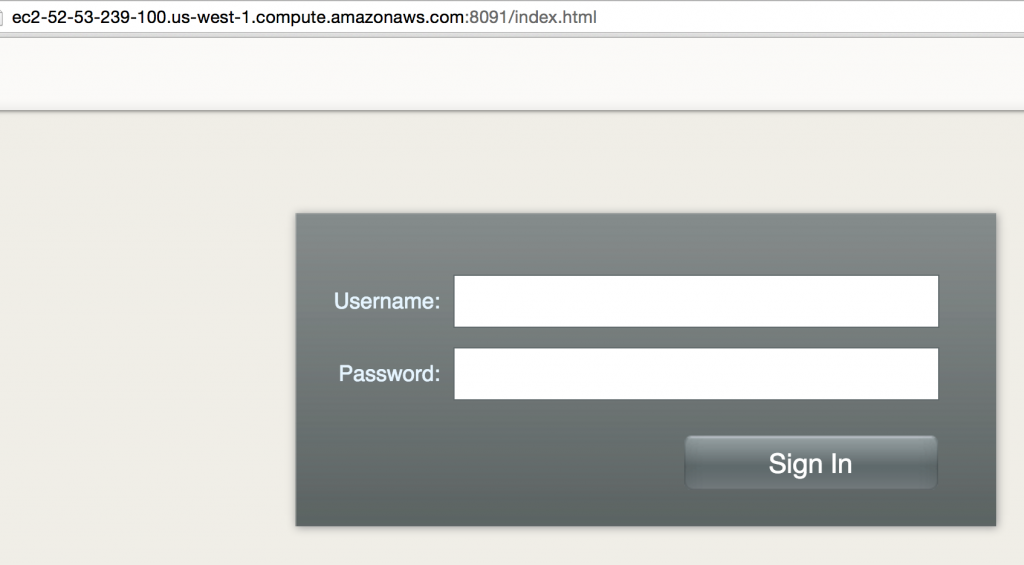
각 카우치베이스
노드는 사용자 이름을 관리자로, 비밀번호를 비밀번호로 구성합니다. 자격 증명을 입력하면 Couchbase 웹 콘솔이 표시됩니다:
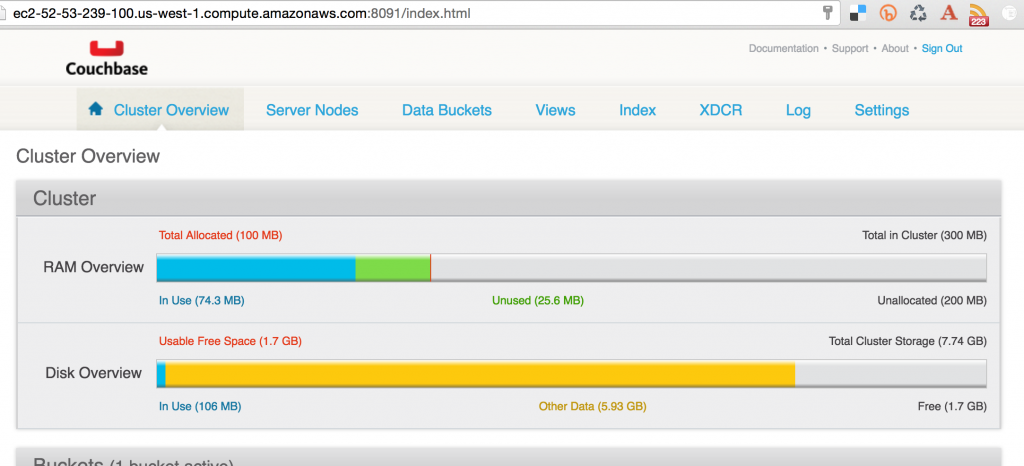
를 클릭합니다.
서버 노드를 확인하여 클러스터에 단일 노드만 있는지 확인합니다:

카우치베이스 클러스터 생성 및 리밸런싱
모든 Couchbase 서버 노드는 동일하게 생성됩니다. 따라서 Couchbase 클러스터는 증가하는 애플리케이션 수요를 충족하기 위해 수평적으로 확장할 수 있습니다. 독립적으로 실행되는 Couchbase 노드는 클러스터에 추가할 수 있습니다. 서버 추가 CLI 명령을 실행합니다. 이 과정은 일반적으로 2단계로 진행됩니다. 첫 번째 단계는 하나 이상의 노드를 추가하는 것입니다. 두 번째 단계는 기존 노드의 데이터를 업데이트된 클러스터 전체에서 재조정하는 클러스터 재조정입니다.
저희의 경우, 각 AMI에서 Couchbase 노드가 실행되고 있습니다. 한 Couchbase 노드의 IP 주소를 선택하고 다른 노드의 IP 주소를 추가합니다. 이 작업은 스크립트를 사용하여 수행할 수 있습니다:
|
1 2 3 4 5 6 7 8 9 10 11 12 13 |
export primary=$1 shift for ip in "$@" do $COUCHBASE_CLI server-add --cluster=$primary:8091 --user Administrator --password password --server-add=$ip --server-add-username=Administrator --server-add-password=password done |
이 스크립트는 다음에서 사용할 수 있습니다. https://github.com/arun-gupta/couchbase-amazon/blob/master/create-cluster.sh 로 호출할 수 있습니다:
|
1 |
./create-cluster.sh `aws ec2 describe-instances --query 'Reservations[*].Instances[*].[PublicDnsName]' --filters Name=instance-state-name,Values=running --output text` |
그리고 출력을 다음과 같이 표시합니다:
|
1 |
SUCCESS: server-add ec2-52-53-239-100.us-west-1.compute.amazonaws.com:8091 |
카우치베이스 웹 콘솔이 표시되도록 업데이트됩니다:
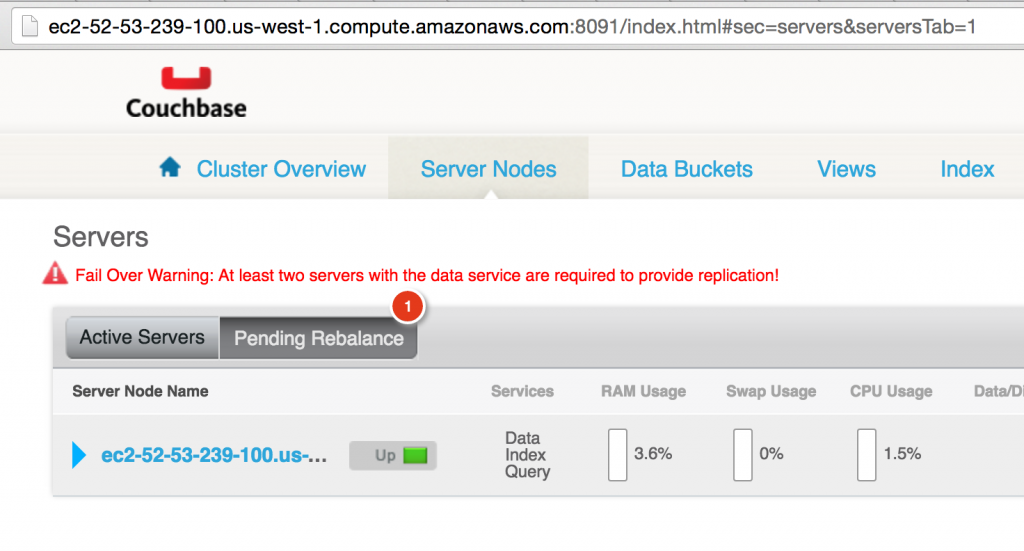
마지막으로 스크립트를 사용하여 클러스터의 밸런스를 재조정합니다:
|
1 2 3 4 5 6 7 8 9 10 11 12 |
export primary=$1 shift for ip in "$@" do $COUCHBASE_CLI rebalance --cluster=$primary:8091 --user Administrator --password password --server-add-username=Administrator --server-add-password=password done |
출력은 다음과 같이 표시됩니다:
|
1 2 |
INFO: rebalancing . . . . . . . . . . . . . . . . . . . . . . . . . . . . . . . . . . . . . . . . . . . . . . . . . . . . . . . . . . . . . . . . . . . . . . . . . . . . . . . . . . . . . . . . . . . . . . . . . . . . . . . . . . . . . . . . . . . . . . . . . . . . . . . . . . . . . . . . . . . . . . . . . . . . . . . . . . . . . . . . . . . . . . . . . . . . . . . . . . . . . . . . . . SUCCESS: rebalanced cluster |
카우치베이스 웹 콘솔이 업데이트되었습니다:

클러스터가 실행되면 다음을 시도해 보세요. 헬로우 카우치베이스 예제.
카우치베이스 노드 종료
마지막으로 클러스터를 죽이는 것은 매우 간단합니다:
|
1 |
aws ec2 terminate-instances --instance-ids `aws ec2 describe-instances --query 'Reservations[*].Instances[*].[InstanceId]' --filters Name=instance-state-name,Values=running --output text` |
이 블로그에서는 AWS CLI를 사용하여 Couchbase 클러스터를 스핀업, 확장 및 리밸런싱하는 방법을 설명합니다. 모든 스크립트는 다음 링크에서 확인할 수 있습니다. https://github.com/arun-gupta/couchbase-amazon.
추가 참고 자료 ...
- 카우치베이스 서버 개발자 포털
- 헬로우 카우치베이스 예제
- 다음에 대한 질문 스택오버플로, 포럼 또는 슬랙 채널
- 팔로우하기 @couchbasedev
- Couchbase 4.5 베타