최근에 데스크톱 애플리케이션 구축에 대한 글을 썼습니다. 카우치베이스 라이트 및 JavaFX. 앞서 살펴본 바와 같이 Couchbase는 사용 가능한 Java SDK 덕분에 데스크톱 애플리케이션에서 데이터 저장 및 동기화를 위한 훌륭한 솔루션이 됩니다. 하지만 JavaFX가 모든 사람에게 적합한 것은 아니라는 것을 알고 있습니다.
Java로 데스크톱 애플리케이션을 구축하기 위한 또 다른 유사한 프레임워크가 있습니다. Gluon이라는 프레임워크가 있으며 Android 및 iOS 애플리케이션도 지원합니다. 하지만 이 예제에서는 데스크톱을 엄격하게 살펴보고 있습니다.
이전 JavaFX 예제에서 사용한 것과 거의 동일한 코드를 사용하여 글루온 데스크톱 애플리케이션을 만드는 방법을 살펴보겠습니다.
요구 사항
Couchbase를 사용하는 Gluon 애플리케이션을 구축하기 위한 몇 가지 요구 사항이 있습니다.
- JDK 1.7+
- IntelliJ 아이디어
- 카우치베이스 동기화 게이트웨이
일반적으로 요구사항으로 삼지는 않지만 IntelliJ와 같은 IDE를 사용하면 Gluon 애플리케이션을 훨씬 쉽게 만들 수 있기 때문에 목록에 포함했습니다. Gradle과 필요한 모든 것을 갖춘 Gluon 프로젝트를 구성할 수 있는 IntelliJ용 플러그인이 있습니다.
Couchbase 동기화 게이트웨이가 반드시 필요한 것은 아니지만, 애플리케이션과 Couchbase Server/다른 플랫폼 및 장치 간에 동기화 지원을 추가하려는 경우 필요합니다.
새 글루온 프로젝트 만들기
IntelliJ를 사용하여 프로젝트를 빌드하기로 결정한 경우, 설명된 대로 Gluon 플러그인을 이미 다운로드했는지 확인하세요. 여기.
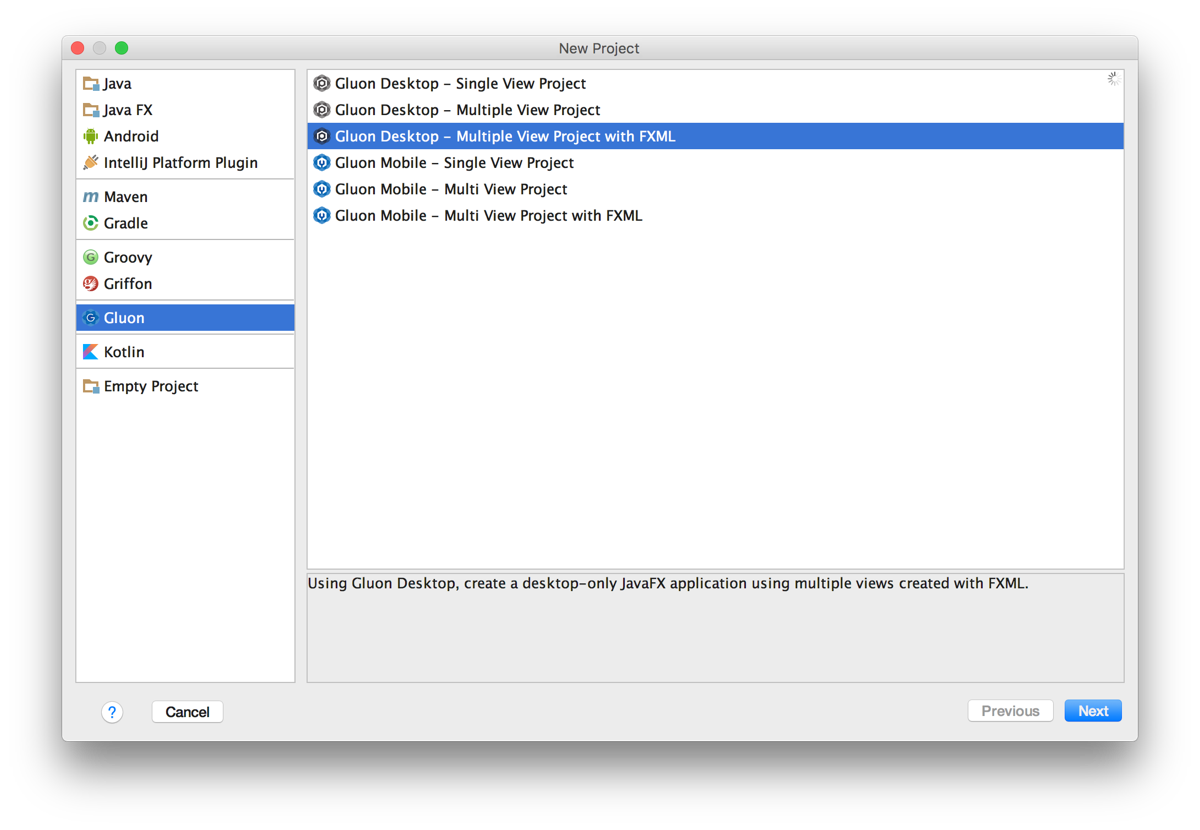
IntelliJ를 사용하여 새 프로젝트를 생성하지만 글루온 데스크톱 - FXML을 사용한 다중 뷰 프로젝트 프로젝트와 같습니다.
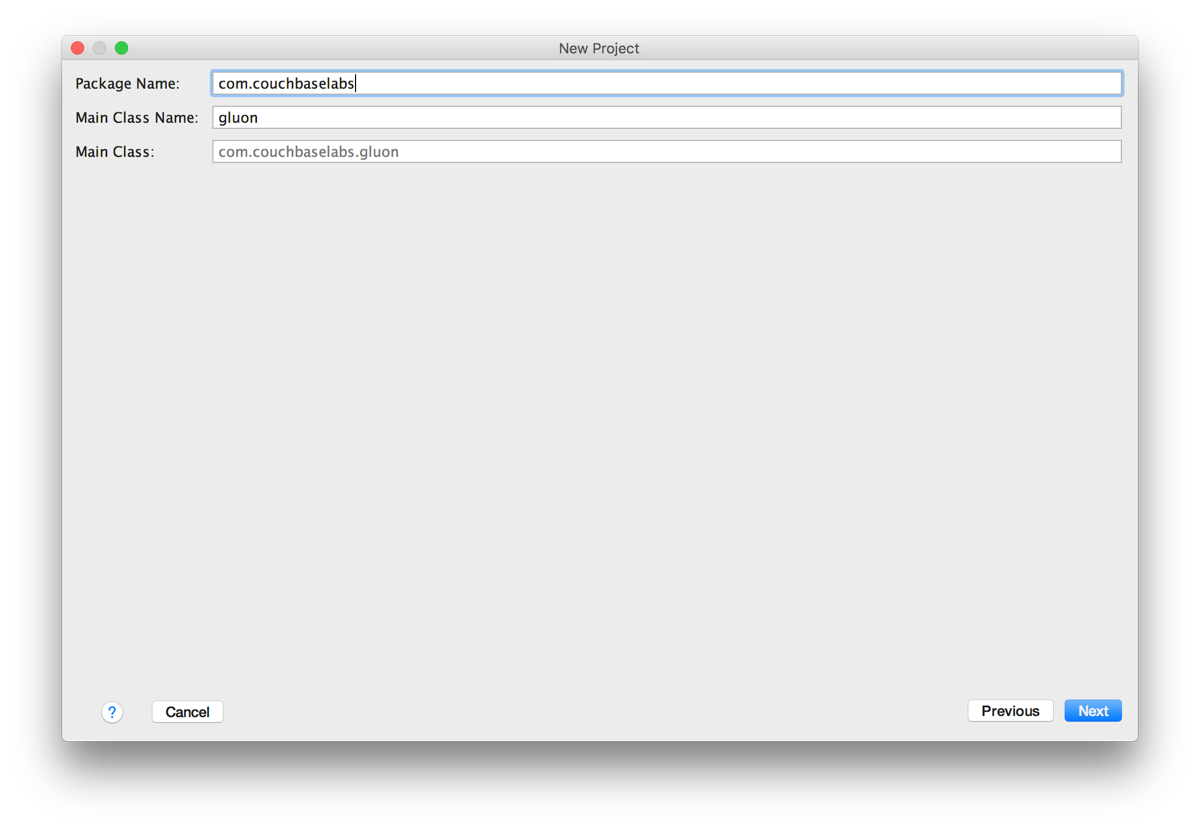
궁극적으로 여기서부터 어디로 갈지는 여러분의 선택에 달려 있지만, 이 가이드에 최대한 가깝게 유지하려면 프로젝트에 com.couchbaselabs 패키지 이름과 글루온 메인 클래스.
Gluon으로 두 페이지짜리 애플리케이션만 만들 예정이므로 이후의 모든 내용은 기본값으로 남겨둬도 됩니다. 완료되면 다음과 같은 파일 및 디렉토리 구조가 남아있기를 바랍니다:
|
1 2 3 4 5 6 7 8 9 10 11 12 13 14 15 16 17 18 19 20 21 22 23 24 25 26 27 28 29 |
gradle wrapper src main java com couchbaselabs views PrimaryPresenter.java PrimaryView.java SecondaryPresenter.java SecondaryView.java CouchbaseSingleton.java Todo.java gluon.java resources couchbaselabs views primary.fxml primary.css secondary.fxml secondary.css style.css icon.png build.gradle gradlew gradlew.bat |
다음과 같은 몇 가지 추가 파일을 만들었음을 알 수 있습니다. CouchbaseSingleton.java 그리고 Todo.java.
기본적으로 XML 뷰와 해당 뷰와 함께 사용할 수 있는 컨트롤러가 있습니다. 이는 우리가 예전에 보았던 JavaFX 애플리케이션. 이러한 뷰를 디자인할 때 몇 가지 옵션이 있습니다. 원시 XML을 사용할 수도 있고, 아니면 씬 빌더. 이제 이 씬 빌더를 JavaFX 씬 빌더와 혼동하지 마세요. 저는 이 실수를 저질렀고 꽤 오랫동안 머리를 쥐어뜯고 있었습니다. 우리가 원하는 버전은 글루온 애플리케이션을 지원할 것입니다.
애플리케이션 코드를 추가하기 전에 프로젝트 Gradle 파일에 종속성을 추가해야 합니다. Gradle이 익숙하지 않으시다면 Maven이나 Ant와 동일한 작업을 수행합니다. 구문은 다르지만 개인적으로 조금 더 깔끔하다고 생각합니다. 프로젝트의 build.gradle 를 열고 다음 코드를 포함하세요:
|
1 2 3 4 5 6 7 8 9 10 11 12 13 14 15 16 17 18 19 20 21 22 23 24 25 26 27 |
buildscript { repositories { jcenter() } dependencies { classpath 'org.javafxports:jfxmobile-plugin:1.0.8' } } apply plugin: 'org.javafxports.jfxmobile' repositories { jcenter() maven { url 'https://nexus.gluonhq.com/nexus/content/repositories/releases' } } mainClassName = 'com.couchbaselabs.gluon' dependencies { compile 'com.gluonhq:charm:3.0.0' compile 'com.couchbase.lite:couchbase-lite-java:1.3.0' desktopRuntime 'com.gluonhq:charm-desktop:3.0.0' } |
여기서 특히 중요한 것은 종속성입니다:
|
1 2 3 4 5 6 7 |
dependencies { compile 'com.gluonhq:charm:3.0.0' compile 'com.couchbase.lite:couchbase-lite-java:1.3.0' desktopRuntime 'com.gluonhq:charm-desktop:3.0.0' } |
여기에는 Gluon용 데스크톱 애플리케이션 런타임뿐만 아니라 Couchbase Lite 라이브러리도 포함됩니다.
프로젝트가 준비되면 애플리케이션 개발을 시작할 수 있습니다.
카우치베이스 데이터 계층 설계하기
Couchbase로 작업할 때는 싱글톤 인스턴스를 만드는 것이 좋습니다. 즉, 애플리케이션을 닫을 때까지 전체 애플리케이션에서 동일한 오픈 인스턴스를 사용하게 됩니다.
프로젝트의 src/main/java/com/couchbaselabs/CouchbaseSingleton.java 파일을 열고 다음 코드를 포함하세요:
|
1 2 3 4 5 6 7 8 9 10 11 12 13 14 15 16 17 18 19 20 21 22 23 24 25 26 27 28 29 30 31 32 33 34 35 36 37 38 39 40 41 42 43 44 45 46 47 48 49 50 51 52 53 54 55 56 57 58 59 60 61 62 63 64 65 66 67 68 69 70 71 72 73 74 75 76 77 78 79 80 81 82 83 84 85 86 87 88 89 90 91 92 93 94 95 96 |
package com.couchbaselabs; import com.couchbase.lite.*; import com.couchbase.lite.replicator.Replication; import java.net.URL; import java.util.ArrayList; import java.util.HashMap; import java.util.Iterator; import java.util.Map; public class CouchbaseSingleton { private Manager manager; private Database database; private Replication pushReplication; private Replication pullReplication; private static CouchbaseSingleton instance = null; private CouchbaseSingleton() { try { this.manager = new Manager(new JavaContext("data"), Manager.DEFAULT_OPTIONS); this.database = this.manager.getDatabase("fx-project"); View todoView = database.getView("todos"); todoView.setMap(new Mapper() { @Override public void map(Map<String, Object> document, Emitter emitter) { emitter.emit(document.get("_id"), document); } }, "1"); } catch (Exception e) { e.printStackTrace(); } } public static CouchbaseSingleton getInstance() { if(instance == null) { instance = new CouchbaseSingleton(); } return instance; } public Database getDatabase() { return this.database; } public void startReplication(URL gateway, boolean continuous) { this.pushReplication = this.database.createPushReplication(gateway); this.pullReplication = this.database.createPullReplication(gateway); this.pushReplication.setContinuous(continuous); this.pullReplication.setContinuous(continuous); this.pushReplication.start(); this.pullReplication.start(); } public void stopReplication() { this.pushReplication.stop(); this.pullReplication.stop(); } public Todo save(Todo todo) { Map<String, Object> properties = new HashMap<String, Object>(); Document document = this.database.createDocument(); properties.put("type", "todo"); properties.put("title", todo.getTitle()); properties.put("description", todo.getDescription()); try { todo.setDocumentId(document.putProperties(properties).getDocument().getId()); } catch (Exception e) { e.printStackTrace(); } return todo; } public ArrayList query() { ArrayList results = new ArrayList(); try { View todoView = this.database.getView("todos"); Query query = todoView.createQuery(); QueryEnumerator result = query.run(); Document document = null; for (Iterator it = result; it.hasNext(); ) { QueryRow row = it.next(); document = row.getDocument(); results.add(new Todo(document.getId(), (String) document.getProperty("title"), (String) document.getProperty("description"))); } } catch (Exception e) { e.printStackTrace(); } return results; } } |
이전에 빌드한 JavaFX 애플리케이션을 보셨다면 이 싱글톤이 두 프로젝트에서 동일하다는 것을 알 수 있습니다. Android에서도 비슷한 버전을 사용할 수 있습니다.
에서 카우치베이스싱글턴 생성자 메서드를 사용하여 로컬 데이터베이스를 생성하고 열고 있습니다. fx-project. 이 데이터베이스는 애플리케이션 전체에서 사용됩니다. 또한 쿼리를 위한 Couchbase Lite 보기도 만들고 있습니다. 이 토도스 보기는 로컬 데이터베이스의 모든 문서에 대해 문서 ID와 문서의 키-값 쌍을 생성합니다.
생성자 메서드는 비공개이므로 사용자가 객체를 인스턴스화할 수 없기를 원하지 않습니다. 대신 정적 getInstance 메소드를 사용하여 작업을 완료할 수 있습니다.
가이드 후반부까지는 복제에 대해 걱정하지 않겠지만, 지금부터 기초를 다지고자 합니다. 이 가이드의 시작 복제 메서드를 사용하면 동기화 게이트웨이와 양방향 동기화를 정의할 수 있습니다. 중지복제 메서드를 사용하면 애플리케이션이 닫힐 때 복제를 중지할 수 있습니다.
이제 데이터를 저장하고 로드하는 함수가 생겼습니다.
|
1 2 3 4 5 6 7 8 9 10 11 12 13 14 15 |
public Todo save(Todo todo) { Map<String, Object> properties = new HashMap<String, Object>(); Document document = this.database.createDocument(); properties.put("type", "todo"); properties.put("title", todo.getTitle()); properties.put("description", todo.getDescription()); try { todo.setDocumentId(document.putProperties(properties).getDocument().getId()); } catch (Exception e) { e.printStackTrace(); } return todo; } |
에서 저장 메서드에 대한 사용자 정의 Todo 객체입니다. 이 객체에는 실제로 ID, 제목, 설명만 포함됩니다. 클래스는 다음과 같이 생겼습니다:
|
1 2 3 4 5 6 7 8 9 10 11 12 13 14 15 16 17 18 19 20 21 22 23 24 25 26 27 28 29 30 31 32 33 34 35 36 37 38 39 40 41 |
package com.couchbaselabs; import java.util.*; public class Todo { private String documentId; private String title; private String description; public Todo(String documentId, String title, String description) { this.documentId = documentId; this.title = title; this.description = description; } public Todo(String title, String description) { this.documentId = UUID.randomUUID().toString(); this.title = title; this.description = description; } public void setDocumentId(String documentId) { this.documentId = documentId; } public String getDocumentId() { return this.documentId; } public String getTitle() { return this.title; } public String getDescription() { return this.description; } } |
위의 클래스는 src/main/java/com/couchbaselabs/Todo.java 파일로 이동합니다. 우리가 하는 일은 실제로 개체를 가져와서 Couchbase NoSQL 문서에 속성으로 추가하는 것입니다. 문서를 저장하고 ID를 얻은 후에는 ID가 포함된 동일한 문서를 반환합니다.
쿼리 함수는 앞서 만든 뷰를 실행하고 각 결과 항목을 배열에 추가합니다. Todo 객체를 호출하여 데이터베이스 싱글톤을 종료합니다.
목록 데이터에 대한 뷰 만들기
우리는 모든 것을 동일한 뷰에 넣는 대신 여러 개의 Gluon 뷰를 사용하는 애플리케이션을 만들 것입니다. UI가 아닌 데이터를 주제로 하는 Couchbase Lite 뷰와 혼동하지 마세요.
기본 보기는 애플리케이션을 실행할 때 가장 먼저 표시되는 보기입니다. 이 보기에는 모든 할 일 요소의 목록이 표시됩니다. SceneBuilder를 사용하지 않는 경우, XML 마크업은 src/main/resources/com/couchbaselabs/views/primary.fxml 는 다음과 같이 표시됩니다:
|
1 2 3 4 5 6 |
<!--?xml version="1.0" encoding="UTF-8"?--> <!--?import com.gluonhq.charm.glisten.mvc.View?--> <!--?import javafx.scene.control.ListView?--> <!--?import javafx.scene.layout.BorderPane?--> |
|
1 2 3 |
이렇게 하면 다음과 같은 보기가 나타납니다:
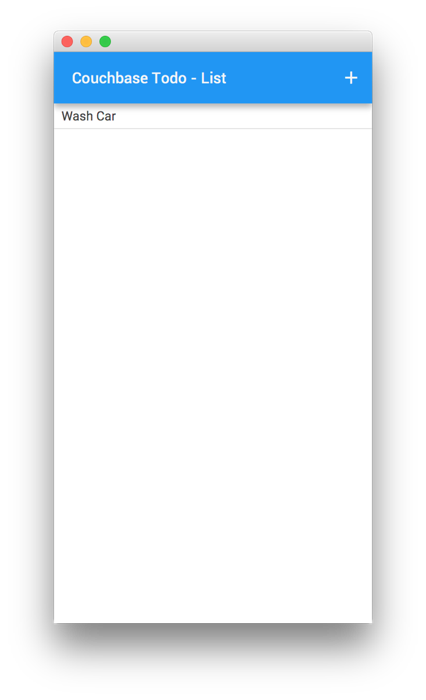
이미지에서 버튼이 있는 탐색 막대가 있지만 XML 레이아웃에는 표시되지 않는 것을 볼 수 있습니다. 대신 레이아웃에는 목록 보기만 포함되어 있습니다. 그러나 XML에서는 src/main/java/com/couchbaselabs/views/PrimaryPresenter.java 파일로 이동합니다. 이 파일은 탐색 모음뿐만 아니라 특정 보기를 구동하는 모든 로직을 정의하는 파일입니다.
그리고 src/main/java/com/couchbaselabs/views/PrimaryPresenter.java 파일은 탐색 컴포넌트에서 차이점을 제외하면 JavaFX 프로젝트와 매우 유사합니다.
|
1 2 3 4 5 6 7 8 9 10 11 12 13 14 15 16 17 18 19 20 21 22 23 24 25 26 27 28 29 30 31 32 33 34 35 36 37 38 39 40 41 42 43 44 45 46 47 48 49 50 51 52 53 54 55 56 57 58 59 60 61 62 63 64 65 66 67 68 69 70 71 72 73 74 75 76 77 78 79 80 81 82 83 84 85 86 87 88 89 90 91 92 93 94 95 96 97 98 99 100 |
package com.couchbaselabs.views; import com.couchbaselabs.CouchbaseSingleton; import com.couchbaselabs.Todo; import com.couchbase.lite.Database; import com.couchbase.lite.Document; import com.couchbaselabs.gluon; import com.gluonhq.charm.glisten.application.MobileApplication; import com.gluonhq.charm.glisten.control.AppBar; import com.gluonhq.charm.glisten.mvc.View; import com.gluonhq.charm.glisten.visual.MaterialDesignIcon; import javafx.application.Platform; import javafx.collections.ObservableList; import javafx.fxml.FXML; import javafx.scene.control.ListCell; import javafx.scene.control.ListView; import javafx.util.Callback; public class PrimaryPresenter { private CouchbaseSingleton couchbase; @FXML private View primary; @FXML private ListView fxListView; public void initialize() { try { this.couchbase = CouchbaseSingleton.getInstance(); fxListView.getItems().addAll(this.couchbase.query()); this.couchbase.getDatabase().addChangeListener(new Database.ChangeListener() { @Override public void changed(Database.ChangeEvent event) { for(int i = 0; i < event.getChanges().size(); i++) { final Document retrievedDocument = couchbase.getDatabase().getDocument(event.getChanges().get(i).getDocumentId()); Platform.runLater(new Runnable() { @Override public void run() { int documentIndex = indexOfByDocumentId(retrievedDocument.getId(), fxListView.getItems()); for (int j = 0; j < fxListView.getItems().size(); j++) { if (((Todo) fxListView.getItems().get(j)).getDocumentId().equals(retrievedDocument.getId())) { documentIndex = j; break; } } if (retrievedDocument.isDeleted()) { if (documentIndex > -1) { fxListView.getItems().remove(documentIndex); } } else { if (documentIndex == -1) { fxListView.getItems().add(new Todo(retrievedDocument.getId(), (String) retrievedDocument.getProperty("title"), (String) retrievedDocument.getProperty("description"))); } else { fxListView.getItems().remove(documentIndex); fxListView.getItems().add(new Todo(retrievedDocument.getId(), (String) retrievedDocument.getProperty("title"), (String) retrievedDocument.getProperty("description"))); } } } }); } } }); } catch (Exception e) { e.printStackTrace(); } fxListView.setCellFactory(new Callback<ListView, ListCell>() { @Override public ListCell call(ListView p) { ListCell cell = new ListCell() { @Override protected void updateItem(Todo t, boolean bln) { super.updateItem(t, bln); if (t != null) { setText(t.getTitle()); } } }; return cell; } }); primary.showingProperty().addListener((obs, oldValue, newValue) -> { if (newValue) { AppBar appBar = MobileApplication.getInstance().getAppBar(); appBar.setTitleText("Couchbase Todo - List"); appBar.getActionItems().add(MaterialDesignIcon.ADD.button(e -> MobileApplication.getInstance().switchView(gluon.SECONDARY_VIEW) )); } }); } private int indexOfByDocumentId(String needle, ObservableList haystack) { int result = -1; for(int i = 0; i < haystack.size(); i++) { if(haystack.get(i).getDocumentId().equals(needle)) { result = i; break; } } return result; } } |
위 파일에는 XML의 실제 목록 보기에 바인딩된 목록 보기 속성이 있습니다. 그러나 실제로 중요한 코드는 다음과 같이 초기화 메서드입니다. 그 안에서 우리는 세 가지 핵심 작업을 수행합니다.
|
1 2 3 4 5 6 7 8 9 10 11 12 13 14 15 16 17 |
fxListView.setCellFactory(new Callback<ListView, ListCell>() { @Override public ListCell call(ListView p) { ListCell cell = new ListCell() { @Override protected void updateItem(Todo t, boolean bln) { super.updateItem(t, bln); if (t != null) { setText(t.getTitle()); } } }; return cell; } }); |
위 코드에서는 데이터가 목록에 표시되는 방식을 정의합니다. 기본적으로 문자열 데이터만 허용하므로 이 데이터를 재정의하여 Todo 객체입니다.
|
1 2 3 4 5 6 7 8 9 10 11 |
primary.showingProperty().addListener((obs, oldValue, newValue) -> { if (newValue) { AppBar appBar = MobileApplication.getInstance().getAppBar(); appBar.setTitleText("Couchbase Todo - List"); appBar.getActionItems().add(MaterialDesignIcon.ADD.button(e -> MobileApplication.getInstance().switchView(gluon.SECONDARY_VIEW) )); } }); |
위의 리스너에서는 탐색 표시줄의 제목과 버튼을 설정했습니다. 버튼을 누르면 보기가 보조 보기로 변경됩니다.
마지막으로 초기 데이터 쿼리를 실행하고 목록을 채우고 새 데이터가 들어올 때 이를 수신하는 작업만 남습니다. 변경 사항이 들어오는 경우, 변경 사항이 반복되고 변경된 모든 문서에 대해 지표가 검토됩니다. 삭제 지표가 있는 경우 목록 보기에서 데이터가 제거됩니다. 변경 사항이 있으면 목록 보기에서 데이터가 제거된 다음 대체됩니다. 그렇지 않으면 데이터만 추가됩니다. 리스너는 백그라운드 스레드에서 작동하기 때문에 UI 변경은 반드시 Platform.runLater.
이제 두 번째이자 마지막 보기로 넘어갑니다.
데이터 저장을 위한 뷰 만들기
두 번째 보기에는 양식이 있으며 데이터베이스에 추가되어 이전 보기에 표시될 사용자 입력을 담당합니다. 이 보기를 지원하는 XML 마크업은 다음과 같습니다:
|
1 2 3 4 5 6 7 8 9 10 11 12 13 14 15 16 17 18 19 20 21 22 23 24 25 26 27 28 29 30 31 32 33 34 35 36 37 38 39 40 41 42 43 44 45 46 47 48 49 50 51 52 53 54 55 56 57 58 59 60 61 62 63 64 65 66 67 68 69 70 71 72 73 74 75 76 77 78 79 80 81 82 83 84 85 86 87 88 89 90 91 92 93 94 95 96 97 98 99 100 101 102 103 104 105 106 107 108 109 110 111 112 113 114 115 116 117 118 119 120 121 122 123 124 125 126 127 128 129 130 131 132 133 134 135 136 137 138 139 140 141 142 143 144 145 146 147 148 149 150 151 152 153 154 155 156 157 158 159 160 161 162 163 164 165 166 167 168 169 170 171 172 173 174 175 176 177 178 179 |
<!--?xml version="1.0" encoding="UTF-8"?--> <!--?import com.gluonhq.charm.glisten.mvc.View?--> <!--?import javafx.geometry.Insets?--> <!--?import javafx.scene.control.TextArea?--> <!--?import javafx.scene.control.TextField?--> <!--?import javafx.scene.layout.BorderPane?--> <!--?import javafx.scene.layout.VBox?--> <textarea> </children> </VBox> </top> <padding> <Insets bottom="10.0" left="10.0" right="10.0" top="10.0" /> </padding> </View> </code> </pre> <p>The XML above is found in the <strong>src/main/resources/com/couchbaselabs/views/secondary.fxml</strong> file and the view itself looks like the following:</p> <p><img src="/wp-content/original-assets/2016/october/using-couchbase-lite-in-a-java-gluon-application/cb-gluon-desktop-4.png" /></p> <p>Notice that there are two <code>TextField</code> inputs. They will be important in the <strong>src/main/java/com/couchbaselabs/views/SecondaryPresenter.java</strong> file referenced in the XML. This file contains the following code:</p> <pre> <code> package com.couchbaselabs.views; import com.couchbaselabs.CouchbaseSingleton; import com.couchbaselabs.Todo; import com.gluonhq.charm.glisten.animation.BounceInRightTransition; import com.gluonhq.charm.glisten.application.MobileApplication; import com.gluonhq.charm.glisten.control.AppBar; import com.gluonhq.charm.glisten.layout.layer.FloatingActionButton; import com.gluonhq.charm.glisten.mvc.View; import com.gluonhq.charm.glisten.visual.MaterialDesignIcon; import javafx.fxml.FXML; import javafx.scene.control.Alert; import javafx.scene.control.TextArea; import javafx.scene.control.TextField; public class SecondaryPresenter { private CouchbaseSingleton couchbase; @FXML private View secondary; @FXML private TextField fxTitle; @FXML private TextArea fxDescription; public void initialize() { this.couchbase = CouchbaseSingleton.getInstance(); secondary.setShowTransitionFactory(BounceInRightTransition::new); secondary.getLayers().add(new FloatingActionButton(MaterialDesignIcon.SAVE.text, e -> save() )); secondary.showingProperty().addListener((obs, oldValue, newValue) -> { if (newValue) { AppBar appBar = MobileApplication.getInstance().getAppBar(); appBar.setTitleText("Couchbase Todo - Create"); } }); } private void save() { if(!fxTitle.getText().equals("") && !fxDescription.getText().equals("")) { couchbase.save(new Todo(fxTitle.getText(), fxDescription.getText())); fxTitle.setText(""); fxDescription.setText(""); MobileApplication.getInstance().switchToPreviousView(); } else { Alert alert = new Alert(Alert.AlertType.INFORMATION); alert.setTitle("Missing Information"); alert.setHeaderText(null); alert.setContentText("Both a title and description are required for this example."); alert.showAndWait(); } } } </code> </pre> <p>The input fields are mapped to this controller, but what really matters here is the code for adding the floating action button and setting the navigation bar title.</p> <pre> <code> secondary.getLayers().add(new FloatingActionButton(MaterialDesignIcon.SAVE.text, e -> save() )); secondary.showingProperty().addListener((obs, oldValue, newValue) -> { if (newValue) { AppBar appBar = MobileApplication.getInstance().getAppBar(); appBar.setTitleText("Couchbase Todo - Create"); } }); </code> </pre> <p>When the floating action button is clicked, the <code>save</code> method is called. In the <code>save</code> method we check to make sure the input fields are not blank and if they aren't, save the data and navigate backwards in the stack to the previous view.</p> <h2>Syncing Data with Couchbase Sync Gateway</h2> <p>Up until now, every part of our Gluon application was built for offline local use. However, including synchronization support into the mix is not only useful, but incredibly easy.</p> <p>At this point I'm going to assume you've downloaded and installed Couchbase Sync Gateway. Before we run it, we need to create a configuration file. Create a JSON file with the following:</p> <pre> <code> { "log":["CRUD+", "REST+", "Changes+", "Attach+"], "databases": { "fx-example": { "server":"walrus:", "sync":` function (doc) { channel (doc.channels); } `, "users": { "GUEST": { "disabled": false, "admin_channels": ["*"] } } } } } </code> </pre> <p>The above configuration file is one of the most simplest you can make for Sync Gateway. You're creating a partition called <strong>fx-example</strong> within the in-memory database <strong>walrus</strong> and you're accepting all documents from everyone with no read or write permissions.</p> <p>Running this configuration with Sync Gateway won't get us very far yet because we haven't activated sync support in our application. Open the project's <strong>src/main/java/com/couchbaselabs/gluon.java</strong> file and include the following:</p> <pre> <code> package com.couchbaselabs; import com.couchbaselabs.views.PrimaryView; import com.couchbaselabs.views.SecondaryView; import com.gluonhq.charm.glisten.application.MobileApplication; import com.gluonhq.charm.glisten.visual.Swatch; import javafx.scene.Scene; public class gluon extends MobileApplication { public static final String PRIMARY_VIEW = HOME_VIEW; public static final String SECONDARY_VIEW = "Secondary View"; public CouchbaseSingleton couchbase; @Override public void init() { addViewFactory(PRIMARY_VIEW, () -> new PrimaryView(PRIMARY_VIEW).getView()); addViewFactory(SECONDARY_VIEW, () -> new SecondaryView(SECONDARY_VIEW).getView()); } @Override public void postInit(Scene scene) { Swatch.BLUE.assignTo(scene); scene.getStylesheets().add(gluon.class.getResource("style.css").toExternalForm()); try { this.couchbase = CouchbaseSingleton.getInstance(); this.couchbase.startReplication(new URL("https://localhost:4984/fx-example/"), true); } catch (Exception e) { e.printStackTrace(); } } } </code> </pre> <p>Really we only care about the <code>startReplication</code> line in the <code>postInit</code> method. Once we call it, replication will happen in both directions, continuously.</p> <h2>Conclusion</h2> <p>You just saw how to create a Java desktop application with Gluon and Couchbase. Using Gradle you can build and run the application and with a few revisions it can be converted to Android as well.</p> <p>The full source code to this project can be found on GitHub <a href="https://github.com/couchbaselabs/couchbase-lite-gluon-example">here</a>.</p> </textarea> |