React Native permite crear aplicaciones para Android con aspecto nativo utilizando únicamente JavaScript. En este caso, React Native se encarga de gestionar el estado de la interfaz de usuario y sincronizarlo con los modelos. Y por suerte para nosotros, podemos utilizar Couchbase Lite para añadir sincronización y persistencia a una aplicación React Native. En este tutorial, aprenderás a construir una aplicación sencilla para guardar documentos y replicarlos a Pasarela de sincronización. Estos son los conceptos básicos que aprenderás:
- Crear un proyecto básico con Couchbase Lite Android y Couchbase Lite Java Listener
- Integración de React Native en su proyecto
- Añadir modelos y componentes de interfaz de usuario con JavaScript
- Configuración de Couchbase Sync Gateway
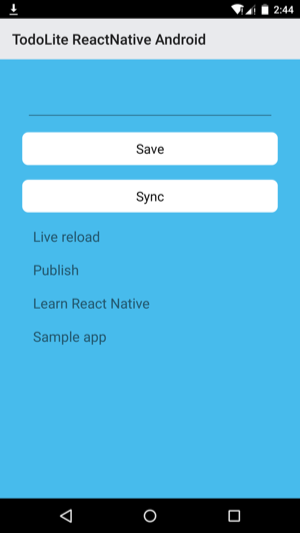
Aquí tienes un adelanto de lo que vas a construir:
Puede descargar el proyecto completo en GitHub.
Requisitos previos
- Node.js 4.0 o superior
- Android Studio y un emulador
Primeros pasos
En esta sección, crearás un nuevo proyecto de Android Studio desde cero y integrar React Native a ella.
Nuevo proyecto Android Studio
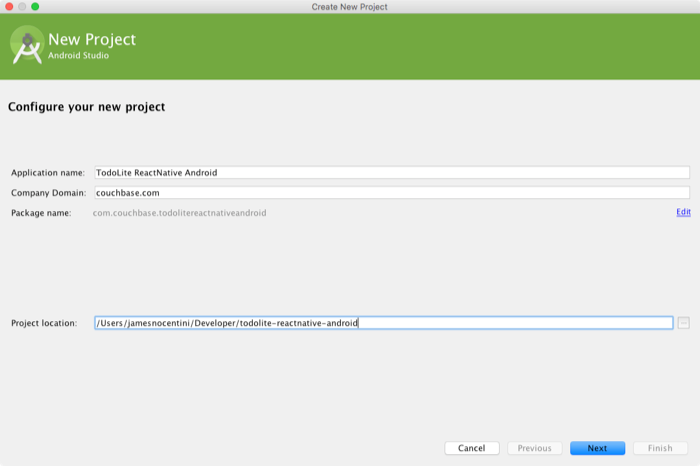
Antes de empezar a escribir algo de JavaScript necesitas crear un nuevo proyecto en Android Studio con todas las dependencias. Abre Android Studio y en la pantalla de bienvenida selecciona Nuevo proyecto. En la ventana Nuevo proyecto, introduzca TodoLite ReactNative Android para el nombre de la aplicación y todolite-reactnative-android para el nombre de la carpeta:
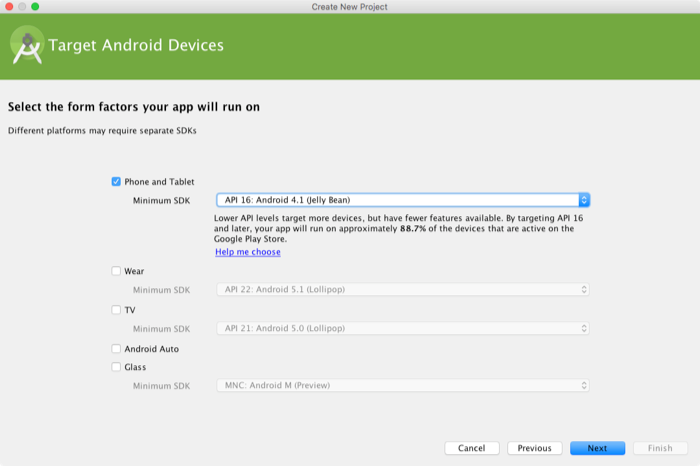
Establezca el SDK mínimo requerido en API 16: Android 4.1 o posterior y utilizar la API de Android recomendada actualmente. Después de rellenar los campos, la ventana Nuevo proyecto debería tener este aspecto:
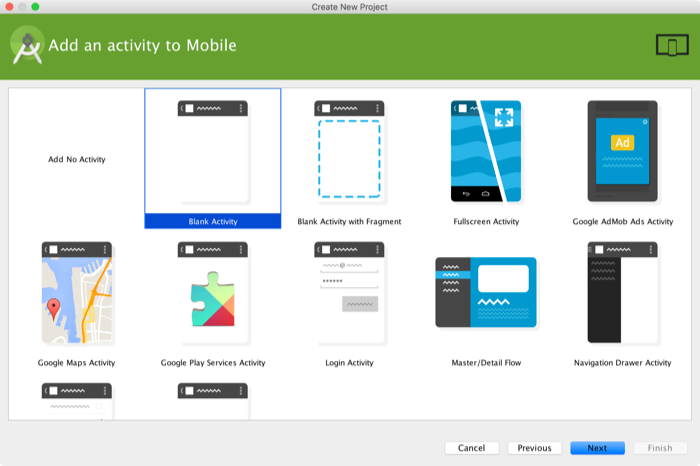
Haga clic en Siguiente y elija Actividad en blanco plantilla:
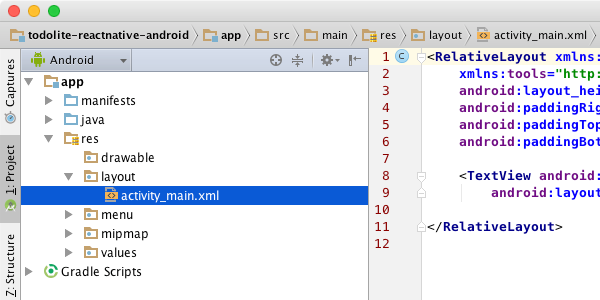
Haga clic en Acabado y debería ver lo siguiente en el navegador de proyectos:
Agrupación de dependencias
Expanda la carpeta de aplicaciones y abra la carpeta build.gradle archivo. Asegúrese de abrir el que se encuentra en la carpeta aplicación (también llamada módulo) y añada lo siguiente en la carpeta android sección:
|
1 2 3 4 5 6 7 |
// workaround for "duplicate files during packaging of APK" issue // see https://groups.google.com/d/msg/adt-dev/bl5Rc4Szpzg/wC8cylTWuIEJ packagingOptions { exclude 'META-INF/ASL2.0' exclude 'META-INF/LICENSE' exclude 'META-INF/NOTICE' } |
A continuación, abra build.gradle en la raíz (también llamado archivo gradle a nivel de proyecto) y añade una referencia al repositorio Maven de Couchbase:
|
1 2 3 4 5 6 7 8 |
allprojects { repositories { jcenter() maven { url "https://files.couchbase.com/maven2/" } } } |
Ahora, añada las siguientes líneas al nivel superior dependencias sección:
|
1 2 3 4 5 6 7 8 9 10 |
dependencies { compile fileTree(dir: 'libs', include: ['*.jar']) testCompile 'junit:junit:4.12' compile 'com.android.support:appcompat-v7:23.1.0' compile 'com.couchbase.lite:couchbase-lite-android:1.1.0' compile 'com.couchbase.lite:couchbase-lite-java-listener:1.1.0' compile 'com.couchbase.lite:couchbase-lite-java-javascript:1.1.0' compile 'com.facebook.react:react-native:0.13.0' } |
En la barra de herramientas de Android Studio, haz clic en Sincronizar proyecto con archivos Gradle.
Configuración de Couchbase Lite y el Listener
Abrir AndroidManifest.xml situado en app/src/main y añade los permisos:
|
1 2 3 |
La actividad React Native Android
Necesitas añadir algo de código nativo para iniciar el tiempo de ejecución de React Native y conseguir que renderice algo. Reemplaza el contenido de MainActivity.java con lo siguiente y le explicaremos lo que ocurre a continuación:
|
1 2 3 4 5 6 7 8 9 10 11 12 13 14 15 16 17 18 19 20 21 22 23 24 25 26 27 28 29 30 31 32 33 34 35 36 37 38 39 40 41 42 43 44 45 46 47 48 49 50 51 52 53 54 55 56 57 58 59 60 61 62 63 64 65 66 67 68 69 70 71 72 73 74 75 76 77 78 79 80 81 82 83 84 85 86 87 88 89 90 91 92 93 94 95 96 97 98 99 100 101 102 103 104 105 106 107 108 109 110 111 112 113 114 115 116 117 118 |
public class MainActivity extends Activity implements DefaultHardwareBackBtnHandler { private ReactRootView mReactRootView; private ReactInstanceManager mReactInstanceManager; private final String TAG = "TodoLite"; private static final int DEFAULT_LISTEN_PORT = 5984; private int listenPort; private Credentials allowedCredentials; @Override protected void onCreate(Bundle savedInstanceState) { super.onCreate(savedInstanceState); Log.d(TAG, "onCreate method called"); // 1 mReactRootView = new ReactRootView(this); mReactInstanceManager = ReactInstanceManager.builder() .setApplication(getApplication()) .setBundleAssetName("index.android.bundle") .setJSMainModuleName("index.android") .addPackage(new MainReactPackage()) .setUseDeveloperSupport(BuildConfig.DEBUG) .setInitialLifecycleState(LifecycleState.RESUMED) .build(); mReactRootView.startReactApplication(mReactInstanceManager, "TodoLite-ReactNative-Android", null); setContentView(mReactRootView); initCBLite(); } private void initCBLite() { try { // 2 allowedCredentials = new Credentials("", ""); // 3 View.setCompiler(new JavaScriptViewCompiler()); // 4 AndroidContext context = new AndroidContext(this); Manager.enableLogging(Log.TAG, Log.VERBOSE); Manager.enableLogging(Log.TAG_SYNC, Log.VERBOSE); Manager.enableLogging(Log.TAG_QUERY, Log.VERBOSE); Manager.enableLogging(Log.TAG_VIEW, Log.VERBOSE); Manager.enableLogging(Log.TAG_CHANGE_TRACKER, Log.VERBOSE); Manager.enableLogging(Log.TAG_BLOB_STORE, Log.VERBOSE); Manager.enableLogging(Log.TAG_DATABASE, Log.VERBOSE); Manager.enableLogging(Log.TAG_LISTENER, Log.VERBOSE); Manager.enableLogging(Log.TAG_MULTI_STREAM_WRITER, Log.VERBOSE); Manager.enableLogging(Log.TAG_REMOTE_REQUEST, Log.VERBOSE); Manager.enableLogging(Log.TAG_ROUTER, Log.VERBOSE); Manager manager = new Manager(context, Manager.DEFAULT_OPTIONS); // 5 listenPort = startCBLListener(DEFAULT_LISTEN_PORT, manager, allowedCredentials); Log.i(TAG, "initCBLite() completed successfully with: " + String.format( "https://%s:%s@localhost:%d/", allowedCredentials.getLogin(), allowedCredentials.getPassword(), listenPort)); } catch (final Exception e) { e.printStackTrace(); } } private int startCBLListener(int listenPort, Manager manager, Credentials allowedCredentials) { LiteListener listener = new LiteListener(manager, listenPort, allowedCredentials); int boundPort = listener.getListenPort(); Thread thread = new Thread(listener); thread.start(); return boundPort; } @Override protected void onPause() { super.onPause(); if (mReactInstanceManager != null) { mReactInstanceManager.onPause(); } } @Override protected void onResume() { super.onResume(); if (mReactInstanceManager != null) { mReactInstanceManager.onResume(this); } } @Override public void onBackPressed() { if (mReactInstanceManager != null) { mReactInstanceManager.onBackPressed(); } else { super.onBackPressed(); } } @Override public boolean onKeyUp(int keyCode, KeyEvent event) { if (keyCode == KeyEvent.KEYCODE_MENU && mReactInstanceManager != null) { mReactInstanceManager.showDevOptionsDialog(); return true; } return super.onKeyUp(keyCode, event); } @Override public void invokeDefaultOnBackPressed() { super.onBackPressed(); } } |
Aquí están pasando algunas cosas:
- Usted crea una Actividad que crea un
ReactRootViewinicia una aplicación React en su interior y la establece como vista de contenido principal. A continuación, llama a la aplicacióninitCBLiteque hace algunas cosas. - Aquí se definen un nombre y una contraseña vacíos que serán utilizados por el Listener. Esto significa que, en teoría, cualquiera podría acceder a su base de datos. Esto está bien para este tutorial, pero en la producción que reemplazaría la línea con
nuevas Credenciales(). - Conecta el componente para compilar el JavaScript Views. No vamos a usar Couchbase Views en este tutorial todavía pero puede ser útil.
- Instanciar el
Directory activar el registro. - Inicie Couchbase Listener introduciendo el puerto de escucha, la instancia del gestor y las credenciales seguras.
Eso es todo por la parte de Android, ¡ahora puedes centrar tu atención en JavaScript!
JavaScript Land
En la carpeta raíz de tu proyecto, ejecuta:
|
1 2 3 |
$ npm init $ npm install --save react-native $ curl -o .flowconfig https://raw.githubusercontent.com/facebook/react-native/master/.flowconfig |
Esto crea un módulo node para tu aplicación y añade la dependencia react-native npm. Ahora abre el módulo paquete.json y añada esta línea dentro del archivo guiones campo:
|
1 |
"start": "node_modules/react-native/packager/packager.sh" |
Hola Mundo
Copia y pega el siguiente código en un nuevo index.android.js en la carpeta raíz:
|
1 2 3 4 5 6 7 8 9 10 11 12 13 14 15 16 17 18 19 20 21 22 23 24 25 26 27 28 29 30 31 32 33 34 35 36 37 38 39 40 41 42 |
/** * Sample React Native App * https://github.com/facebook/react-native */ 'use strict'; var React = require('react-native'); var Home = require('./app/components/Home'); var { AppRegistry, StyleSheet, Text, View, ToolbarAndroid } = React; var styles = StyleSheet.create({ container: { flex: 1, backgroundColor: '#111111' }, toolbar: { backgroundColor: '#e9eaed', height: 56, } }); var TodoLite = React.createClass({ render: function() { return ( ); } }); AppRegistry.registerComponent('TodoLite-ReactNative-Android', () => TodoLite); |
Construir y correr
Para ejecutar su aplicación, primero debe iniciar el servidor de desarrollo. Para ello, basta con ejecutar el siguiente comando en la carpeta raíz:
|
1 |
npm start |
NOTA: En el momento de escribir esto, es posible que tenga que ejecutar brew update && brew reinstall watchman para actualizar watchman si obtiene el error Error al construir DepdendencyGraph: TypeError: No se puede leer la propiedad 'root' de null.
Ahora construye y ejecuta tu aplicación Android en una nueva pestaña de Terminal:
|
1 |
./gradlew installDebug |
Ábrelo en el simulador de Android y verás lo siguiente:
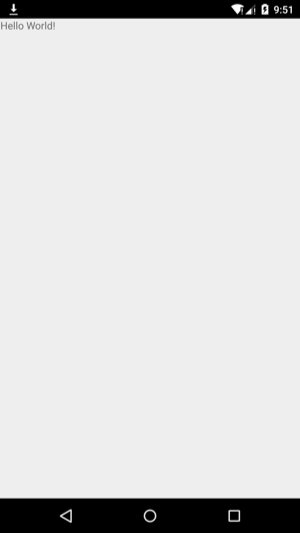
¡Bien hecho en conseguir el entorno de desarrollo en funcionamiento! React Native incluye grandes características como la recarga en vivo que hacen que sea mucho más fácil iterar sobre la interfaz de usuario de la aplicación, pero primero debes definir los modelos y métodos para persistir documentos a la base de datos Couchbase Lite.
Una aplicación Todo
Una API sencilla
Crear un nuevo archivo app/utils/api.js y añade lo siguiente:
|
1 2 3 4 5 6 7 8 9 10 11 12 13 14 15 16 17 18 19 20 21 22 23 24 25 26 27 28 29 30 31 32 33 34 35 36 37 38 39 40 41 42 43 44 45 46 47 48 49 50 51 52 53 54 55 56 57 |
var api = { // 1 localDatabaseUrl: 'https://localhost:5984', // 2 remoteDatabaseUrl: 'https://localhost:4984', // 3 saveTodo(title){ return fetch(this.localDatabaseUrl + '/todos', { method: 'post', headers: { 'Content-Type': 'application/json' }, body: JSON.stringify({ type: 'list', title: title }) }).then((res) => res.json()); }, // 4 getTodos(){ return fetch(this.localDatabaseUrl + '/todos/_all_docs?include_docs=true').then((response) => { if (response.status !== 200) { return fetch(this.localDatabaseUrl + '/todos', { method: 'put', headers: { 'Accept': 'application/json', 'Content-Type': 'application/json' }, body: JSON.stringify({ok: true}) }).then((res) => res.json()); } return response.json(); }) }, // 5 startSync(){ return fetch(this.localDatabaseUrl + '/_replicate', { method: 'post', headers: { 'Content-Type': 'application/json' }, body: JSON.stringify({ source: 'todos', target: this.remoteDatabaseUrl + '/todos', continuous: true }) }).then((res) => res.json()); } }; module.exports = api; |
Esto es lo que estás haciendo:
- Declara el endpoint en el que se ejecuta el Couchbase Listener.
- En este caso, la base de datos remota es Sync Gateway. Esta se sustituiría por su instancia de producción de Sync Gateway.
- El método para persistir un documento de tarea.
- Aquí, obtendrás todos los documentos de Couchbase Lite.
- Inicia una replicación push desde la base de datos de Couchbase Lite a Sync Gateway. También podría haber una replicación pull.
Una vez creada la API básica, puedes dedicarte a crear la interfaz de usuario.
Construir la interfaz de usuario
Crear un nuevo archivo en app/components/Home.js con lo siguiente:
|
1 2 3 4 5 6 7 8 9 10 11 12 13 14 15 16 17 18 19 20 21 22 23 24 25 26 27 28 29 30 31 32 33 34 35 36 37 38 39 40 41 42 43 44 45 46 47 48 49 50 51 52 53 54 55 56 57 58 59 60 61 62 63 64 65 66 67 68 69 70 71 72 73 74 75 76 77 78 79 80 81 82 83 84 85 86 87 88 89 90 91 92 93 94 95 96 97 98 99 100 101 102 103 104 105 106 107 108 109 110 111 112 113 114 115 116 117 118 119 120 121 122 123 124 125 126 127 128 129 130 131 132 133 134 135 136 137 138 139 140 141 142 143 144 145 146 147 148 |
var React = require('react-native'); var api = require('./../utils/api'); var { Text, View, StyleSheet, ScrollView, TextInput, TouchableOpacity } = React; var styles = StyleSheet.create({ container: { flex: 1 }, buttonText: { fontSize: 18, color: 'white', alignSelf: 'center' }, rowContainer: { padding: 10 }, rowTitle: { color: '#48BBEC', fontSize: 16 }, rowContent: { fontSize: 19 }, mainContainer: { flex: 1, padding: 30, marginTop: 65, flexDirection: 'column', justifyContent: 'center', backgroundColor: '#48BBEC' }, searchInput: { height: 50, padding: 4, marginRight: 5, fontSize: 23, borderWidth: 1, borderColor: 'white', borderRadius: 8, color: 'white', margin: 5 }, buttonText: { fontSize: 18, color: '#111', alignSelf: 'center' }, button: { height: 45, flexDirection: 'row', backgroundColor: 'white', borderColor: 'white', borderWidth: 1, borderRadius: 8, marginBottom: 10, marginTop: 10, alignSelf: 'stretch', justifyContent: 'center' }, }); class Home extends React.Component { constructor(props) { super(props); this.state = { newTodo: '', todos: [] }; } componentWillMount() { api.getTodos() .then((res) => { var todos = res.rows.map(function (row) { return row.doc; }); this.setState({ todos: todos }); }); } handleTodoChange(event) { this.setState({ newTodo: event.nativeEvent.text }); } handleSave() { api.saveTodo(this.state.newTodo) .then((res) => { api.getTodos() .then((res) => { var todos = res.rows.map(function (row) { return row.doc; }); this.refs.inputText.value = ''; this.setState({ todos: todos, newTodo: '' }); }); }); } handleSync() { api.startSync() .then(function(res) { console.log(res); }); } render() { var lists = this.state.todos.map((item, index) => { return ( {item.title} ); }); return ( Save Sync {lists} ); } } Home.propTypes = { lists: React.PropTypes.array.isRequired }; module.exports = Home; |
No te dejes intimidar por la longitud de este fragmento de código. Todo lo que estamos haciendo aquí es declarar estilos y utilizar algunos componentes integrados de React Native UI para mostrar una entrada de texto, botones y etiquetas de texto. Puedes encontrar la lista de componentes UI incorporados aquí.
Actualización del componente raíz
El último paso antes de que pueda ver su gran trabajo en acción es actualizar index.android.js para cargar el Inicio componente. Por debajo del requiere para importar react-nativeañade lo siguiente:
|
1 |
var Home = require('./app/components/Home'); |
A continuación, sustituya el valor de retorno de la función render con el método . Utilice el ⌘ + m en Genymotion para recargar el JavaScript y deberías ver una pantalla azul brillante. ¡Eso son buenas noticias!
Replicaciones con Couchbase Sync Gateway
Descargue Sync Gateway desde el siguiente enlace y descomprima el archivo:
https://www.couchbase.com/nosql-databases/downloads
En un nuevo archivo llamado sync-gateway-config.jsonpega lo siguiente:
|
1 2 3 4 5 6 7 8 9 |
{ "log": ["*"], "databases": { "todos": { "server": "walrus:", "users": { "GUEST": { "disabled": false, "admin_channels": ["*"] } } } } } |
Y ejecute Sync Gateway con este archivo de configuración:
|
1 |
~/Downloads/couchbase-sync-gateway/bin/sync_gateway /path/to/project/sync-gateway-config.json |
Para que el punto final de Sync Gateway sea accesible dentro del emulador de Android VM, es necesario habilitar un puerto desde el host a la VM. En Terminal, ejecute lo siguiente:
|
1 |
adb reverse tcp:4984 tcp:4984 |
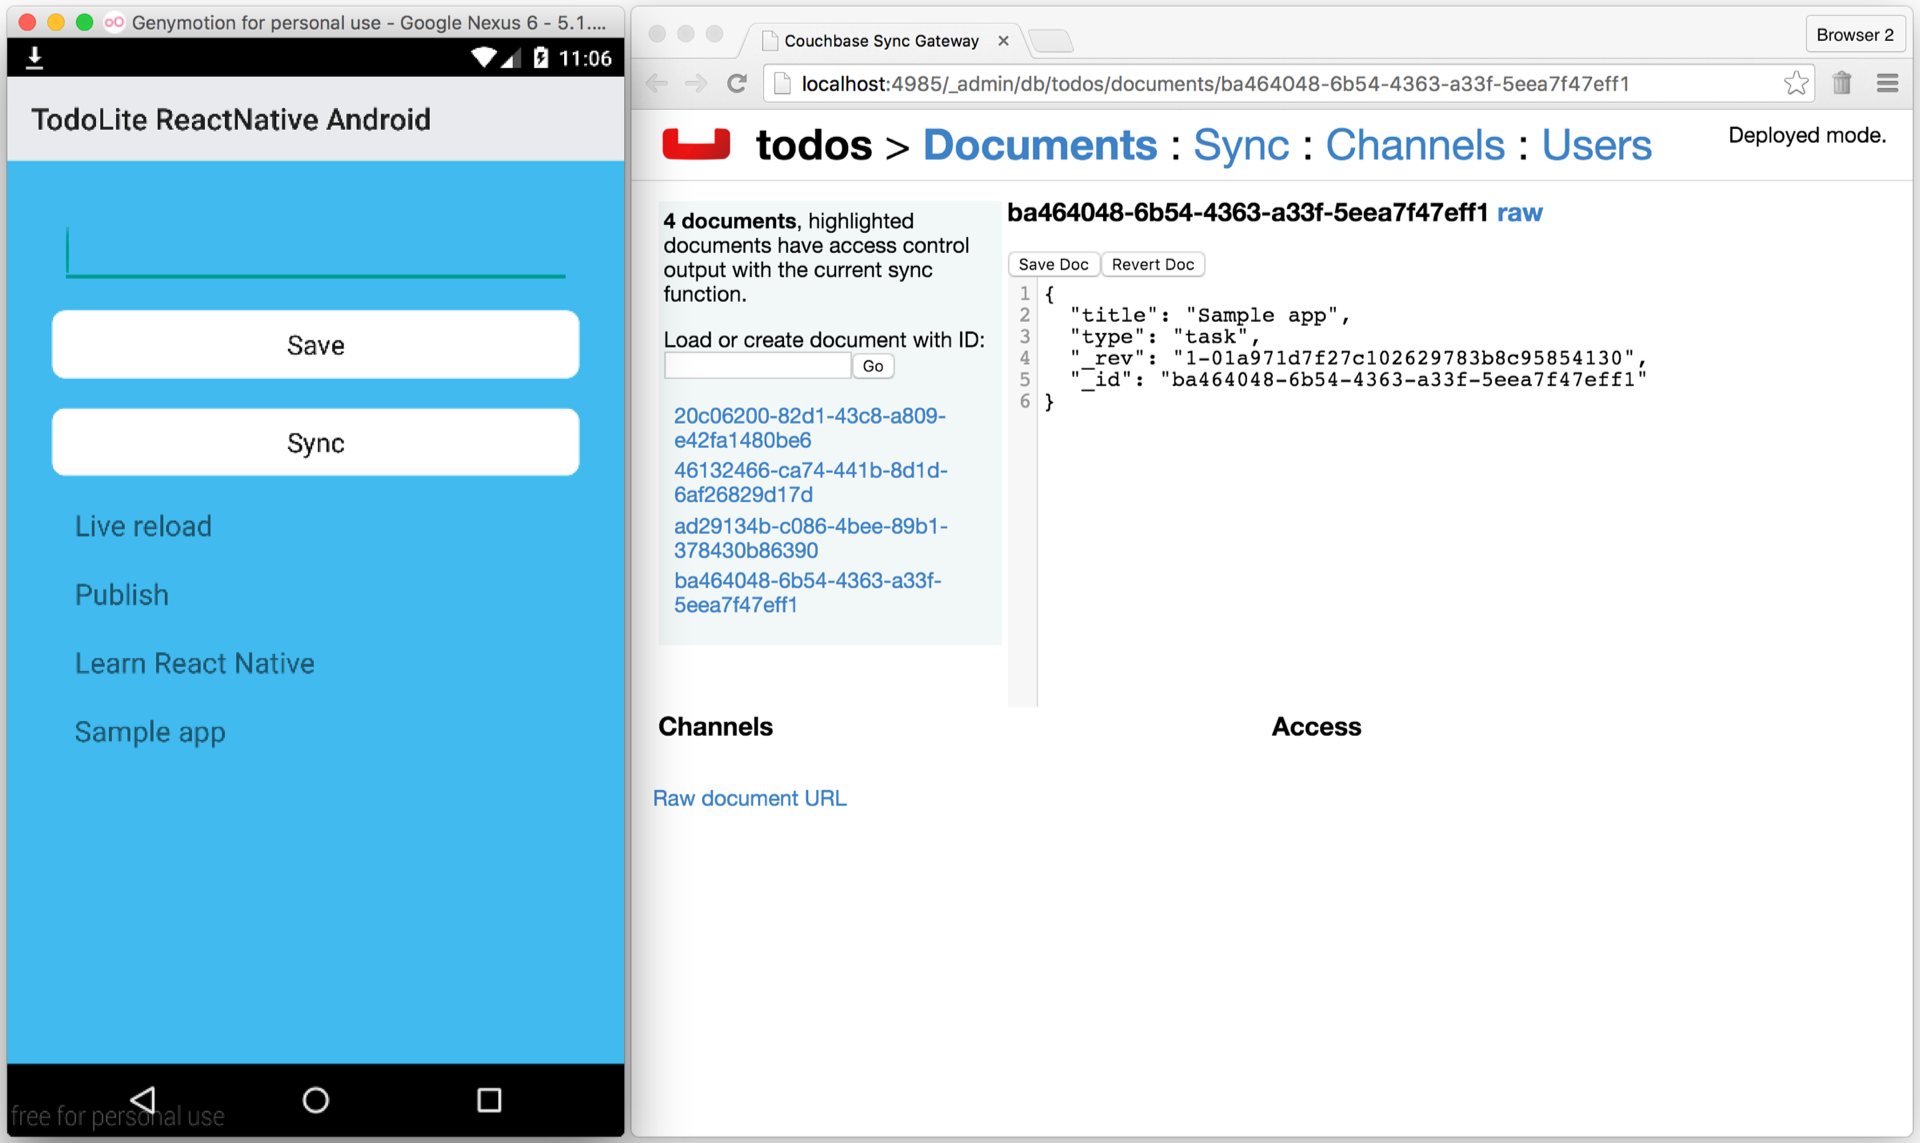
Abra la interfaz de administración para supervisar los documentos guardados en Sync Gateway:
https://localhost:4985/_admin/
Pruebe a añadir más documentos de tareas y observe cómo se envían automáticamente a Sync Gateway.
¿Qué hacer a partir de ahora?
¡Enhorabuena! Has construido tu primera aplicación React Native Android + Couchbase Lite. Ahora estás listo para añadir más componentes como los siguientes:
- Vistas de Couchbase Lite para escribir consultas personalizadas
- Autenticación de usuarios en una réplica
- Despliegue continuo del archivo de configuración de Sync Gateway y otros componentes
Atentos a un tutorial sobre cómo depurar tu aplicación React Native Android + Couchbase Lite usando Charles y Genymotion.
No dudes en compartir tus opiniones, hallazgos o preguntas en los comentarios o en los foros. ¡Hasta pronto!
*Abre AndroidManifest.xml ubicado en app/src/main y añade los permisos:*
la linea de arriba indica los permisos pero no se encuentra ninguno en el recuadro que aparece debajo de ella. por favor agregue esas lineas.