First of three articles focused on building Fullstack with React and GraphQL with Express and Couchbase Server.
- Setting up a NoSQL Couchbase Server (Part 1)
- Building an Express-GraphQL API (Part 2)
- Create Apollo GraphQL Client in React (Part 3)
- Final Source Code
Fullstack React and GraphQL Application
Let’s build a Fullstack React application using GraphQL. This is an approachable tutorial but we do expect some familiarity with JavaScript, React, GraphQL concepts, and NoSQL. We also use Docker to provision our single node Couchbase Server. We will connect to Couchbase via Express-GraphQL, built with Node JS and Express JS using express-graphql. Then we will query the API in React using the Apollo GraphQL client.
A GraphQL High-Level Overview
Before we get started building this app, I want to talk about our choice to use a GraphQL API rather than a traditional REST API, then we will get to our database setup.
GraphQL is a strongly typed query language for APIs. It’s a declarative way to fetch data, quickly being adopted by the JavaScript community and other communities as well. Allowing granular control over data fetches and time saved making additional API calls. All queries and mutations happen at one endpoint rather than multiple endpoints like REST. This means less code to write managing URLs in React. Also a smaller footprint over the wire. For more GraphQL vs REST info, I suggest a talk by Nate Barbettini titled: API Throwdown: RPC vs REST vs GraphQL.
If you are familiar with JSON you’ll find GraphQL’s query syntax simple to use and your data easy to explore with GraphiQL, an in-browser IDE that we use to test our queries and discover what’s possible with any GraphQL API.
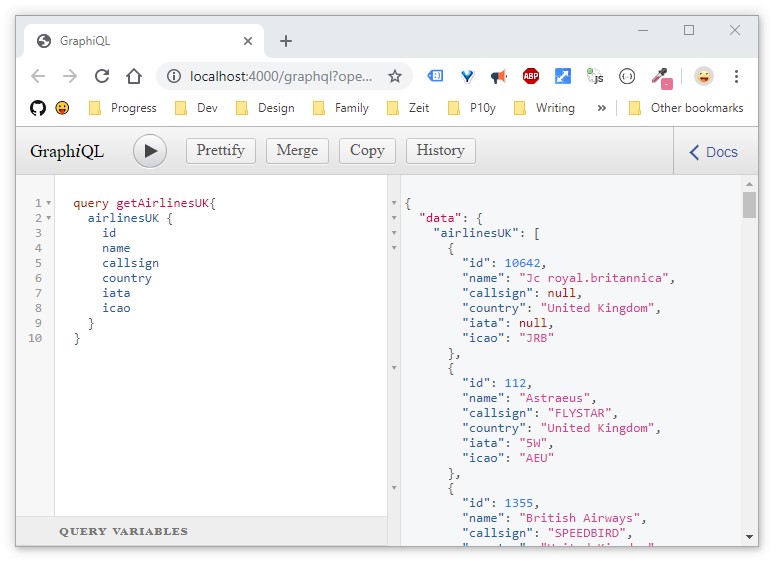
This GraphiQL IDE will be helpful later when we need to test our own GraphQL endpoints. GraphiQL is available for every GraphQL Server. For instance, GitHub has one of the oldest public GraphQL APIs (being an early adopter). It allows you to explore that data graph using the GitHub GraphQL API v4 Explorer.
Note: GitHub had one of the most popular public RESTful APIs known to the developer community and in 2016 they switched to a GraphQL application instead of REST for their version 4 of the GitHub API. This greatly reduces the effort a developer has to go through to use GitHub’s API and makes the developer experience better. A request is simply text sent over an HTTP POST in a syntax that looks like a hybrid between JSON and JS functions. The response is a lightweight (only what I asked for) response from the GraphQL API. These are only a few of the benefits devs get from the switch from REST to GraphQL by GitHub.
The Couchbase Datastore
To get started on our project, we need data. We will approach this project as if we have a client that already has a database, specifically, they are using Couchbase Server as a document store.
The Couchbase Server NodeJS SDK provides the tools needed to connect via Node JS and Express to our Couchbase Server and its data.
FYI, there are many other SDKs available besides Node JS for Couchbase Server, including C, .NET, Go, Java, PHP, Python, and Scala.
Put Your SQL Skills to Work in NoSQL
Couchbase Server leverages your SQL skills by way of the N1QL (SQL for JSON) Database Query Language which allows you to query Couchbase, a NoSQL document datastore with a syntax nearly identical to SQL.
Install and Run Couchbase with Docker
If you choose to download and install Couchbase locally and do not want to use Docker, simply skip to the manual install instructions. For help with Docker itself, visit docs.docker.com.
Get the couchbase image:
|
1 |
docker pull couchbase |
Let’s clone an existing repo to get the dockerfile and configuration.sh file that we need:
|
1 |
git clone https://github.com/httpJunkie/couchbase-server && cd couchbase-server && chmod +x configure.sh |
Build a new image from Dockerfile which uses the official couchbase Docker image as its base:
|
1 |
docker build -t couchbase-server . |
Run that new image:
|
1 |
docker run -d -p 8091-8094:8091-8094 -p 11210:11210 -e CB_ADMIN_USER=Administrator -e CB_ADMIN_PASS=password --network="bridge" --name cbs1 couchbase-server |
If you have issues running the last command, it might be that you do not have a network named “bridge”. In this case, run docker network ls and find the name of your default network name and driver and use it instead.
At this point, we can visit localhost:8091 and login with the Administrator & password.
Installing Couchbase locally
If you installed with Docker you can skip to the next section.
The installation process is straight forward and we have you covered on Linux, Mac, and Windows.
Once installed, you can access the Couchbase Server Web Console using localhost:8091.
From this screen, you can click “Setup New Cluster“.
The cluster name is up to you and represents all of your Couchbase buckets. The admin user and password is a server admin account to log into the dashboard for the entire server, it is not a user and pass to connect to a specific bucket from within our Express application. We’ll cover that later.
I Configured my cluster with the default services and memory quotas.
Explore Our Bucket in the Console
Let’s access the Couchbase Server Dashboard and click on “Servers” to see our initially created server.
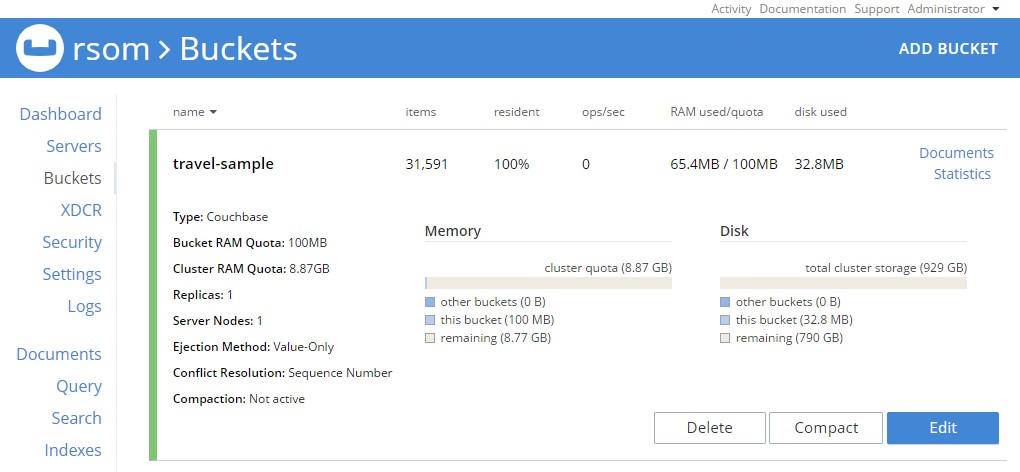
Next click on “Buckets”. A Couchbase Bucket is a document collection. You can “Add Bucket” to create your own document collection, or add sample data. If you followed the Docker file instructions the travel-sample bucket should already be loaded and visible on this screen.
Using this sample database will allow us to hit the ground running with our Fullstack React and GraphQL application and we start with Express to build our API and this will make things easy for us as we already have data and indexes setup.
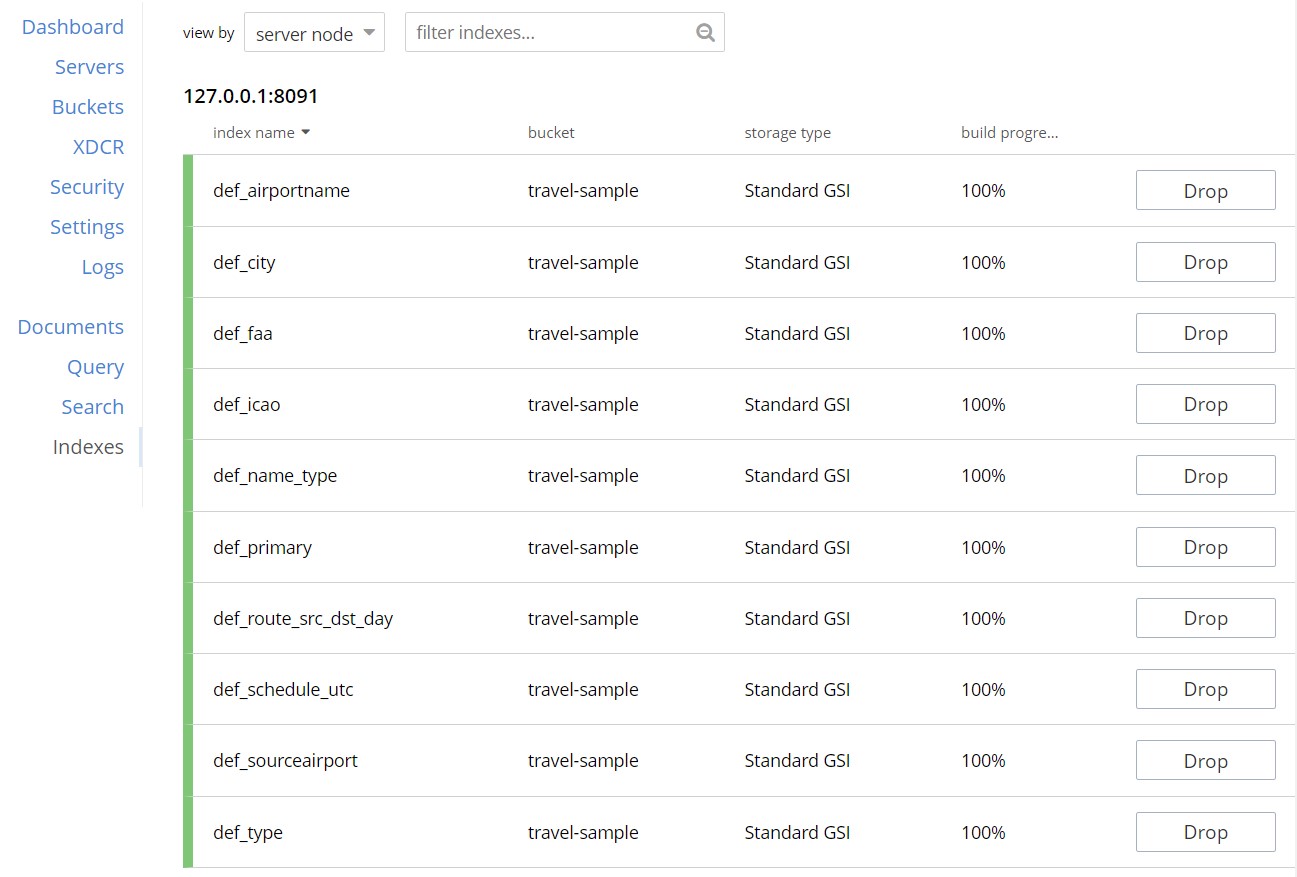
Indexes are set up automatically in this travel-sample bucket as part of the script used to install the bucket. These indexes are required in order to use the N1QL query language (SQL for JSON).
If you want to learn more and create your own bucket and indexes, check out this article!
Your Bucket should be similar to the bucket in the image below:
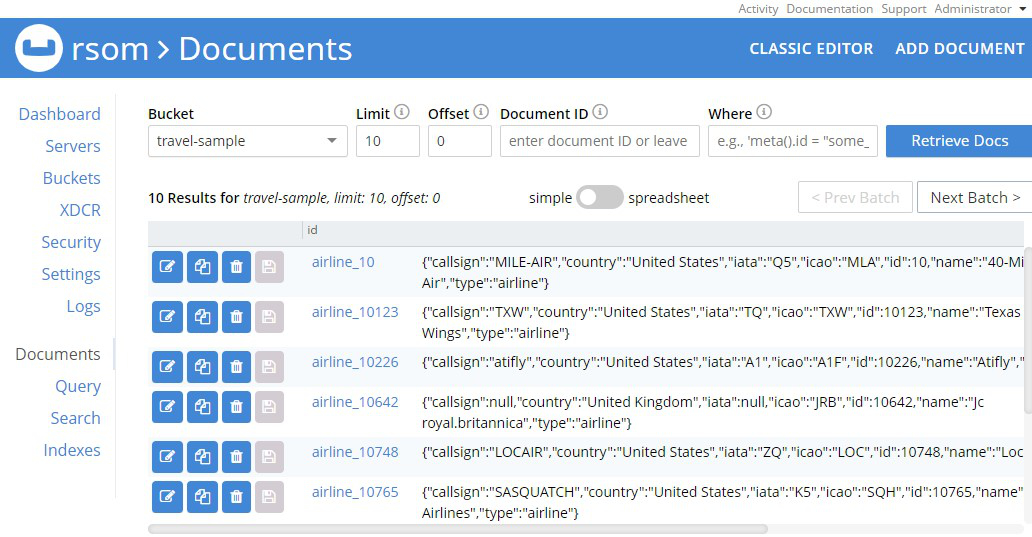
If we click on the “Documents” button we can see some of the data in our Bucket:
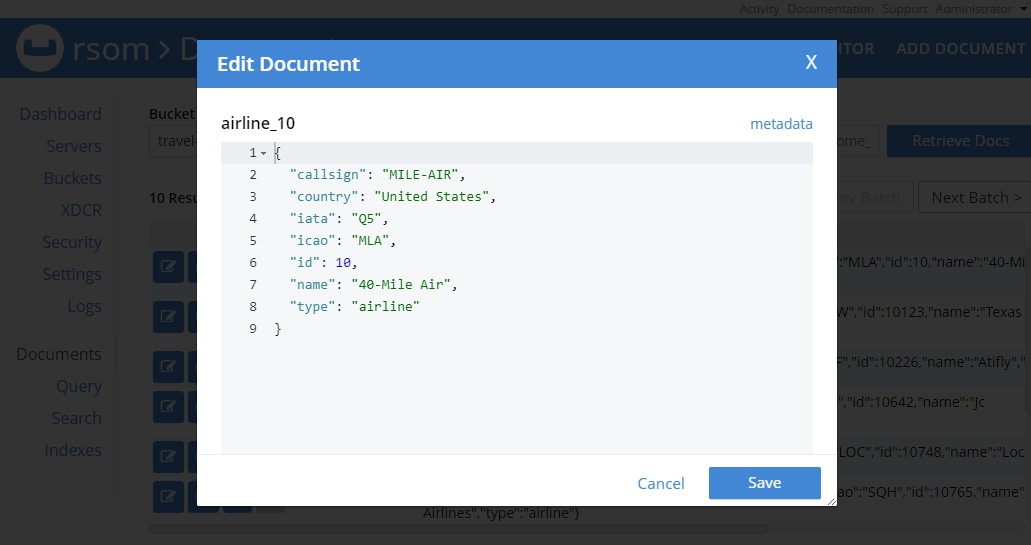
Clicking on the “Edit Document as JSON” to see the JSON for that specific key’s value and we can even edit the data from here. Try it!
Before moving on, we want to click on the “Security” tab and set up a user to connect to this bucket.
Once on the “Security” page, click on “Create User”. Add a username and password specific for connecting to the bucket from our Express application. I used my own name and it will match the info in the source code for the project. So remember to use your name and update the code as needed.
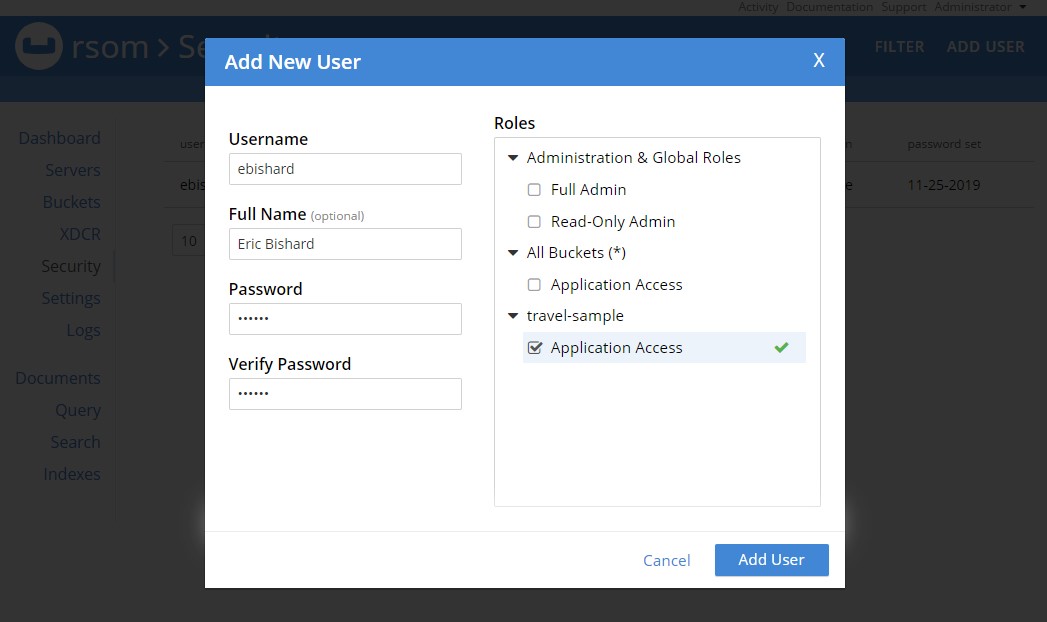
Make sure to check the “Application Access” checkbox for our travel-sample bucket. That’s all we need. Remember your username and password, as we will need this to connect.
Bucket Indexes
For this demo, our indexes were automatically generated. If you wanted to add indexes, you can add them using the “Query” tab and execute the SQL needed to create them. If you are familiar with SQL, creating indexes for Couchbase will be intuitive!
If you want to learn more about indexes in Couchbase, take a look at a recent article showing how to use the Index Advisor Service for Couchbase. This is a new tool provided alongside our latest Couchbase Server 6.5 release. Another point of interest may also be our Global Secondary Indexes documentation.
Here are the indexes for the travel-sample bucket that we install with Couchbase Server.
A Quick Mention about N1QL Queries
Something else to mention about Couchbase Server is the language we use to querying our documents. Couchbase Server uses N1QL. N1QLis a SQL-like syntax that anyone from a relational background should be able to grok. It’s especially useful for querying collections of documents. We cover some basics in our next article when we build our GraphQL API.
You can find more information on N1QL in the documentation as well as information about using the couchbase.get method of querying all of which info can be found in our Couchbase Server NodeJS SDK docs.
With Couchbase setup now we can continue and get into the JavaScript portion of building our Fullstack React and GraphQL application. We will move onto building our Express-GraphQL Server next, and then we will build a React client in the last segment.
