Recently, we published a series of articles on the topic of using Couchbase Lite in a React Native application. In this tutorial, you’ll take it one step further and use the recommended Couchbase Lite Module for React Native (available as an npm module). You will add the necessary Couchbase Lite code to complete the Login and List Screens for a simple Todo Application. By the end of the tutorial, you will have covered the following core concepts:
- Creating, deleting a database and documents within it.
- Using Couchbase Views to display List documents by date.
- Replications with Basic Authentication.
- Creating Sync Gateway Users and using a Sync Function.
Requirements
- Node.js 4.0 +
- Xcode 7 or higher
- An iOS simulator or device running iOS 9 or higher
Getting Started
To save some time, I’ve already put together a starter project which contains all the UI code. Go ahead and download it to your preferred directory and unzip the content. Then, from the project directory install the dependencies:
|
1 |
$ npm install |
If it’s not already the case, also make sure to have the React Native CLI globally installed:
|
1 |
$ npm install react-native -g |
Next, start the React Native daemon:
|
1 |
$ react-native start |
Open the Xcode project at ios/UntitledTodoApp.xcodeproj and run it in the simulator or device from Xcode. You should see both screens:
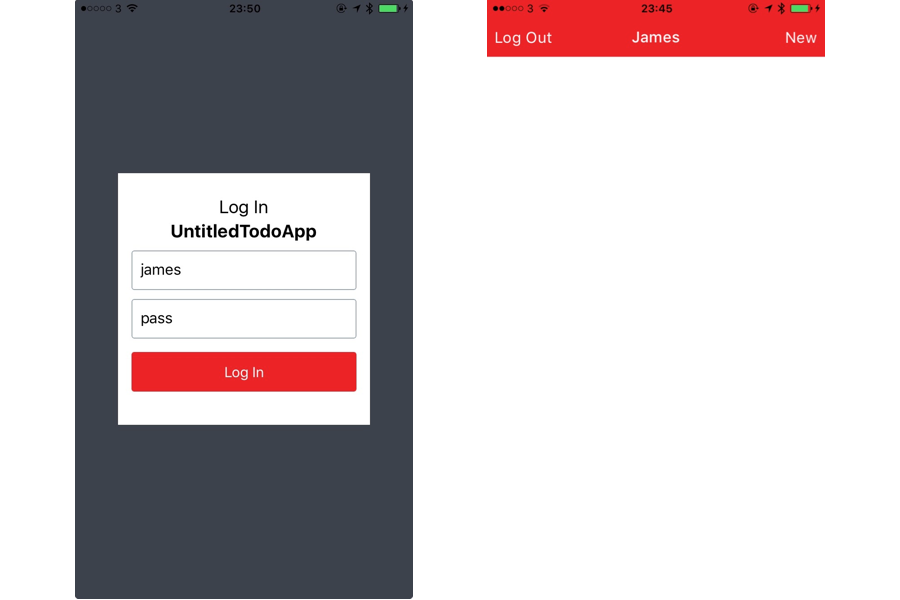
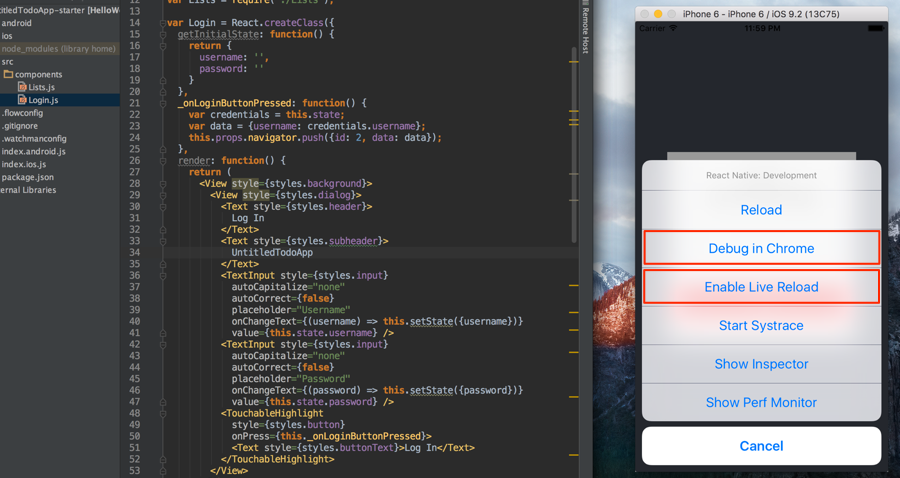
Notice that the Log Out button doesn’t take you back to the LogIn Screen and nothing is displayed in the ListView. Don’t worry, you will fix that in the next section :) Remember to enable LiveReload using the Cmd+D shortcut (and Chrome Debugging might be handy at times).
Local Persistence with Couchbase Lite
The starter project already contains the React Native Couchbase Lite Module (you can follow the repo instructions to use it in another React Native project). In this section, you will learn how to instantiate a new manager, database and persist documents locally.
Create a new file in src/database.js and paste the following:
|
1 2 3 4 5 6 7 8 9 10 11 |
// 1 import {manager, ReactCBLite} from 'react-native-couchbase-lite'; // 2 ReactCBLite.init(5984, 'admin', 'pass'); // 3 var database = new manager('https://admin:pass@localhost:5984/', 'myapp'); // 4 module.exports = database; |
The code does the following:
- Import the
managerandReactCBLiteobjects from the module using the de-structuring assignment syntax in ES6. - Start the Couchbase Lite Listener which serves an HTTP REST API that you will use later.
- Instantiate a manager instance passing the URL of the embedded server and the desired database name.
- Export the object so it can be used throughout the application life-cycle.
Now you can turn your focus to components/Login.js. Add a require statement to use the database object from the previous step:
|
1 |
var database = require('./../database'); |
This component has two input fields and a button, for now you're not going to check if the user exists because Sync Gateway isn't up and running yet. However, you'll need to bootstrap the local database before opening the List View. Replace the body of _onLoginButtonPressed with the following:
|
1 2 3 4 5 6 7 8 9 10 11 12 13 14 15 16 17 18 19 |
var remote = `https://${this.state.username}:${this.state.password}@localhost:4984/todos`; var credentials = this.state; database.createDatabase() .then((res) => { database.replicate('myapp', remote, true); database.replicate(remote, 'myapp', true); var todoViews = { lists: { "map": function (doc) { emit(doc.created_at, doc); }.toString() } }; database.createDesignDocument("_design/todo", todoViews); }).catch((err) => { throw err }); var data = {username: credentials.username}; this.props.navigator.push({id: 2, data: data}); |
Here, you’re creating the database and then registering a design document with a view to query documents by their created_at property.
Next, open Lists.js and require the database object once more:
|
1 |
var database = require('./../database'); |
In the render method, notice the 2 variables leftButtonConfig and rightButtonConfig that are used in the NavigationBar component in the return statement. They correspond to the Log Out and New buttons. The click handlers don’t do anything though so you will change that right away. In the handler field of the object literal leftButtonConfig add:
|
1 2 3 4 5 6 |
database.deleteDatabase() .then((res) => { if (res.ok) { this.props.navigator.pop(); } }); |
You’re simply deleting the database (and all the documents and potential replications in progress with it) and then returning to the LogIn View.
Next, in the handler for the rightButtonConfig add:
|
1 2 3 4 5 6 7 8 9 10 11 12 13 14 15 16 17 18 19 20 21 22 |
AlertIOS.alert( 'New List Title', null, [ { text: 'Save', onPress: (text) => { database.createDocument({ type: 'list', title: text, owner: that.props.data.username, created_at: new Date().getTime() }); } }, { text: 'Cancel', style: 'cancel' } ], 'plain-text' ); |
In this case, you’re displaying an alert dialog to enter the new list title and then persisting it to the database (with the owner field set to the logged in user and created_at field as the current timestamp).
Next, below the getInitialState method add the following to query the persisted documents:
|
1 2 3 4 5 6 7 8 9 10 11 12 13 14 15 16 17 18 19 20 21 |
_redrawListView: function() { // 1 database.queryView('_design/todo', 'lists') .then((res) => { this.setState({ dataSource: this.state.dataSource.cloneWithRows(res.rows) }); }); }, componentWillMount: function() { // 2 var that = this; that._redrawListView(); this.interval = setInterval(function () { that._redrawListView(); }, 100); }, // 3 componentWillUnmount: function() { clearInterval(this.interval); }, |
Here’s the breakdown of what is happening:
_redrawListViewis a private method that queries thelistsview and updates the datasource to display the new rows (if any) on the screen.- In
componentWillMountyou’re using thesetIntervalto check for new documents periodically and update the UI. - Stop the interval method when the component unmounts (i.e. when returning to the LogIn View).
Create a new list and open https://localhost:5984/myapp/_design/todo/_view/lists in your browser. You must provide admin for the username and pass for the password. The JSON response should look like this:
|
1 2 3 4 5 6 7 8 9 10 11 12 13 14 15 16 17 18 19 20 |
{ "offset":0, "rows":[ { "key":1452038776654, "value":{ "owner":"james", "_id":"-_XbsYkL8LNqVDSMuZceW71", "_rev":"1-e62876578d58bcdef321bb50470debf4", "created_at":1452038776654, "title":"Groceries", "type":"list", "_local_seq":2 }, "id":"-_XbsYkL8LNqVDSMuZceW71" }, ... ], "total_rows":2 } |
To display them on the screen you will use the ListView component. It has two mandatory attributes:
dataSourceto provide the data: you can passthis.state.dataSource.renderRowtakes a function that returns aViewobject given a list item.
You’re missing the method to draw the row, below render, add a renderRow method with the following:
|
1 2 3 4 5 6 7 8 9 |
renderRow: function(list) { var list = list.value; return ( {list.title} {list.owner} ); } |
The desired data is held in the value field and you’re displaying the title and owner fields in Text elements. Back in the return statement of the render method, add the ListView below the NavigationBar component like so:
|
1 2 3 4 |
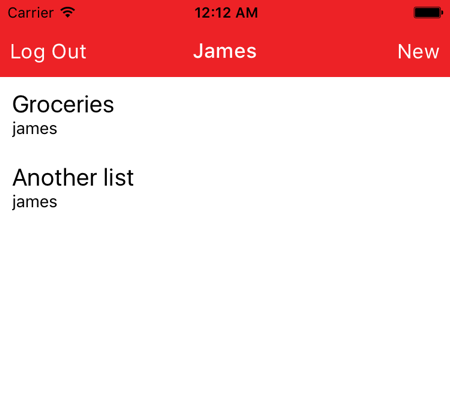
Persist documents and notice the screen updating itself:
Sync Gateway Configuration
In this section, you will use Sync Gateway to introduce bi-directional synchronization and server-side user authentication so multiple users can log in. First, download Sync Gateway from here and in the root directory of the project, create a new file named sync-gateway-config.json with the following JSON:
|
1 2 3 4 5 6 7 8 9 10 11 12 13 14 15 16 17 18 |
{ "log": ["*"], "databases": { "todos": { "users": { "moderator": {"password": "pass", "admin_channels": ["*"]}, "laura": {"password": "pass"}, "james": {"password": "pass"}, "adam": {"password": "pass"} }, "sync": `function(doc, oldDoc) { var channelname = "chan_" + doc.owner channel(channelname); access(doc.owner, channelname); }` } } } |
A few important things to note here are:
- The
GUESTmode is disabled (in fact, it’s the case by default) so any unauthenticated requests will be treated as unauthorized and return a 401 status code. For that matter, 4 different users have been created (with names moderator, laura, james, adam). The user named moderator has access to all channels. - The Sync Function routes a document to a channel named after the
ownerfield and grants theowneraccess to that channel.
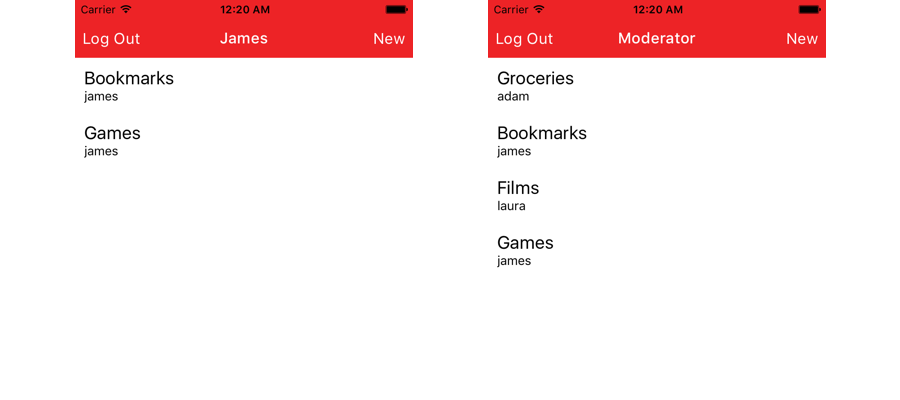
So, in theory, the moderator should see all List documents where as the other users will see their own List documents only.
Start Sync Gateway from the command line:
|
1 |
$ ~/Downloads/couchbase-sync-gateway/bin/sync_gateway ./sync-gateway-config.json |
In Login.js, update the _onLoginButtonPressed as follow:
|
1 2 3 4 5 6 7 8 9 10 11 12 13 14 15 16 17 18 19 20 21 22 23 24 25 26 27 28 29 30 31 32 33 34 35 36 37 38 39 40 41 42 43 44 45 46 47 |
// 1 - Request configuration var remote = `https://${this.state.username}:${this.state.password}@localhost:4984/todos`; var credentials = this.state; var settings = { method: 'POST', headers: { 'Content-Type': 'application/json' }, body: JSON.stringify({ name: credentials.username, password: credentials.password }) }; var that = this; // 2 - Check that the name/password are valid fetch(remote + '/_session', settings) .then((res) => { switch (res.status) { case 200: // 3 - Bootstrap application database.createDatabase() .then((res) => { database.replicate('myapp', remote, true); database.replicate(remote, 'myapp', true); var todoViews = { lists: { "map": function (doc) { emit(doc.created_at, doc); }.toString() } }; database.createDesignDocument("_design/todo", todoViews); }).catch((err) => { throw err }); var data = {username: credentials.username}; that.props.navigator.push({id: 2, data: data}); break; case 401: // 4 - Wrong credentials alert('User not found or password incorrect'); break; default: break; } }); |
Here’s what is happening:
- Construct the URL of the remote database (in this case it’s a Sync Gateway database) and set the name/password JSON fields in the request body.
- Use the POST /_session endpoint to check the name/password with Sync Gateway.
- If the credentials are valid, create the database and once that’s done kick off continuous push/pull replications and register a design document with a view to query document by their
created_atproperty. - If the credentials are invalid, display an alert window.
Run the application and login as different users. If possible, run the app on two devices to observe the continuous replication and different read permissions for the moderator:
Conclusion
In this tutorial, you learnt how to use the React Native Couchbase Lite module to build a simple Todo application where multiple users can log in.
The final project can be found on GitHub.
Feel free to share your feedback, findings or ask any questions in the comments below or in the forums. Talk to you soon!
Hi james,
it seems that this tutorial is obsolete by now, as
import {manager, ReactCBLite} from ‘react-native-couchbase-lite’
returns undefined for ReactCBLite.
Could you please update or point to any actual tutorial where CBL operations from JS perspective are described in such a clean and comprehensive way as you did in this post?