Keycloak, an open-source single sign-on (SSO) and identity management solution, offers seamless integration capabilities with various client applications. In this tutorial, we’ll explore the process of integrating a Security Assertion Markup Language (SAML) client with Keycloak, enabling convenient and secure user authentication.
It is important to note that Keycloak is not tested or validated by Couchbase. Couchbase provides instructions and support for Microsoft Azure AD, Okta, Ping Identity, CyberArk, Google Workspace, and OneLogin.
We will demonstrate how to integrate SAML authentication using a generic SAML provider, in this case Keycloak. While any SAML provider can be utilized, we highly recommend using one of our supported services for optimal compatibility and a seamless integration experience.
Prerequisites
-
- I assume that you have a Keycloak instance up and running
- You have access to Capella as an Organization admin
- SSO has been enabled for your tenant
Step 1: Set Up Keycloak
It is outside the scope of this tutorial to explain how to deploy Keycloak as an Identity Provider. I assume that you already have a functioning Keycloak instance and it is ready to be utilized.
Create a realm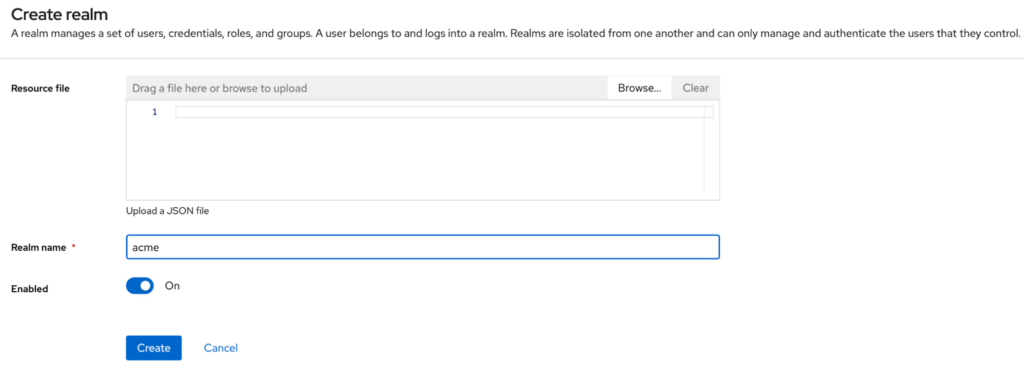
Create a new realm in Keycloak to manage your SAML client’s configuration. In our example, we will call this realm “acme”.
Once the realm is created, we need to save the public key. The easiest way to do that is by opening the SAML Metadata endpoint.
Get the SAML configuration
Please click on the Realm settings on the left side. This will open the realm settings page. At the bottom of this page, there are two Metadata endpoints.
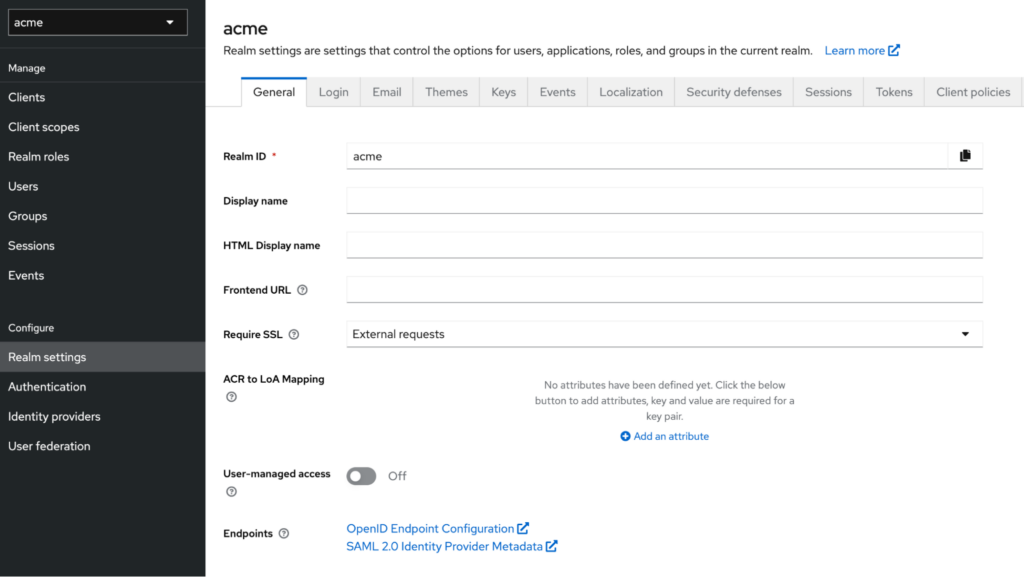
You need to click on the SAML 2.0 Identity Provider Metadata link. The XML contains the SAML Metadata that you will need when you create your Capella SSO configuration.
SAML HTTP-POST binding:
|
1 |
<md:SingleSignOnService Binding="urn:oasis:names:tc:SAML:2.0:bindings:HTTP-POST" Location="https://yourdomain.com/realms/acme/protocol/saml"/> |
The X.509 certificate:
|
1 |
<ds:X509Certificate>MIIClzCCAX8CBg......==</ds:X509Certificate> |
Make a note of these as we will need them in the next steps.
Step 2: Create a realm in Capella
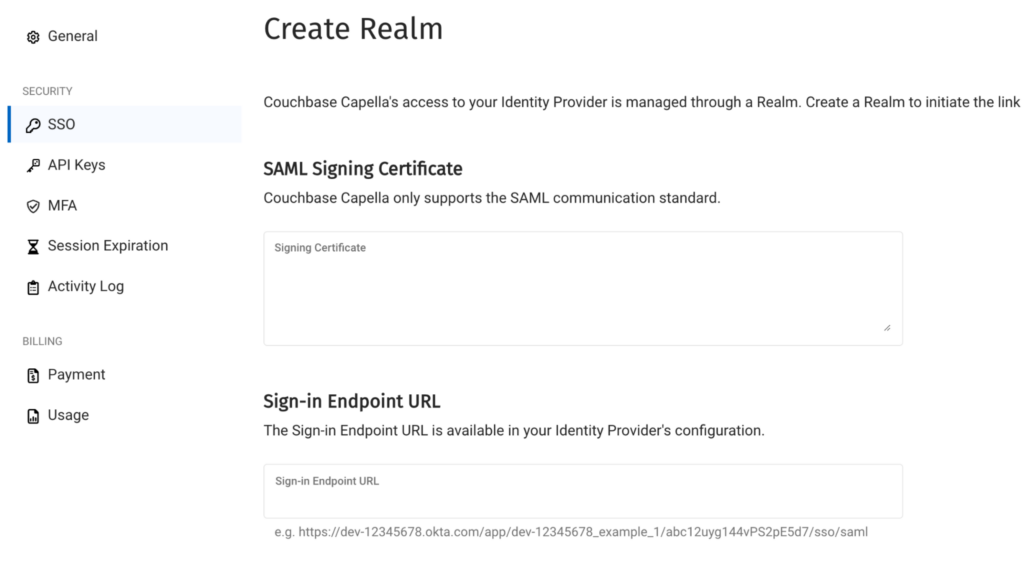
In this step, we will create a Capella realm. In order to set this up, we need to copy the certificate we saved in step one, into the SAML Signing Certificate field. We also have to copy the HTTP_POST binding URL to the Sign-in Endpoint URL field.
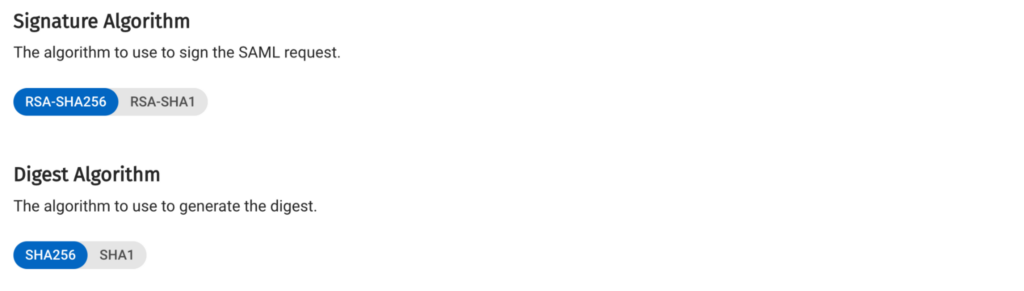
The Signature Algorithm and Digest Algorithm should be the left as default.
Make sure the SAML Protocol Binding field is set up to be HTTP-POST:

At this point you are ready to create the realm.
Step 3: Create a Keycloak SAML client
Display Capella Realm information
At this point, we have created the Capella Realm. Now, we are ready to create a SAML client in Keycloak.
First, we need some information about the Capella realm. Click on the newly created realm name in Capella to display the realm information.
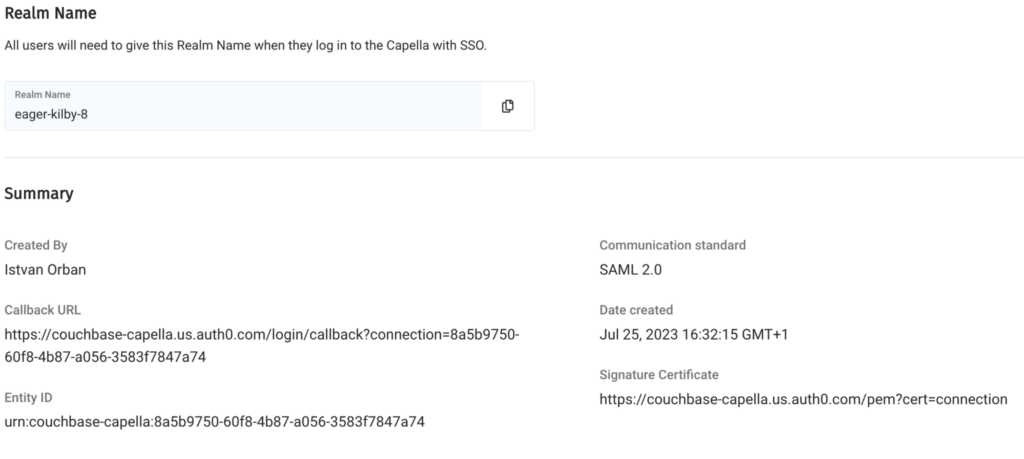
We will need to copy several pieces of information from this screen into Keycloak during the client creation process. Make note of the following fields.
-
- Realm name
- Entity ID
- Callback URL
- Signature Certificate
Create the Keycloak SAML client
Open the Keycloak admin console and select the realm you created earlier. On the left side of the navigation, click on Clients.

On this screen click Create client:
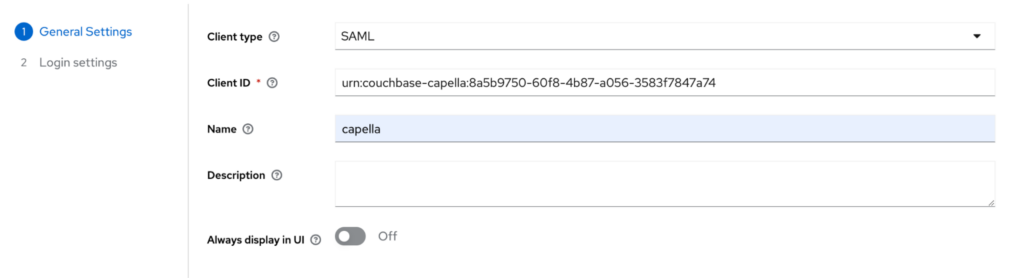
Copy the EntityID from Capella and paste it into the Client ID field of keycloak. You can use any name that you like in the Name field.
When you are ready, click the Next button. On this screen, you need to enter the Home URL and the redirect URIs as shown in the screenshot:
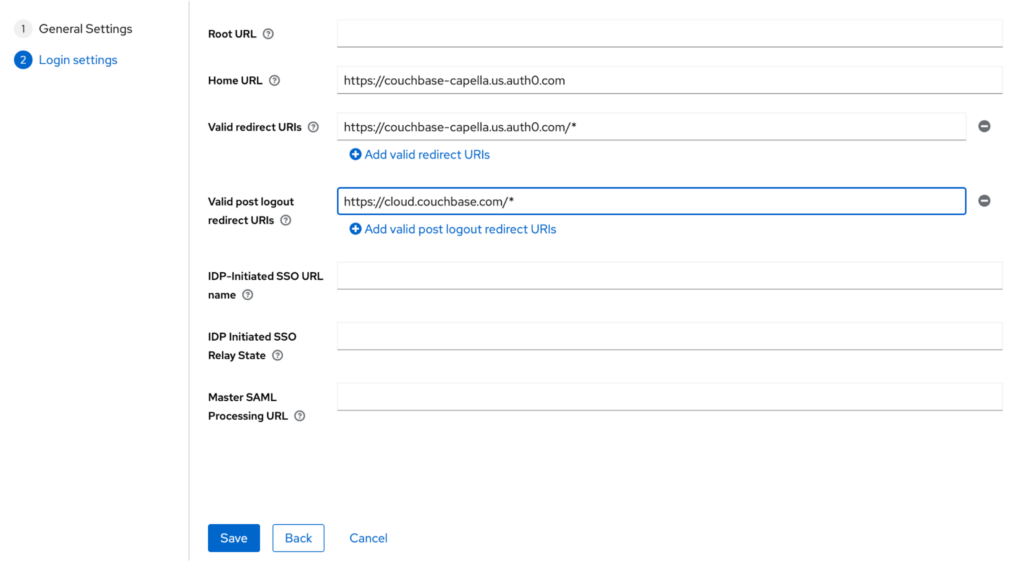
The new SAML client will be created in Keycloak when you click on the Save button.
Configure the Keycloak SAML client
You need to open the SAML client you have created and click on the Advanced tab. That will take you to a screen like this:
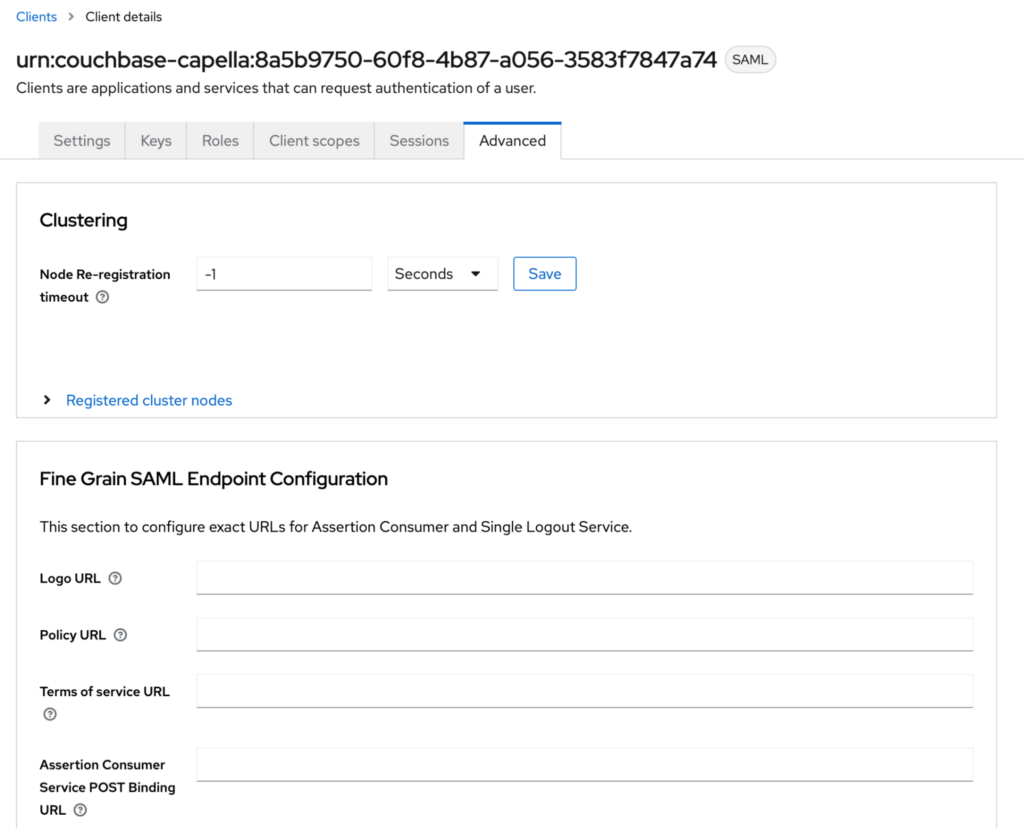
On this screen, you only need to fill in the Assertion Consumer Service POST Binding URL. You need to copy the Callback URL from Capella’s Realm page and enter it in this field.

Import client signatures
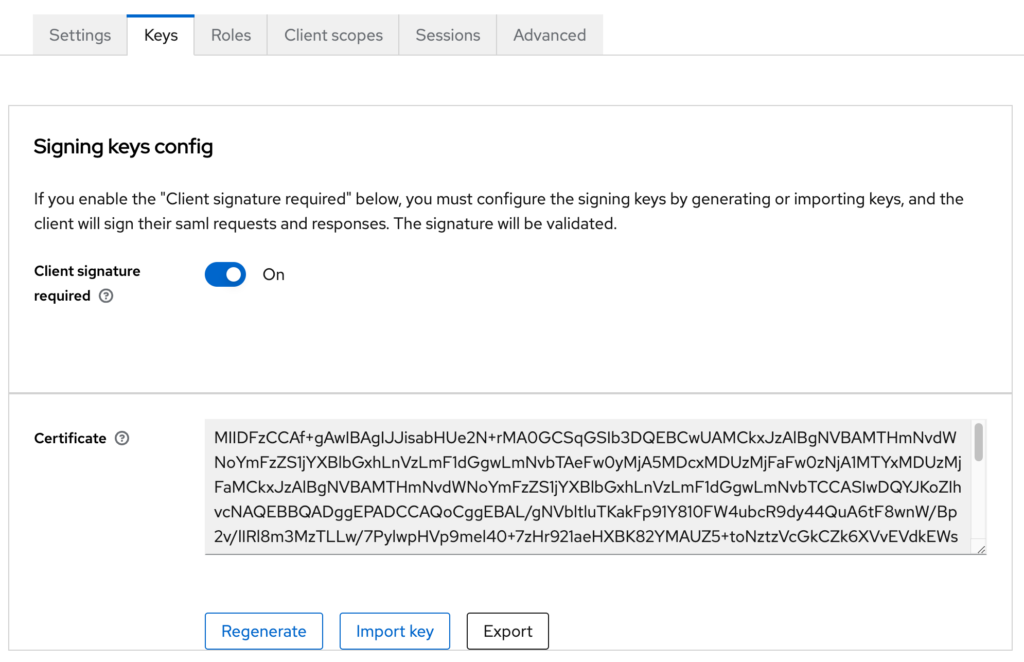
By default Client signature required is enabled in Keycloak. In that case Keycloak will validate the SAML request. In order to do that, we need to save Capella’s SAML public key and import it into Keycloak.
First we need to save the Certificate from Capella. Open your SSO settings page in Capella.
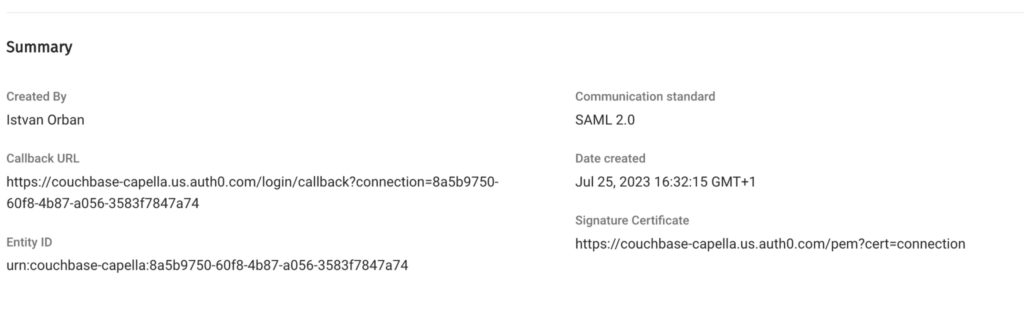
Open the URL shown as Signature Certificate https://couchbase-capella.us.auth0.com/pem?cert=connection in a new tab. This will trigger a download. The file will be called couchbase-capella.pem. This certificate is used to verify the signature on the SAML assertion that is sent to Keycloak. It is not the same as the security certificate of the Couchbase Database.
Now you need to log back into Keycloak and open the client that you created before. Go to the Keys tab.
-
- Click on the Import key button.
- Select Certificate PEM in the Archive format dropdown.
- Click on browse to select file and find the file you have just saved from Capella
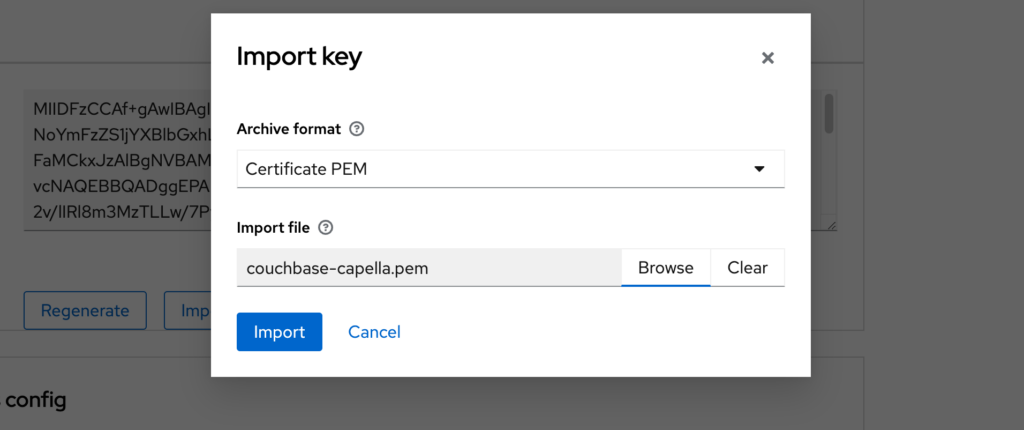
-
- Click Import to load Capella’s certificate into Keycloak
Step 4: Configure SAML Mappers
Now the SAML client is ready. In the next step we will configure the necessary SAML mappers that will allow Capella to read the user details from the Assertion when the user is logging in.
Open the SAML client we have just created, and click on the Client Scopes tab:
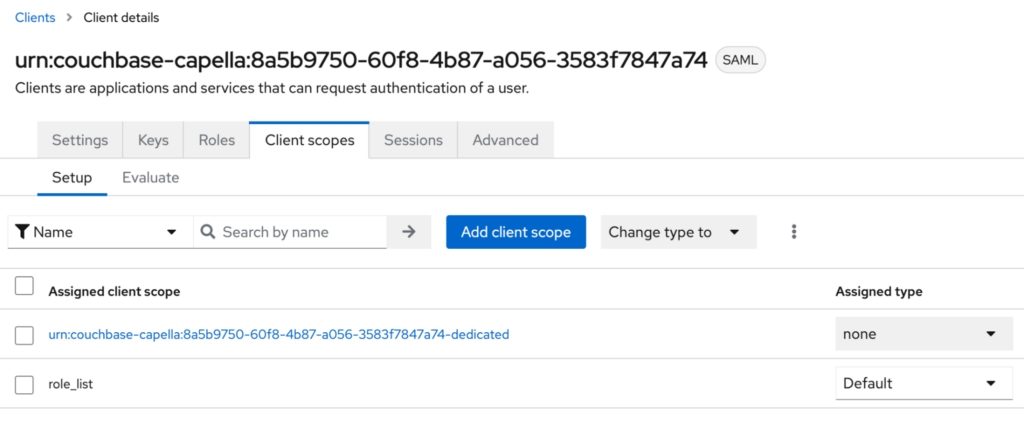
You should see a client scope named after your client id and a dash and dedicated. You need to click on that link to add custom mappers.
Once you click on that button you should see the following screen:
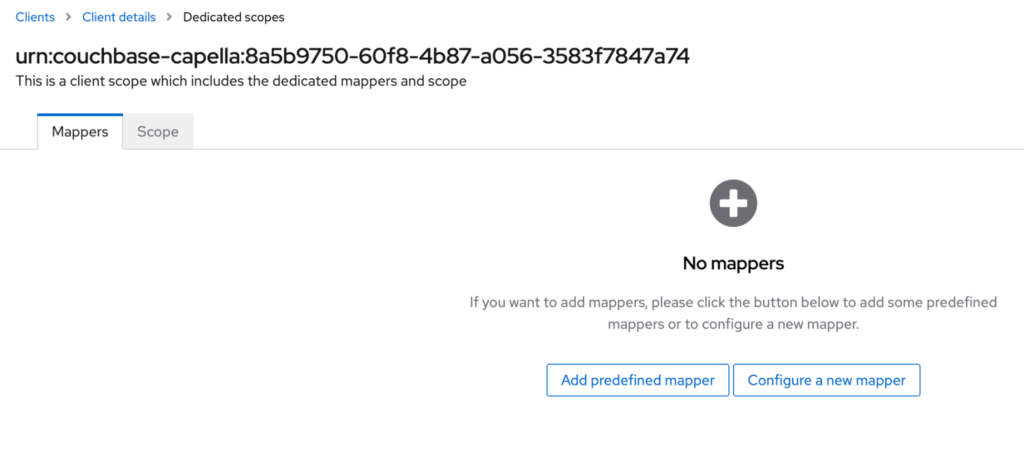
Add the surname mapper
-
- Click on the add configure a new mapper button
- Select User property from the list of mappers.

-
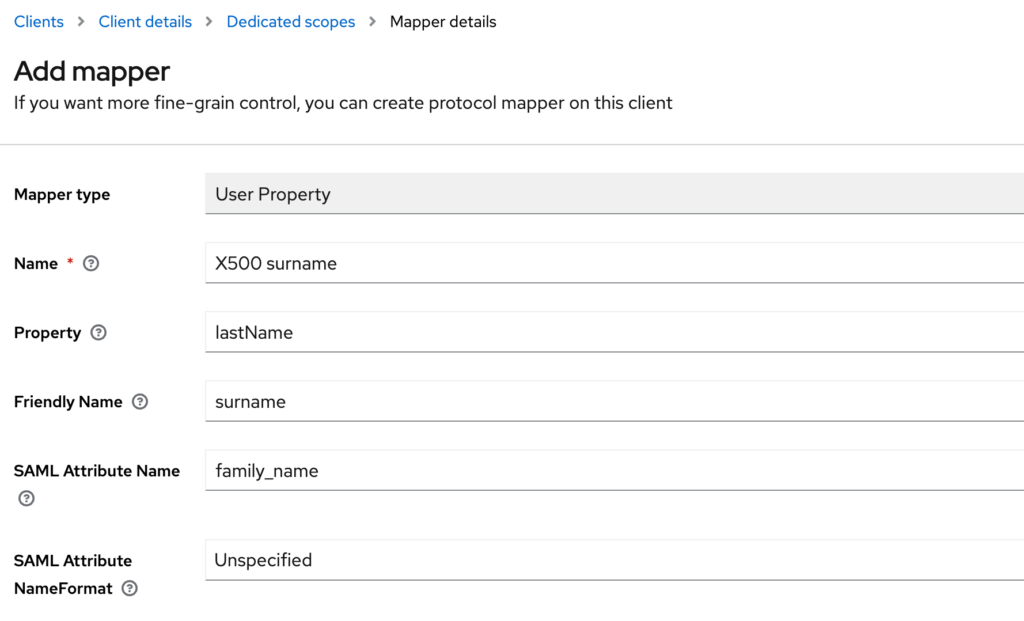
- Fill the form using the following values:
Name: X500 surname
Property: lastName
Friendly Name: surname
SAML Attribute Name: family_name
SAML Attribute NameFormat: Unspecified
- Fill the form using the following values:
Click save. Once you see the confirmation message, you need to click on the Dedicated scopes link to add the next mapper.
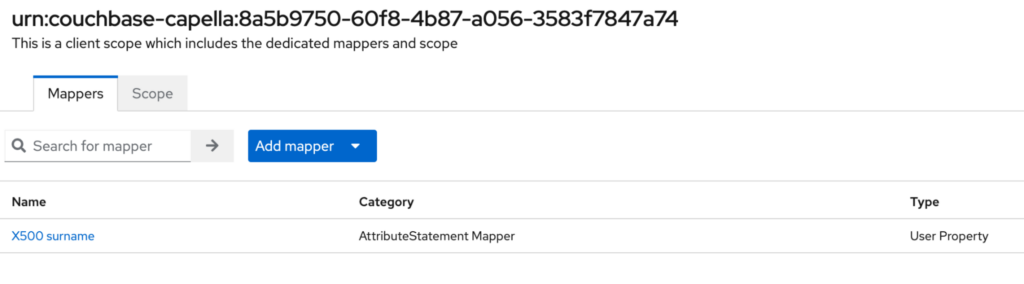
Now we are ready to add the next mapper.
Add the firstName mapper
-
- Click on the Add mapper button and select By configuration.
- Select User property from the list of mappers.
-
- Fill the form using the following values:
Name: X500 givenName
Property: firstName
Friendly Name: givenName
SAML Attribute Name: given_name
SAML Attribute NameFormat: Unspecified
- Fill the form using the following values:

Click save. Once you see the confirmation message (Mapping successfully created), you need to click on the Dedicated scopes link to add the next mapper.
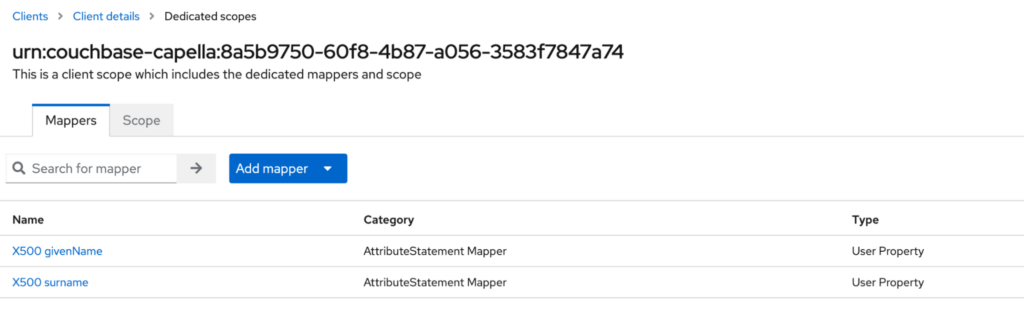
Now we are ready to add the final mapper.
Add the email mapper
-
- Click on the Add mapper button and select By configuration.
- Select User property from the list of mappers.
-
- Fill the form using the following values:
Name: X500 email
Property: email
Friendly Name: email
SAML Attribute Name: email
SAML Attribute NameFormat: Unspecified
- Fill the form using the following values:
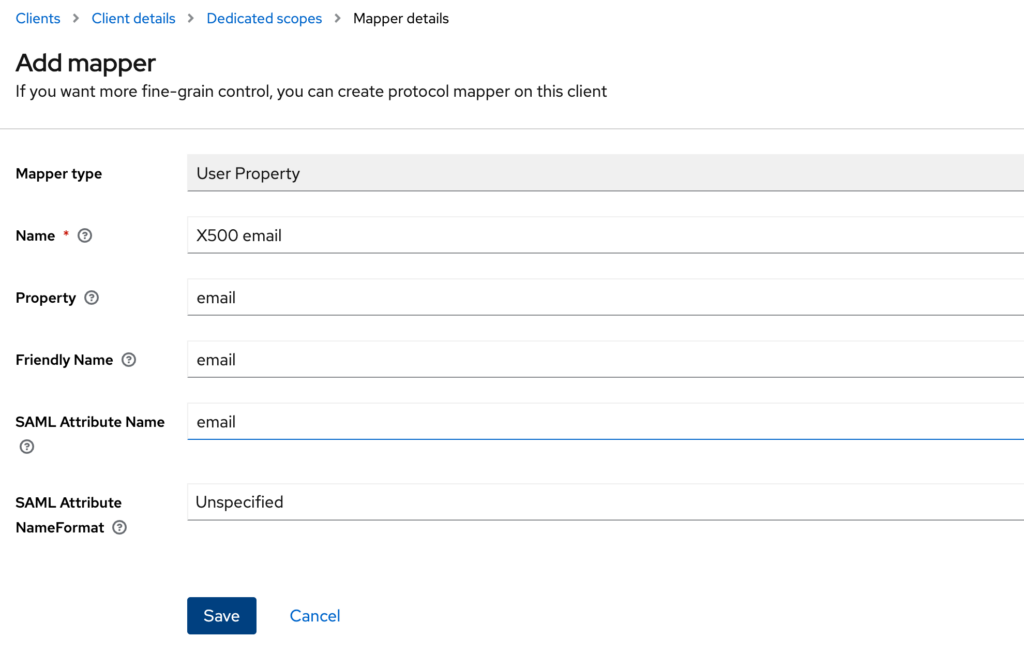
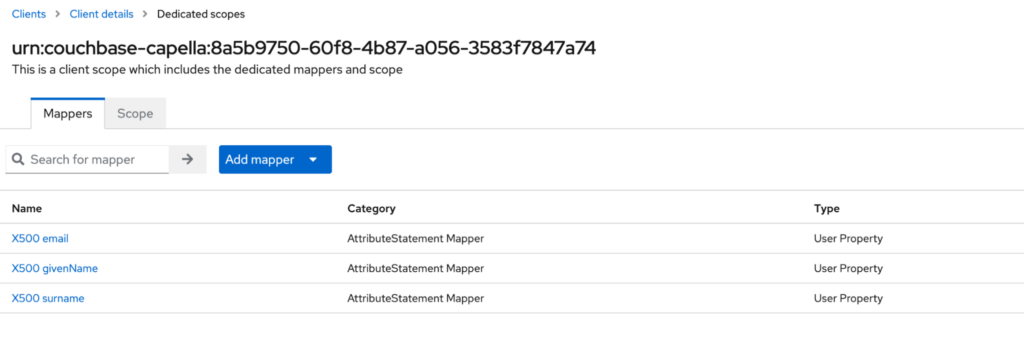
Click save. Once you see the confirmation message, you need to click on the Dedicated scopes link to see the full list of mappers. At this point you should see all three of them.
Step 5: Testing the integration
In order to start testing, you need at least one user in your realm. You can use existing users or create a user just for testing the integration. Also make sure you are logged out from Capella before you start the testing.
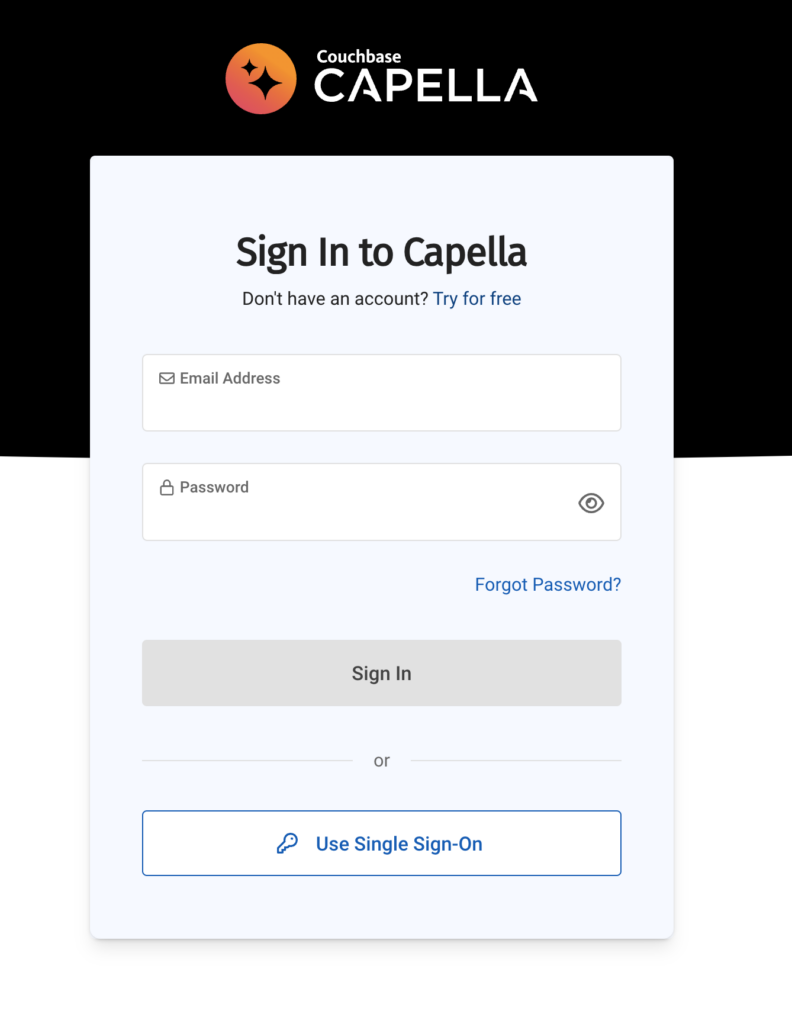
-
- Click on Use Single Sign-On
- Enter your Capella SSO realm name
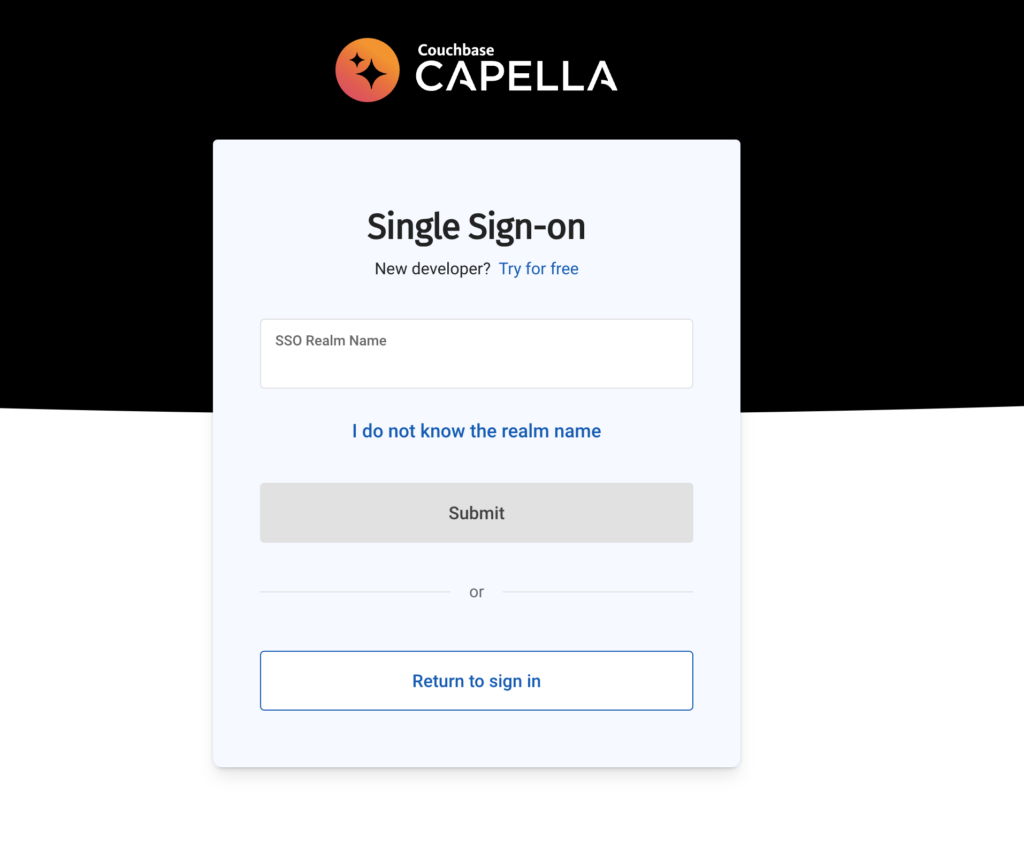
Once you enter your tenant name, you will be forwarded to your Keycloak. You need to use your test user and credential to log in. At the end of the login flow you will be logged into Capella.
Please note: Capella uses JIT user provisioning. Capella will create a user automatically at the first time you log-in with a user through your Identity provider.
Conclusion
Integrating a SAML client with Keycloak allows you to leverage Keycloak’s powerful identity management features, enabling seamless single sign-on functionality in Capella. By following the step-by-step guide provided in this blog, you should now have the knowledge and tools necessary to successfully integrate Capella with Keycloak, ensuring secure user authentication and a streamlined user experience.
