Lately I’ve been working a lot with Jenkins to run Java JAR files for continuous deployment of one of my applications. In case you haven’t seen it, the keynote demonstration given at Couchbase Connect 2016 used Jenkins to build and redeploy the Java backend and Angular frontend every time a change was detected on GitHub. This is the application I helped build.
So how did I leverage Jenkins deploy this Java application? We’re going to see how to create a JAR file using Jenkins, resulting in a continuous deployment pipeline that includes building and deploying to a server.
To be clear, I won’t be explaining how to use the Couchbase Connect 2016 application, which I’m calling GitTalent, with Jenkins as it is a bit more complicated. We’re going to start slow to get a better understanding.
The Requirements
There are a few requirements that need to be met in order to be successful with this guide. They can be found below:
- JDK 8
- Jenkins 2.32+
- Couchbase Server 4.6+
In this example, Jenkins, the JDK, and Couchbase Server will all reside on the same machine. This means that a Jenkins continuous deployment script will pull code from GitHub, build it using the JDK, and publish it locally rather than to some remote server. That said, some of the automation is removed from this example because to get Jenkins to automatically build when commits are found, GitHub hooks require a machine that is not localhost. The effectiveness of this guide will still be present.
While Couchbase is a requirement, it is not the focus of this guide. It needs to be present for the sample application that we’ll be pulling off GitHub.
Configuring Jenkins with the Required Plugins and Dependencies
At this point you should have at least downloaded Jenkins. We’re going to walk through setting it up because it can be a little confusing for a first time user.
You can run Jenkins by executing the following from the Command Prompt or Terminal:
|
1 |
java -jar jenkins.war -httpPort=8080 |
The above command will make Jenkins accessible at https://localhost:8080 in your web browser. Upon first launch you’ll be guided through a wizard for configuration.
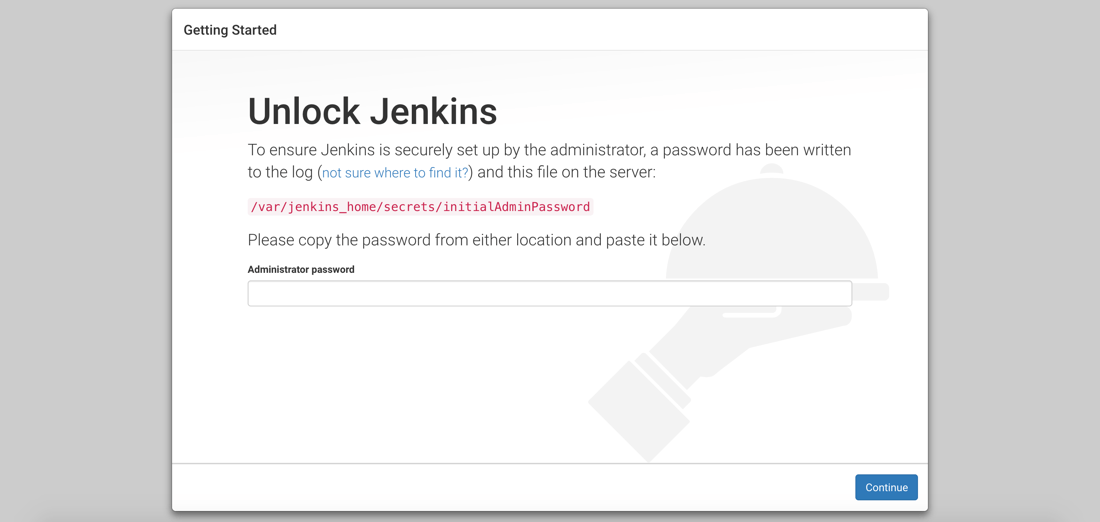
As part of the first configuration step, you’ll need to obtain a generated value to be used as the super admin password.
After providing the password as per the instructions on the screen, you’ll be asked about the installation of Jenkins plugins.
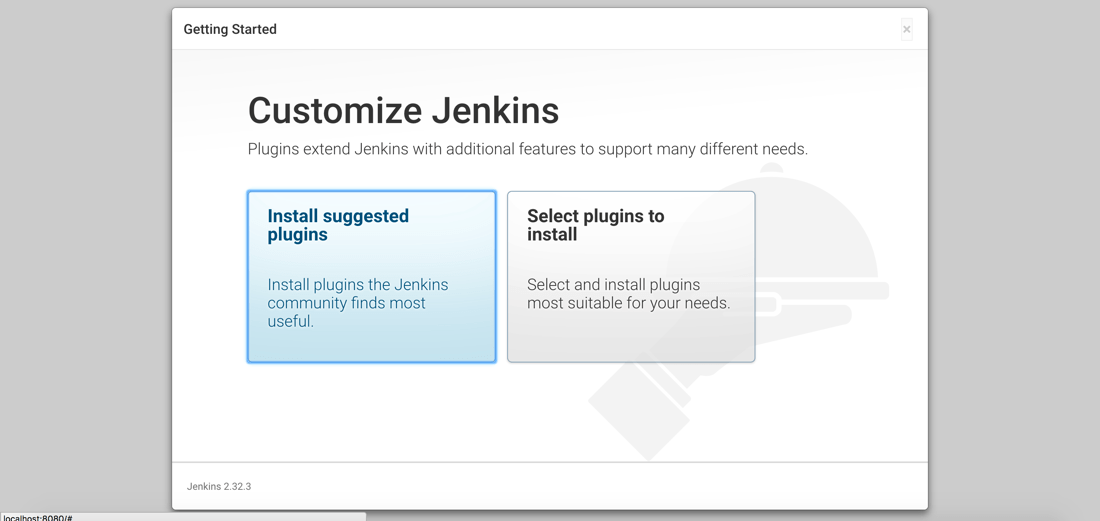
We’re going to start by installing the suggested plugins and then install extras later. It may take some time, but after the suggested plugins have been installed you’ll be prompted to set up your first administrative user account.
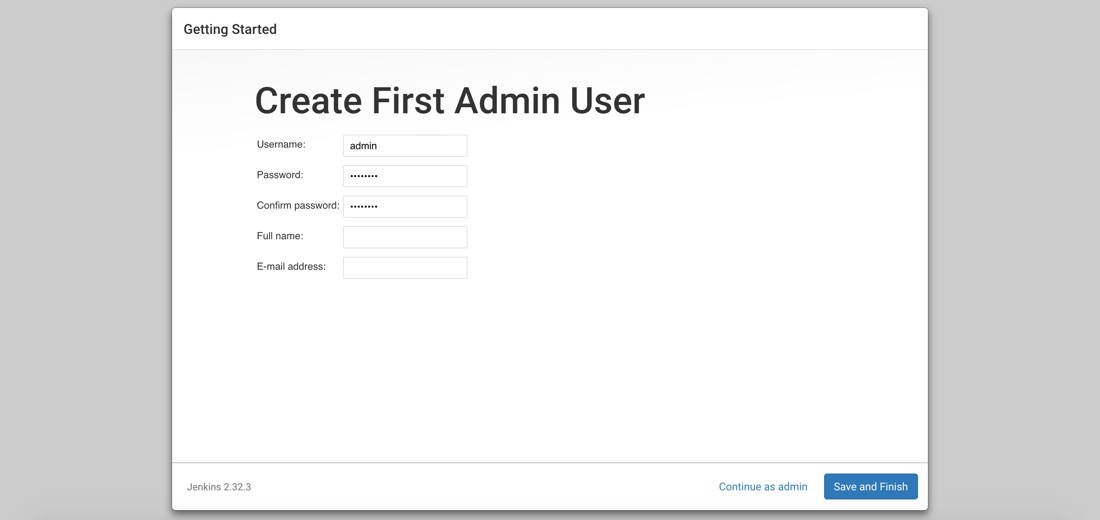
You can choose to create an administrative user, or continue to use the generated password when working with Jenkins.
After creating an account, Jenkins is ready to be used. Before we create our first workflow, or job, we need to install an extra plugin.
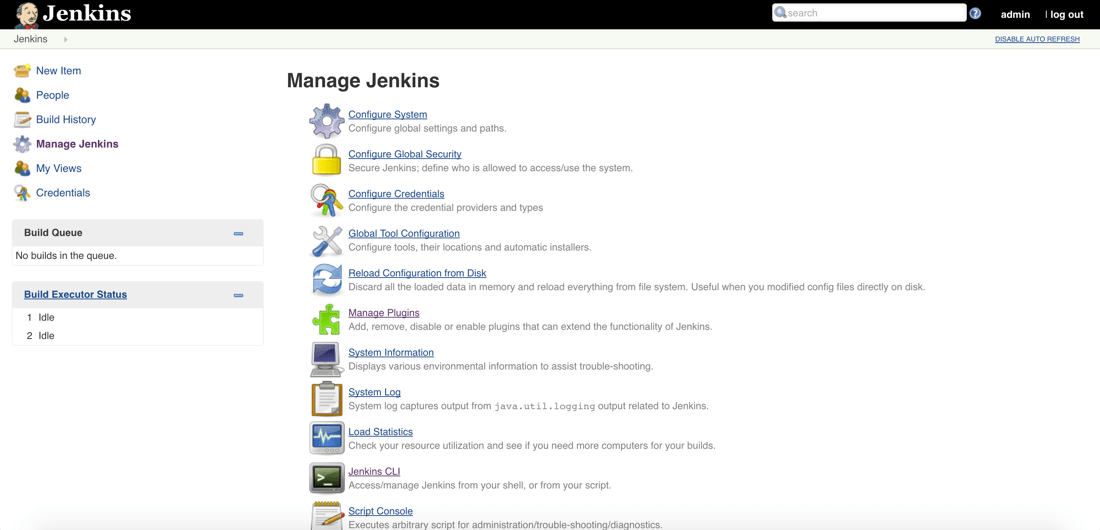
You’ll want to choose to Manage Jenkins which will bring us to a list of management sections, one of which being a section for managing plugins.
Choose to Manage Plugins and do a search for the Post-Build Script plugin.
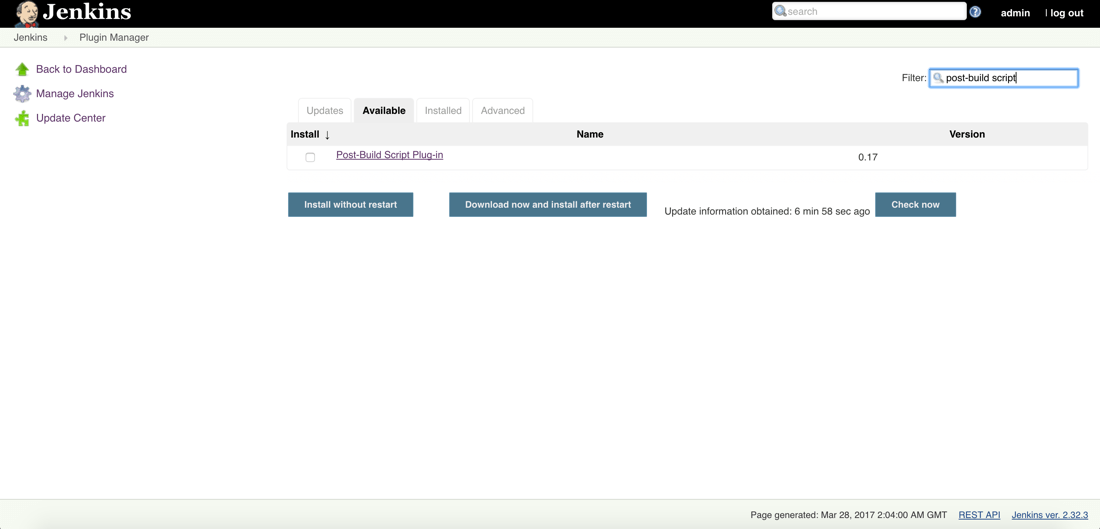
This plugin will allow us to execute scripts on the Jenkin host after the build has completed without errors. We need this so Jenkins can deploy the JAR after it has been packaged.
Now Jenkins as a whole has been configured. While it is ready for us to create jobs, we’re first going to get Couchbase ready to go.
Preparing Couchbase with a Bucket for Document Storage
Couchbase isn’t the highlight of this example, but since we’re using one of my old projects, it was a requirement per the project.
If you haven’t already downloaded Couchbase, do so now and walk through the configuration. For help with configuring Couchbase, check out a previous article I wrote.
What is important is the Bucket that we’ll be using. Make sure to create a Bucket titled restful-sample with at least a primary N1QL index.
If you need help with any of this, a full write-up of our project can be found here. Of course, that write-up doesn’t include continuous deployment with Jenkins.
Now we can focus on our pipeline.
Creating a Job for Building and Deploying an Application Developed with Java
With Jenkins and Couchbase ready to go we can focus on creating a job that will control our pipeline. To reiterate on our plan, we will be pulling from GitHub, packaging a JAR in the build process, and deploying that JAR during the post-build (deployment) process.
Go ahead and create a new job in Jenkins. The first thing you’ll be asked is for a project name as well as the type of project name.
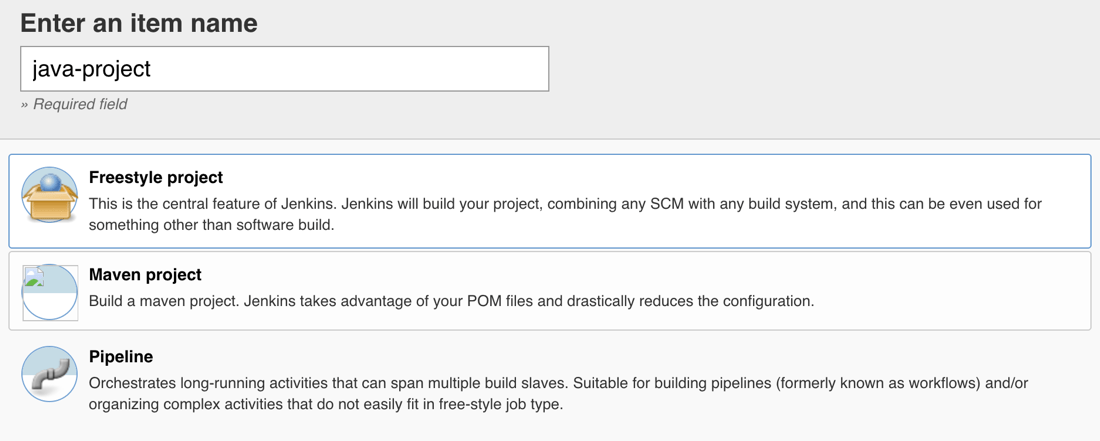
Give the job a unique name and also make sure to use Freestyle Project from the list. When configuring this project, our first concern is the GitHub repository that we’ll be using.
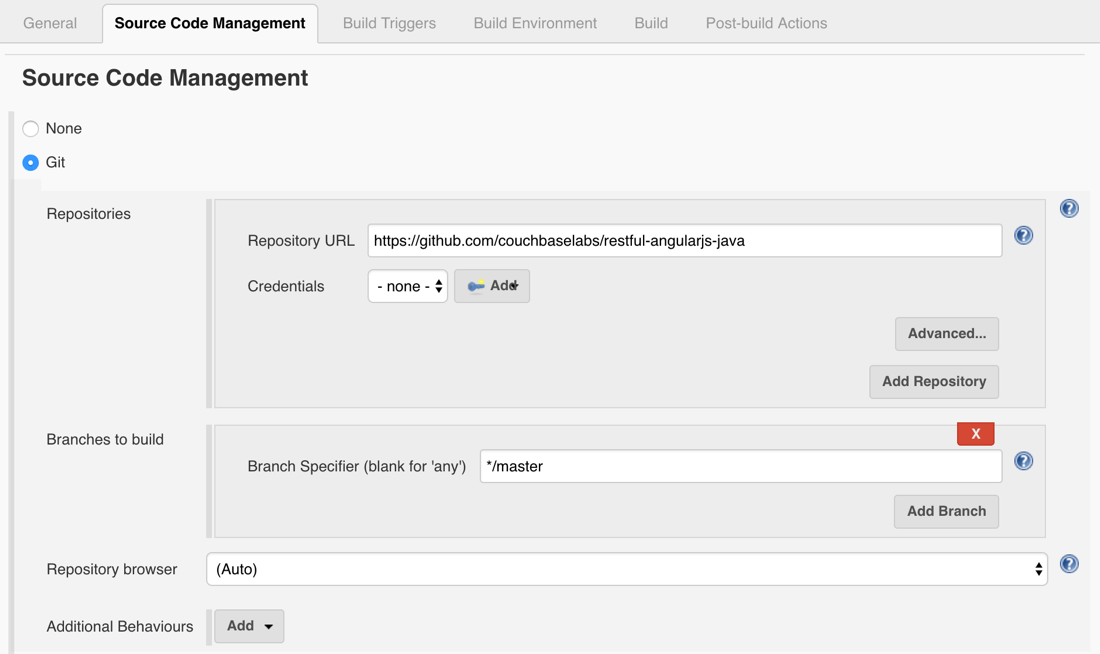
If your repository is not public, don’t worry as you can add credentials, but for this example my project is public.
I’m using the project found here:
|
1 |
https://github.com/couchbaselabs/restful-angularjs-java |
Feel free to use your own project if you’d like. With the source control figured out, let’s move onto the Build step.
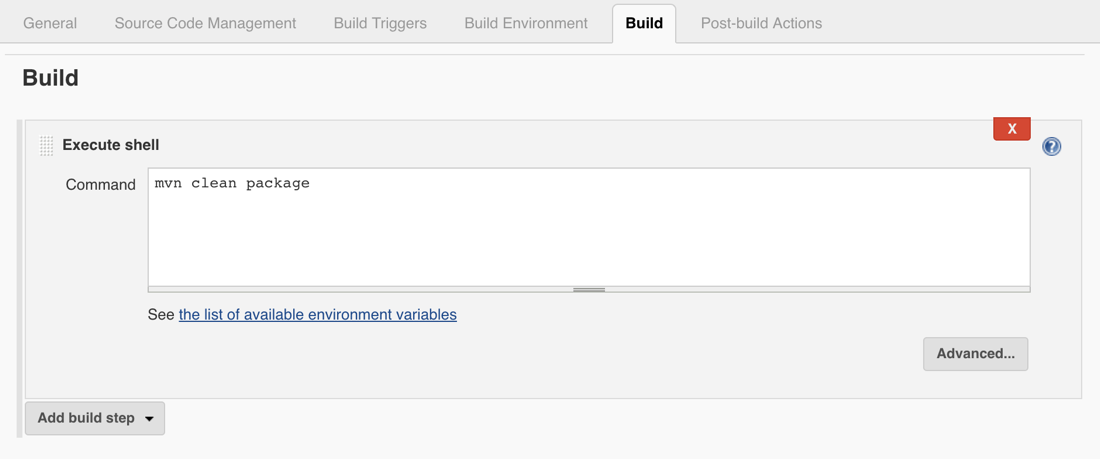
Here we can enter whatever shell commands that we want in order to build the application that was pulled from Git.
We only want to generate a JAR file in this example, which can be done by adding the following command:
|
1 |
mvn clean package |
This leaves us with a JAR file in a new target directory that is only relevant to Jenkins at this time. The final step is to kill any already running instance of the application and run it again.
Since we installed the Post-Build Plug-in Script we can define what happens with our build.
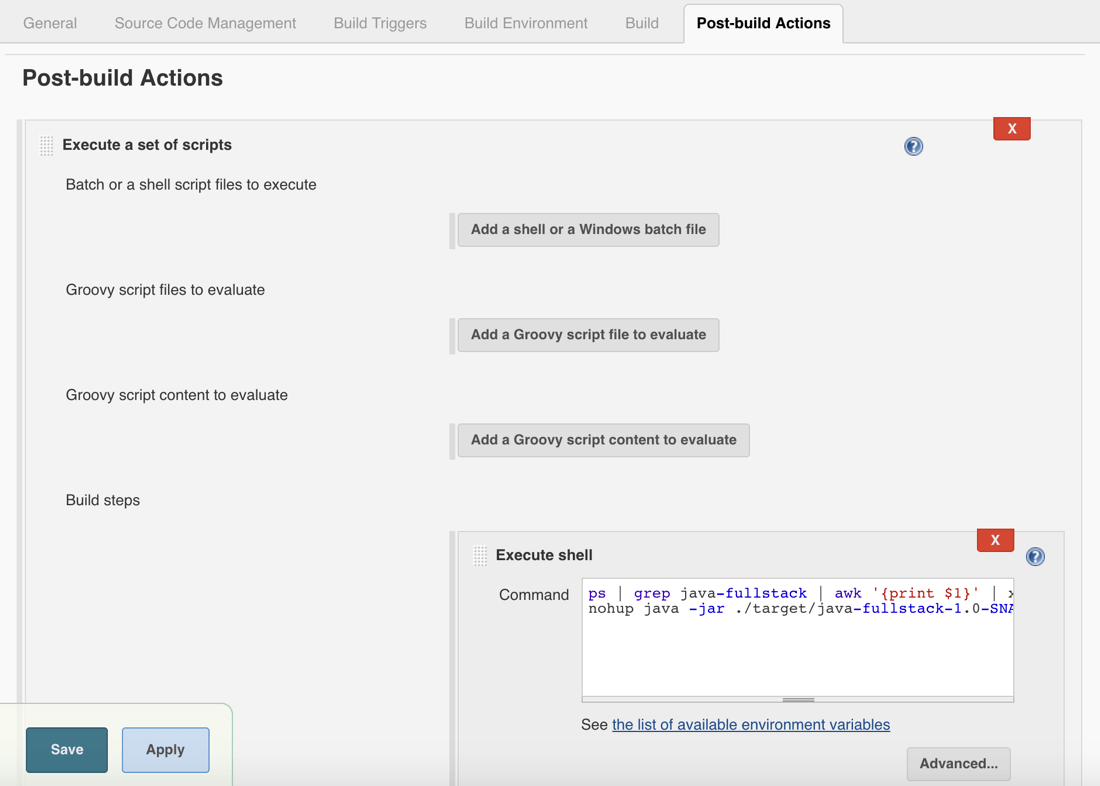
In this example we aren’t deploying it to another machine, but we could. Instead we’re just going to run it on the local machine.
Choose to execute a shell script and include the following:
|
1 2 |
ps | grep java-fullstack | awk '{print $1}' | xargs kill -9 || true env SERVER.PORT=8081 nohup java -jar ./target/java-fullstack-1.0-SNAPSHOT.jar & |
The above is cheating a little, but it’s necessary because we’re running everything locally on the same machine.
The first command will search for any running process on my Mac that looks like our Java application. Once found it will kill the process. Even if it doesn’t find the process it will return true because of our pipe. This prevents the job from failing.
After the process is stopped, we run the built JAR in the background.
Keep in mind that your script may be a bit different if you’re running locally on Linux or Windows. In a production scenario, you’ll probably use the SSH plugin for Jenkins and push the JAR to some server and restart the controlling daemon.
Go ahead and try to run the job using the Build Now button. If you don’t want to initiate it manually, consider adding a hook or a cron timer in the configuration area that we had just explored.
If everything goes well, you’ll have your Java application accessible at https://localhost:8081 and it will communicate with Couchbase Server.
Conclusion
You just saw how to deploy a JAR file in Jenkins to do continuous deployment of a Java application that communicates with Couchbase Server. This Jenkins configuration will pull from GitHub, build a JAR, and deploy it. While it should be a little more polished in a production scenario, it is a good way to get started.
Want to use Jenkins for continuous deployment of microservices bundled into Docker containers? Check out a previous article that I wrote titled, Continuous Deployment of Web Application Containers with Jenkins and Docker.
Want more information on using Java continuous deployment with Couchbase? Check out the Couchbase Developer Portal for examples and documentation.
I encourage you to check out the Couchbase Connect 2016 keynote demonstration if you haven’t already.