
Apache NiFi is an ETL (extract, transform, load) software framework that is designed to automate data flows between different computer systems and can also be used as a computational platform on its own. It provides a web-based user interface that allows configuring flows and transformation of large amounts of data. Every piece of data that is processed by NiFi is abstracted as a FlowFile structure that may have some content and metadata associated with them. These FlowFiles are passed between standard and custom NiFi processors that can transform the data or trigger different actions.
Recently, contributors to NiFi have updated the NiFi Couchbase connector to support the latest Couchbase SDK. This update adds support for collections and enables Apache NiFi to connect with Couchbase Capella clusters to store and retrieve information. In this post, we will build and configure a NiFi instance with Couchbase support and connect it to a Capella cluster.
NiFi Components for Interacting With Couchbase
The Nifi Couchbase connector provides service controllers and processors that can be used in NiFi flows and reporting tasks:
- Instances of Couchbase Cluster Service are used by other connector components to connect to Couchbase clusters; an instance is expected to be created for every cluster; Cluster service instances can be re-used across other components.
- Instances of Couchbase Key/Value Lookup Service can be used in standard and custom NiFi components to look up string values from documents in a Couchbase collection.
- Instances of Couchbase Map Cache Client can be used in NiFi components to maintain a cache of documents from a Couchbase collection across multiple nodes in a NiFi cluster.
- Couchbase Record Lookup Services can be used in NiFi components to look up records from a Couchbase collection by their keys.
- Get Couchbase Key processors can be used in NiFi flows to retrieve couchbase documents as FlowFile contents.
- Put Couchbase Key processors can be used in NiFi flows to store FlowFile contents as Couchbase documents.
Most of the configuration fields in Couchbase NiFi connector components support NiFi expressions and, therefore, can be parametrized with values from FlowFile contents or attributes.
Required Tools
The following is a list of tools that are required to execute all of the commands used to install and configure the NiFi Couchbase connector:
- NiFi 2.9.0 or later
- Maven
- Access to a Couchbase cluster (for example, a Free Tier Couchbase Capella cluster)
This post uses bash command syntax and is intended to be followed on a *nix computer. For more information on other supported operating systems, please refer to the NiFi documentation.
Downloading and Installing NiFi
NiFi can be downloaded from the NiFi Downloads page. There are two packaging options available:
- A “tarball” (tar.gz) that is tailored more to Linux
- A zip file that is more applicable for Windows users
macOS users may also use the tarball or can install via Homebrew by simply running the command brew install nifi from the command line terminal.
For users that are not running macOS or do not have Homebrew installed, after downloading the version of NiFi that you would like to use, simply extract the archive to the location that you wish to run the application from. The location will be referred to as NIFI_HOME in this tutorial.
For information on how to configure the instance of NiFi (for example, to configure security, data storage configuration, or the port that NiFi is running on), see the Admin Guide.
Installing NiFi Couchbase Connector
NiFi extensions are stored as platform-independent “.nar” (NiFi Archive) and “.jar” files to store compiled extensions and modules. These modules can be added to your NiFi installation by placing them under the “./lib” sub-folder of the NiFi home directory.
Couchbase connector NAR and JAR files are published by the NiFi development team on Maven Central. To simplify the installation process, we created a maven pom.xml file that lists all components required for the installation:
|
1 2 3 4 5 6 7 8 9 10 11 12 13 14 15 16 17 18 19 20 21 22 23 24 25 26 27 28 29 30 31 32 33 34 |
4.0.0 com.couchbase nifi–resolve 1.0 2.9.0 3.8.2 org.apache.nifi nifi–couchbase–bundle ${nifi.version} pom import org.apache.nifi nifi–couchbase–nar ${nifi.version} nar com.couchbase.client java–client ${couchbase.version} com.couchbase.client core–io ${couchbase.version} org.apache.commons commons–lang3 3.17.0 |
|
1 2 |
2.9.0 3.8.2 |
Change your nifi.version property to your version of NiFi and run the following command to download all of the dependencies:
|
1 |
mvn dependency:copy–dependencies –DoutputDirectory=./lib –DincludeScope=runtime |
This will download all required dependencies into the “./lib” directory. To install them into NiFi, copy all the files from the directory to “./lib” directory in “NIFI_HOME”:
|
1 |
cp lib/* ${NIFI_HOME}/lib/ |
Configuring Credentials and Launching NiFi
Before you launch NiFi, you need to set the default login and password so that you can access the NiFi interface. NiFi developers provide a set of shell scripts that can be used to administrate NiFi instances, including setting logins and passwords. Run the following command from NiFi home directory to set your login and password:
|
1 |
abin/nifi.sh set–single–user–credentials admin password1234 |
Now, you can launch your NiFi instance:
|
1 |
bin/nifi.sh start |
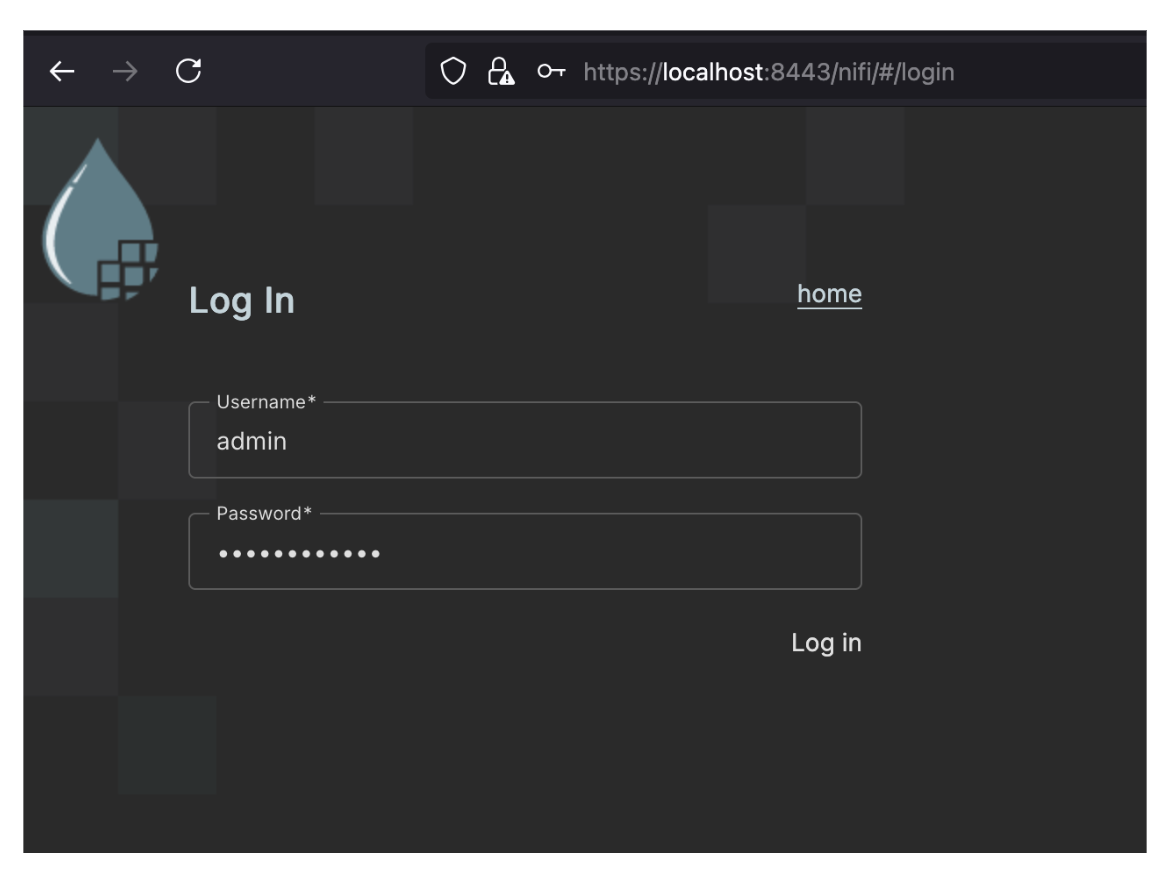
Next, open your browser and navigate to https://localhost:8443/, where you should be greeted with the NiFi login screen:
Connecting NiFi With Couchbase
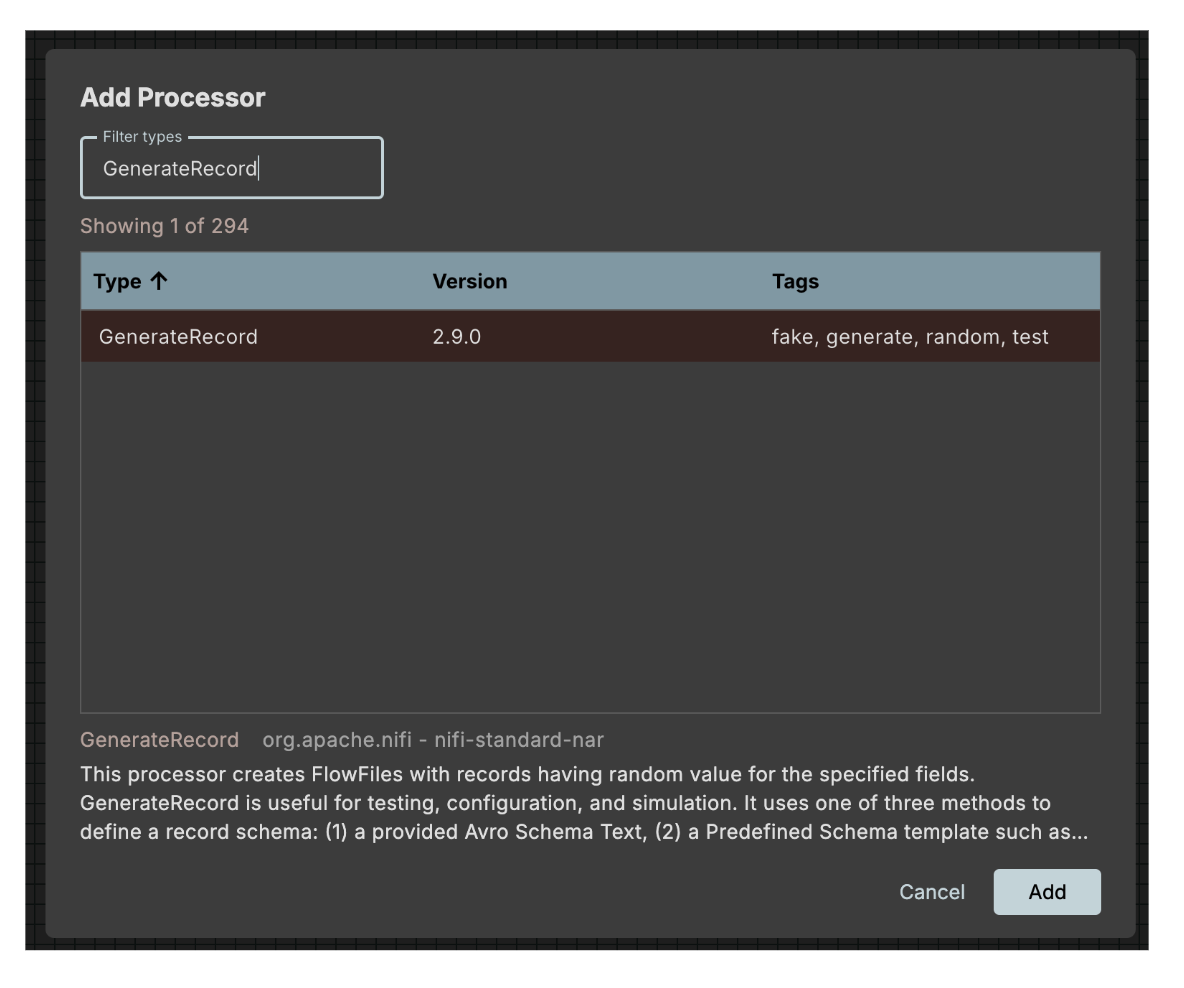
After logging into NiFi, you can create a test flow that would generate and write some records into a Couchbase collection. First, let’s add a processor that generates test records:
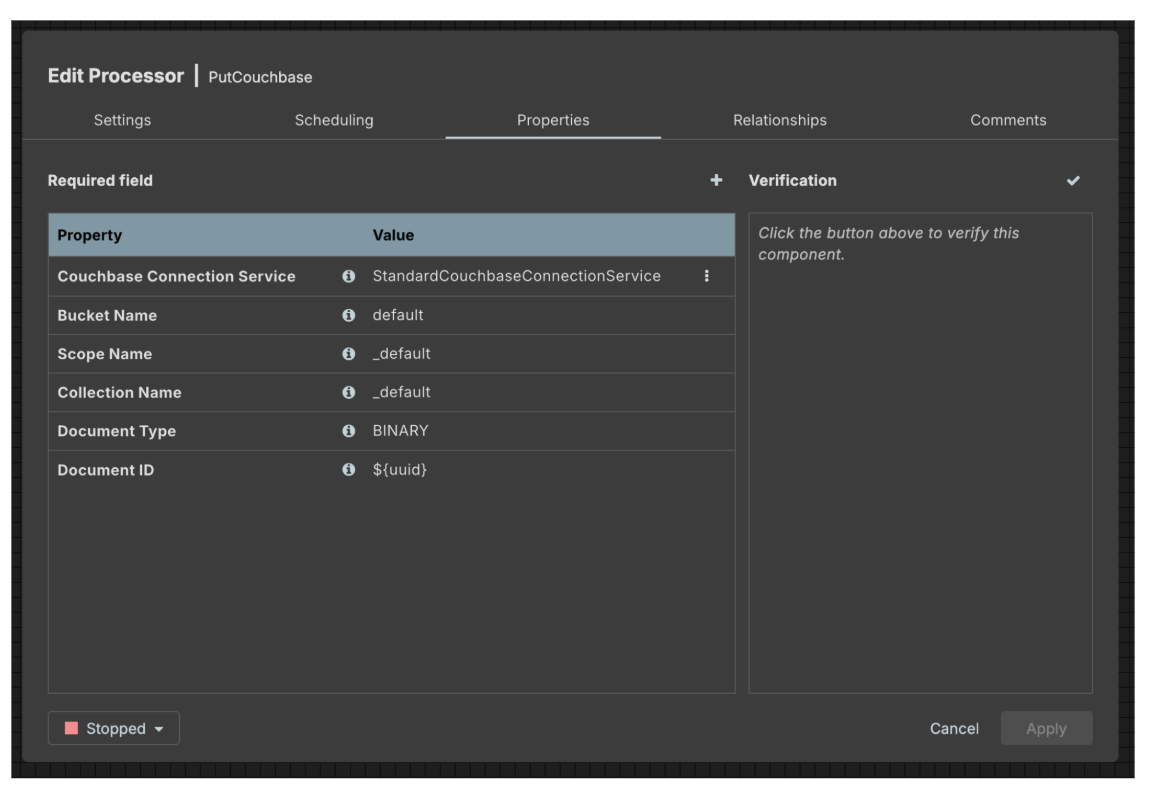
Then, let’s add and configure a PutCouchbase processor:

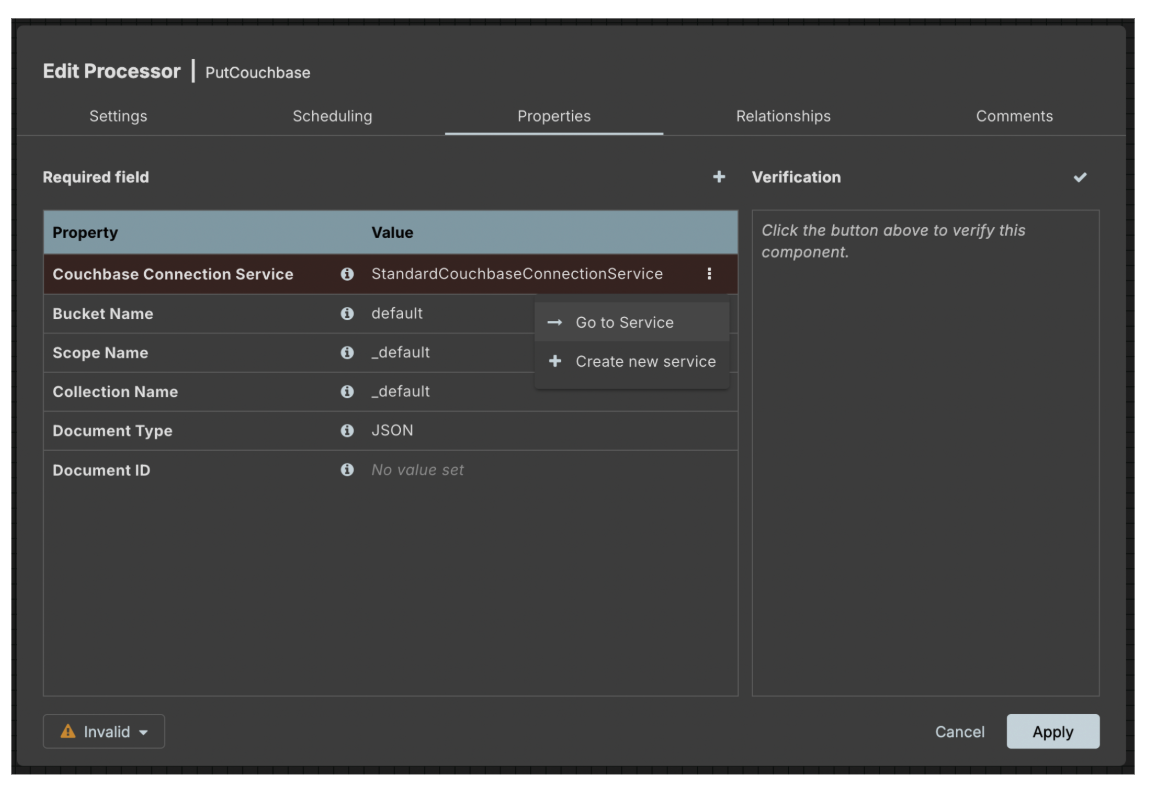
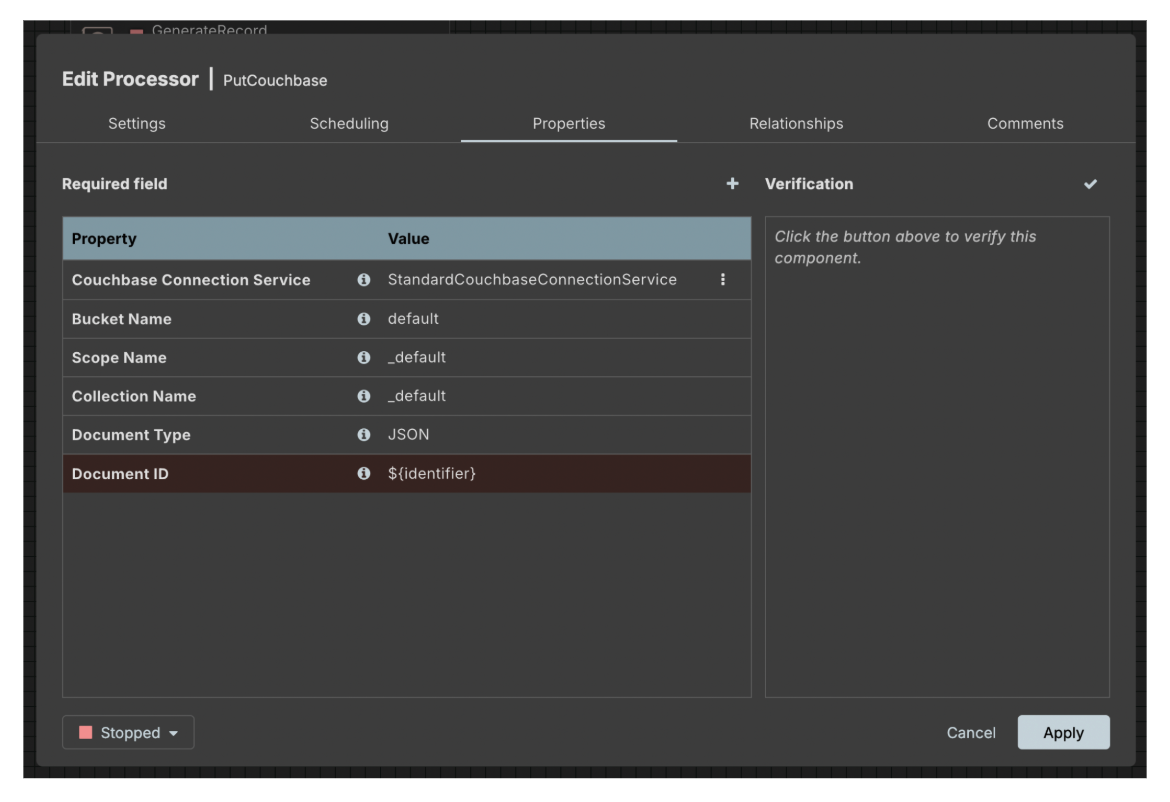
After adding the PutCouchbase processor, double-click on it and open the properties tab:

First, you need to change the Document Type property to “BINARY,” as the GenerateRecord node will generate JSON arrays instead of objects, and set the Document ID field to “${uuid}” expression:
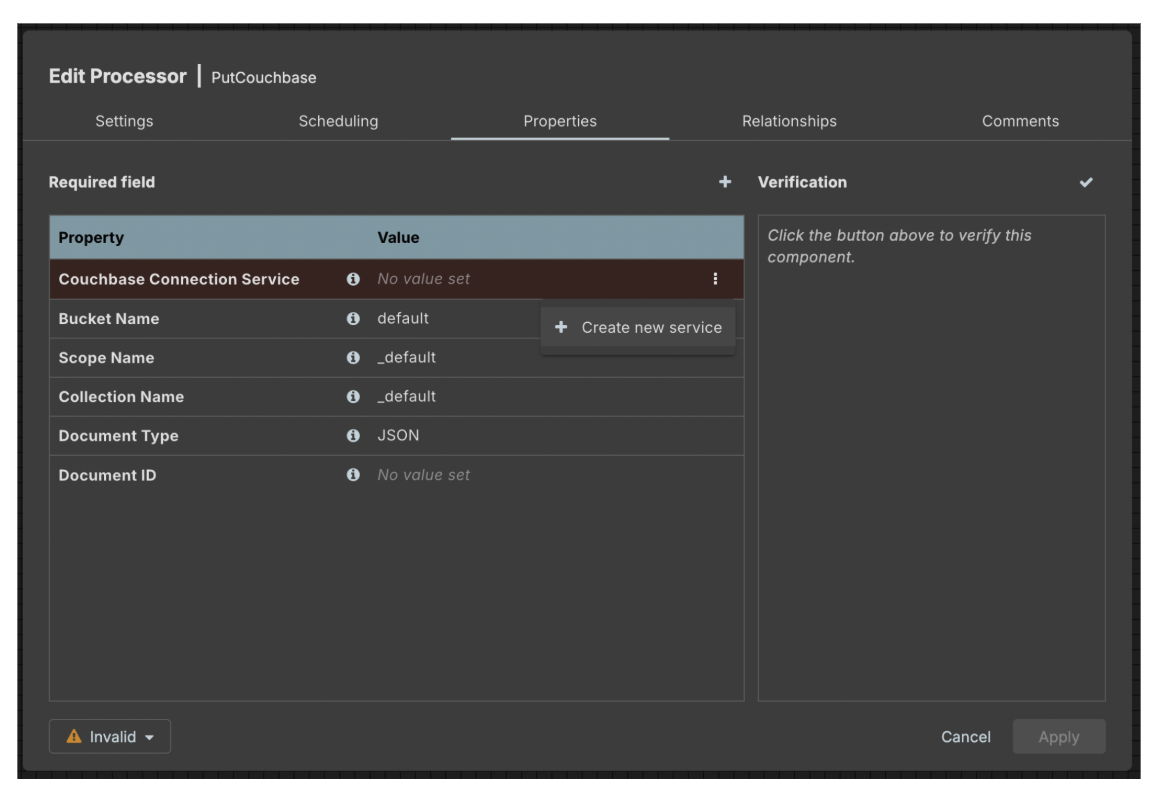
Then, configure the Couchbase Connection Service, which is responsible for storing information about the cluster and connection credentials. Click on the three dots at the right end of the field and select “Create New Service”:
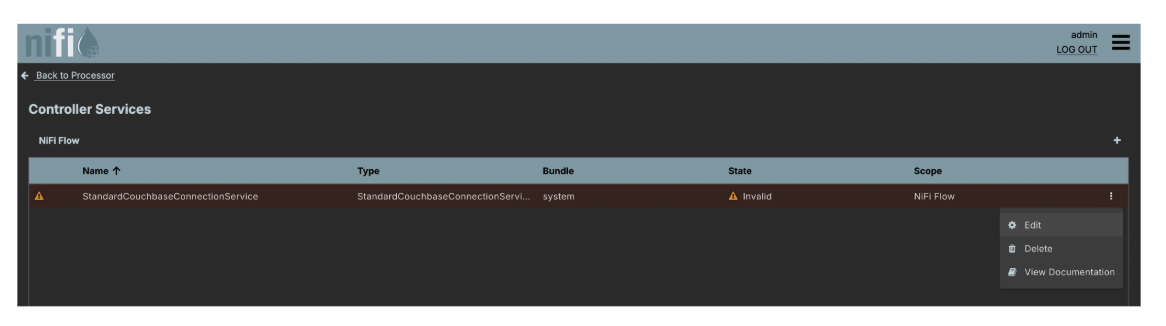
In the “Add Connection Service” window, select “StandardCouchbaseConnectionService.” This will create a new Couchbase Connection Service and set it as a property of the processor. Now, click the triple dot icon again and select “Go to service” (Click “OK” in the popup dialog that asks if you want to save the processor properties):
Use another triple dot icon at the right side of the next window to edit the created Couchbase Cluster Service:
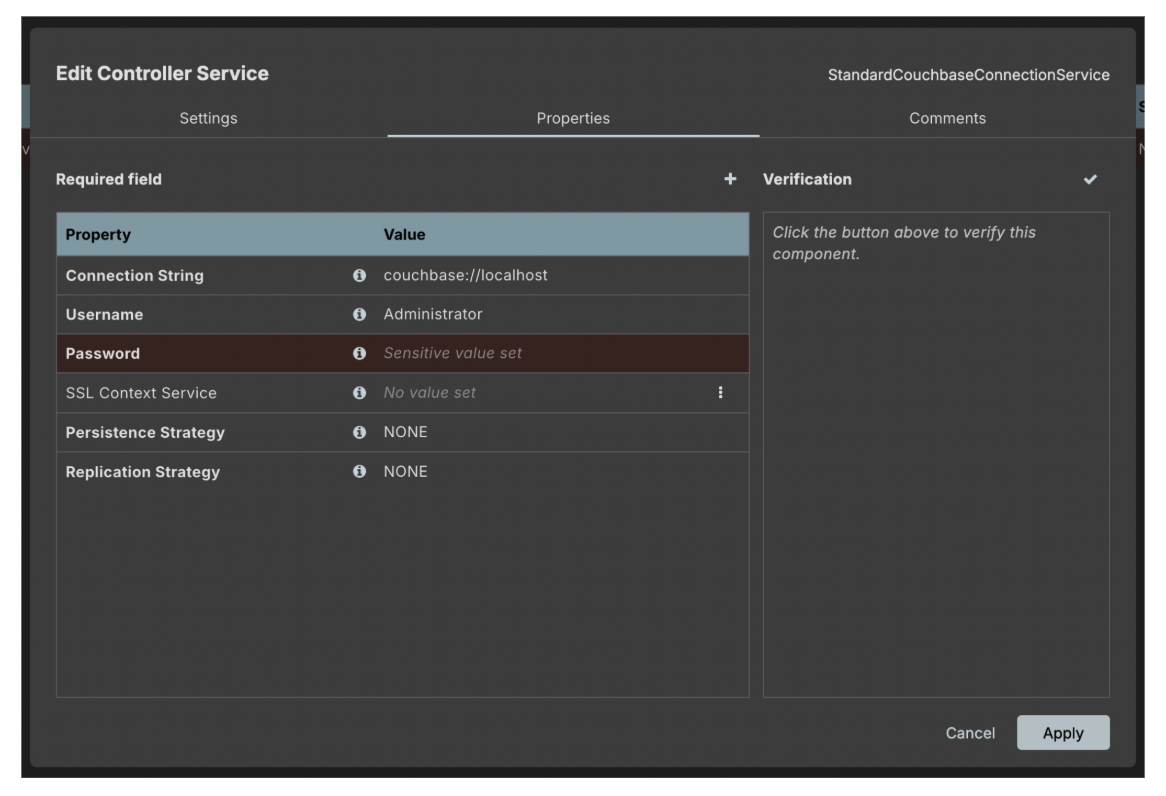
Now, configure the connection string and credentials that can be used to connect to a Couchbase cluster. Since we have a cluster running locally, we will use it to test the NiFi flow. Alternatively, you can use a Free Tier Couchbase Capella cluster:
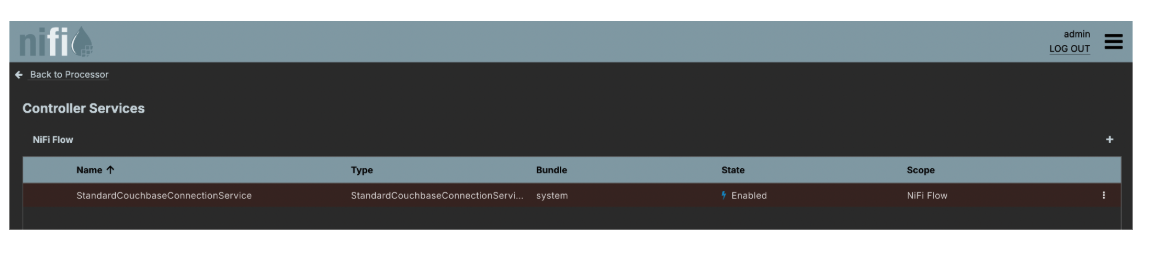
Click “Apply,” then click on the three dots by the processor in the processor list and use the “Enable” context menu item to enable the processor. Verify that the processor changes state into “Enabled.” Note: keeping the “Enabling” state for longer than several seconds might indicate a configuration issue.
Now click the “Back to Processor” navigation link in the top-left corner of the page, which should return you to the processor properties configuration page. For simplicity, let’s keep the default settings here, except for the “Document ID” field. Let’s set it to a NiFi expression that returns the “identifier” attribute from the current FlowFile:
Now, let’s switch to the “Relationships” tab and configure it like this:
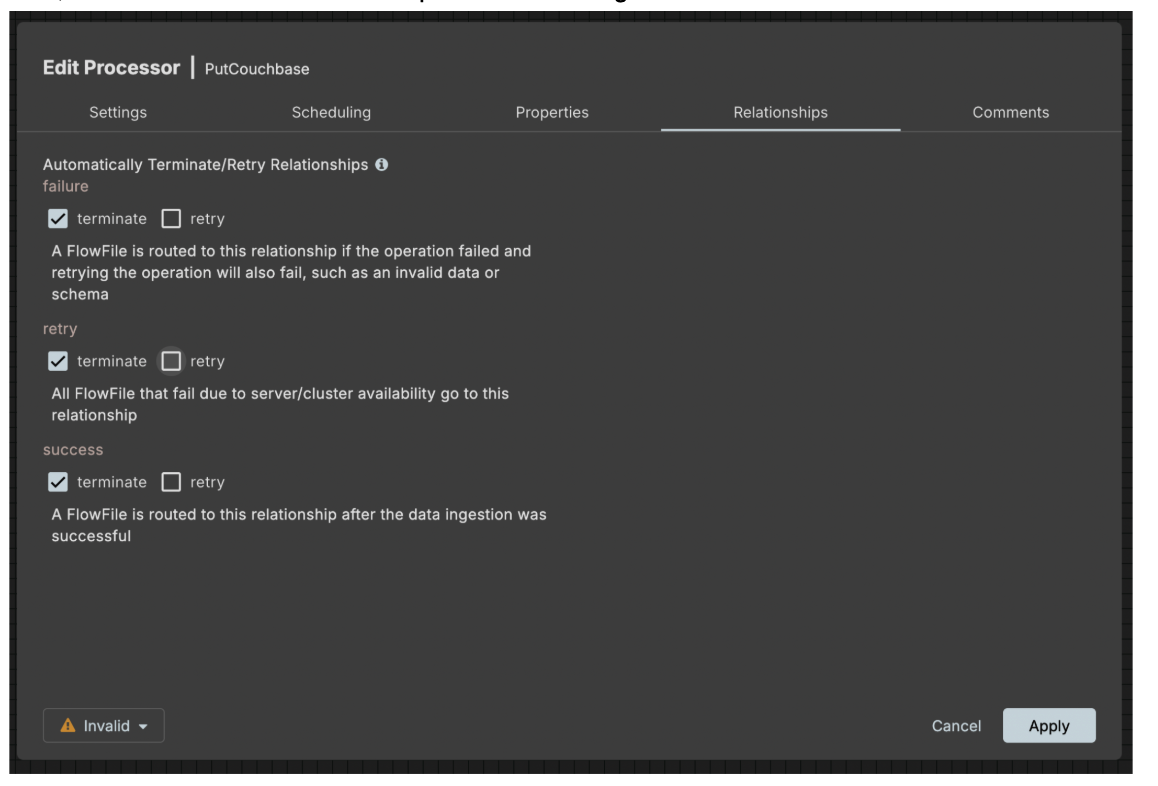
Click “Apply” to store the settings.
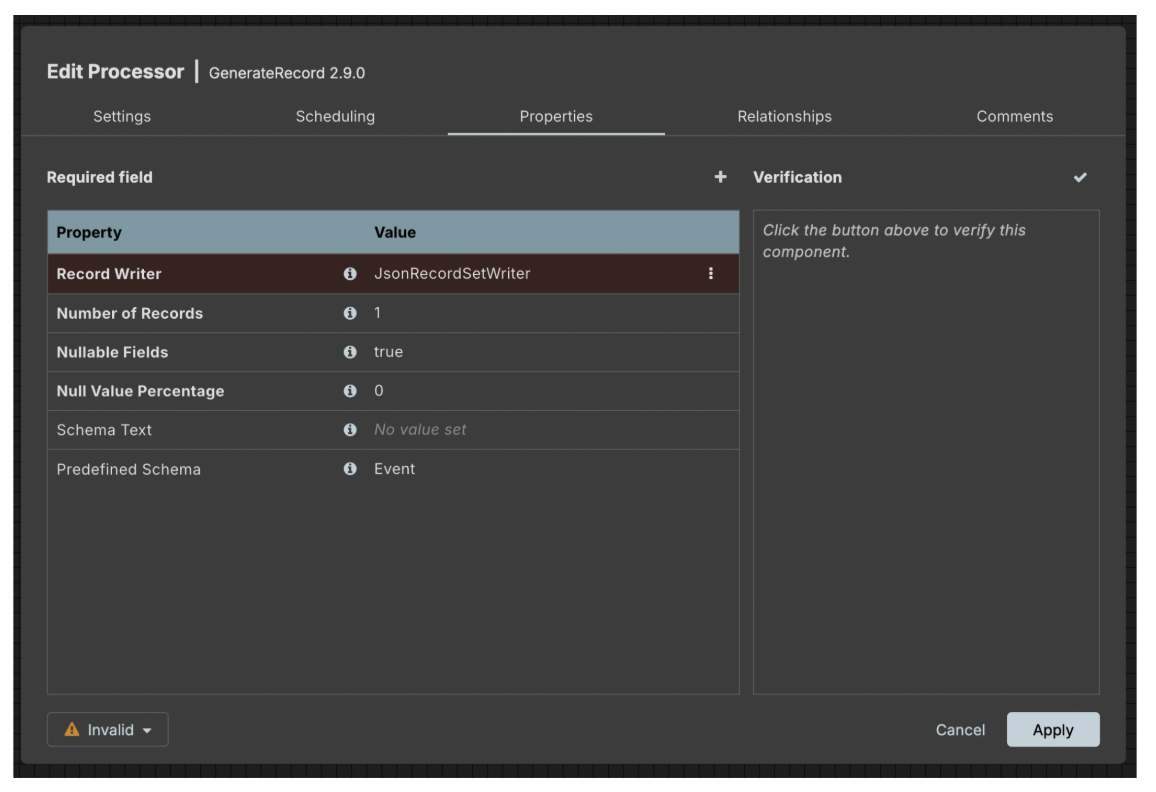
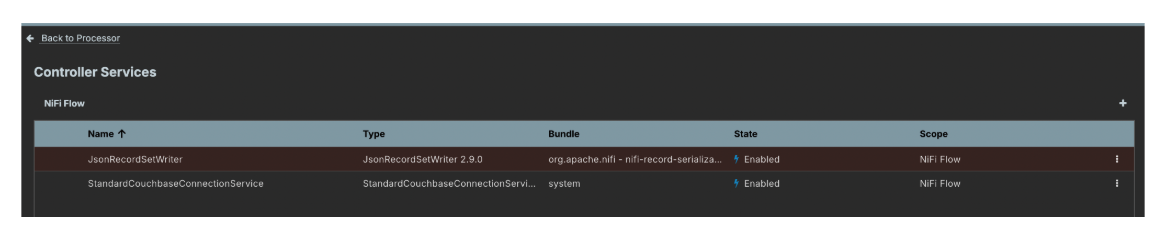
Now, let’s configure the “Generate Record” processor. Simply double-click on it to open the processor properties window. Configure it to use “JsonRecordSetWriter” and produce a single record with a predefined schema of “Event” type:
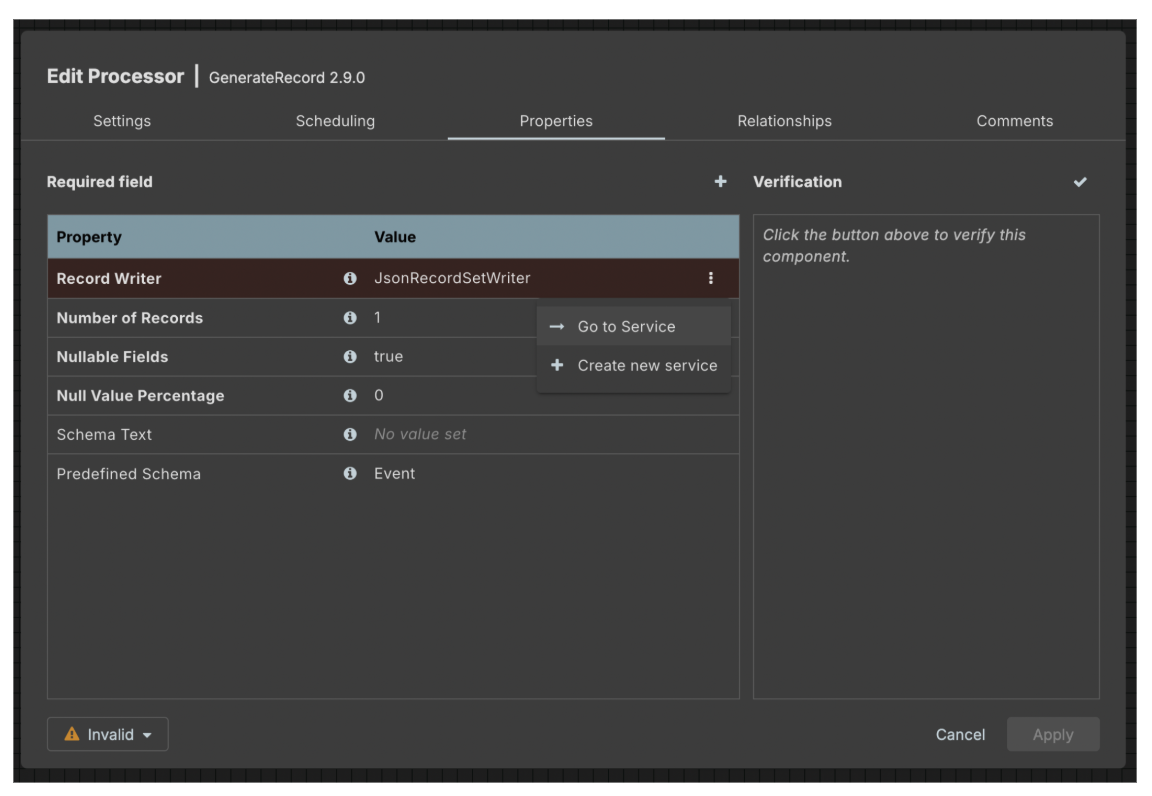
Before using the JsonRecordSetWriter service, you need to enable it first. Click on the three dots by the service name and then click “Go to service”:
Enable the service like we did with the Couchbase Connection Service:
Make sure to store all changes in the GenerateRecord processor, and then return to your NiFi Canvas.
Now, let’s connect our nodes. Hover your mouse over the GenerateRecord processor and drag a connection from it to the PutCouchbase processor:
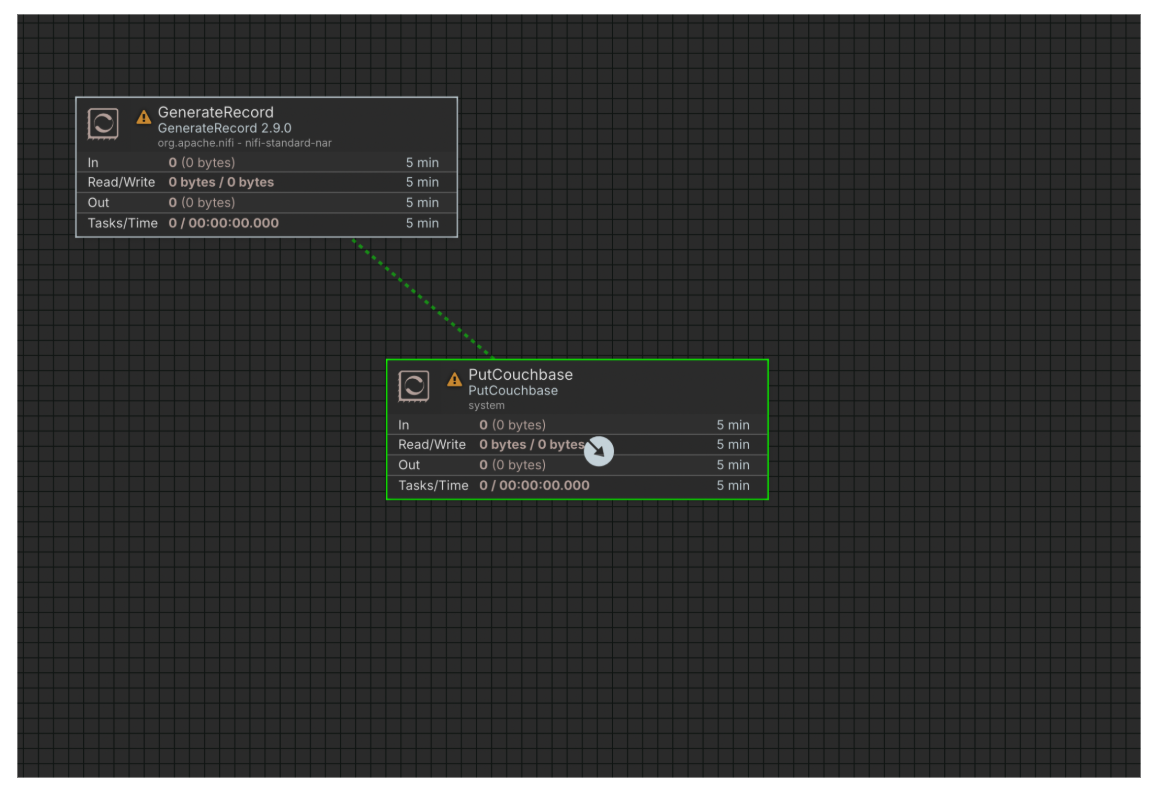
This will open a “Create Connection” dialogue where you will click “Add.” You should now see the nodes connected to each other:

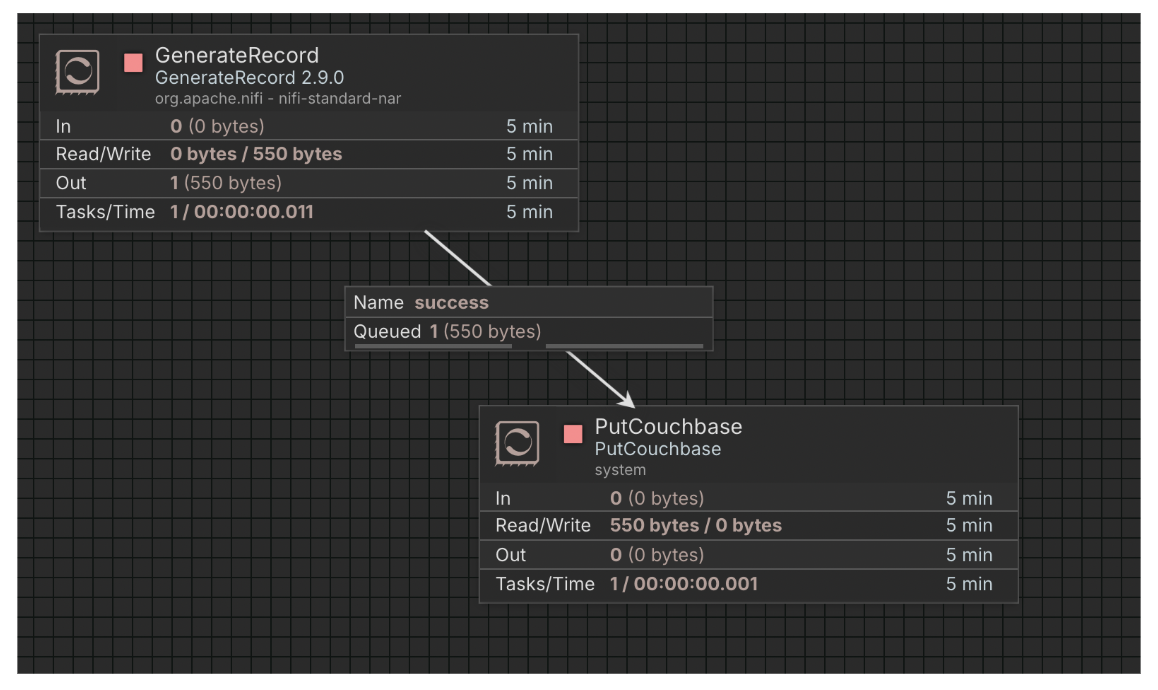
Right click on the PutCouchbase processor node and select “Run.” Then right click on the GenerateRecord node and select “Run Once.” This should queue a single record to be processed by the PutCouchbase node:

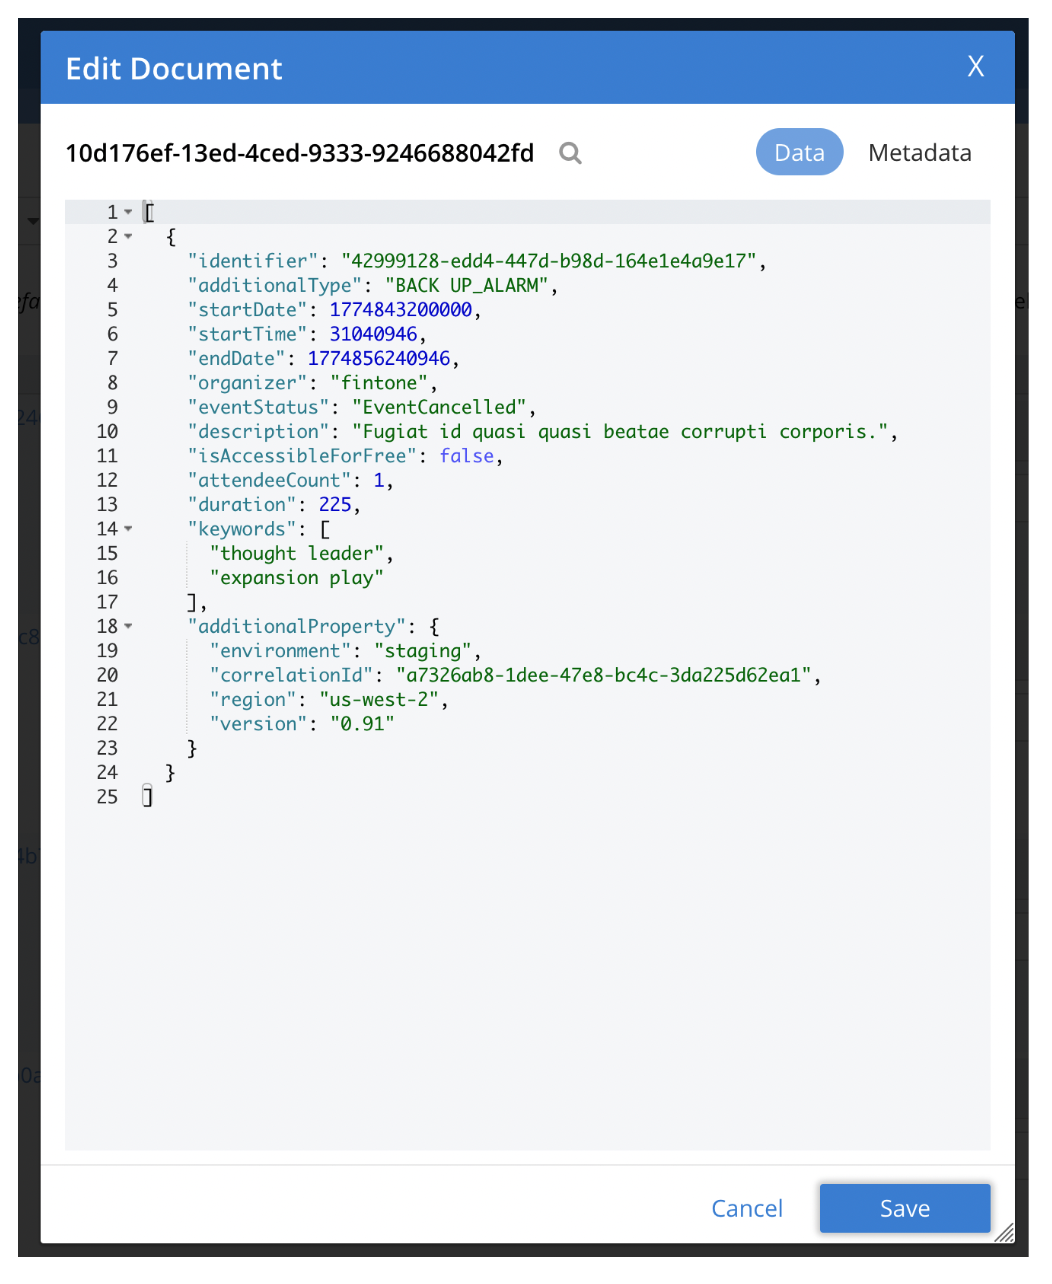
This should start the nodes and write a single record into Couchbase.
Conclusion
The update to the Couchbase NiFi integration provides a simple way to efficiently store data into Couchbase clusters and supports scopes and collections. The GetCouchbase processor allow you to fetch documents from Couchbase clusters by their UUIDs.
The integration supports multiple simultaneous connections to different clusters, allowing developers to connect them together and process their data using Apache NiFi.
Leave a comment
You must be logged in to post a comment.