
Este blog faz parte de uma série de blogs em várias partes que mostra como executar suas aplicações no Kubernetes. Ele usará o Couchbase, an open source NoSQL distributed document database, as the Docker
container.
- Part 1 explained how to start Kubernetes cluster using Vagrant – Kubernetes on Vagrant
- Part 2 did the same for Amazon Web Services – Kubernetes on Amazon Web Services
- Part 3 did the same for Google Cloud – Kubernetes on Google Cloud
This fourth part will show:
- How to setup and start the Kubernetes cluster on Azure
- Executar o container Docker no cluster Kubernetes
- Expor Pod no Kubernetes como Serviço
- Desligar o cluster
Many thanks to @colemickens for helping me through this recipe.
Install and Configure Azure CLI
Azure CLI is a command-line interface to develop, deploy and manage Azure applications. This is needed in order to install Kubernetes cluster on Azure.
- Install Node:
- Install Azure CLI:
- Sign up for free trial at https://azure.microsoft.com/en-us/free/.
- Login to Azure using the command
azure login: - Get account information using
azure account showcommand:Note the value shown instead of XXX and YYY. These will be used to configure the Kubernetes cluster.
Start Kubernetes Cluster
- Download Kubernetes 1.2.4 and extract it.
- Kubernetes cluster on Azure can be started as:
Make sure to specify the appropriate values for
XXXeYYYfrom the previous command.AZURE_SUBSCRIPTION_IDeAZURE_TENANT_IDare specific to Azure. These values
can also be edited incluster/azure/config-default.sh. - Start Kubernetes cluster:
It starts four nodes of
Standard_A1size. Each
node gives you 1 core, 1.75 GB RAM, and 40GB HDD.
Run Docker Container in Kubernetes Cluster on Azure
Now that the cluster is up and running, get a list of all the nodes:
|
1 2 3 4 5 6 |
./Kubernetes/aglomerado/kubectl.sh obter não NAME STATUS AGE kube–20160531–161525–vm–master Ready,SchedulingDisabled 3m kube–20160531–161525–vm–nó–0 Ready 3m kube–20160531–161525–vm–nó–1 Ready 3m kube–20160531–161525–vm–nó–2 Ready 3m |
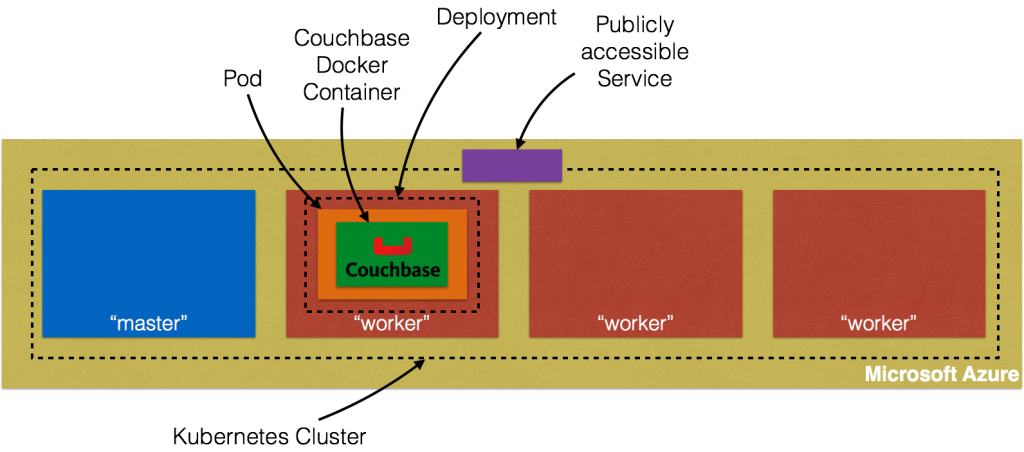
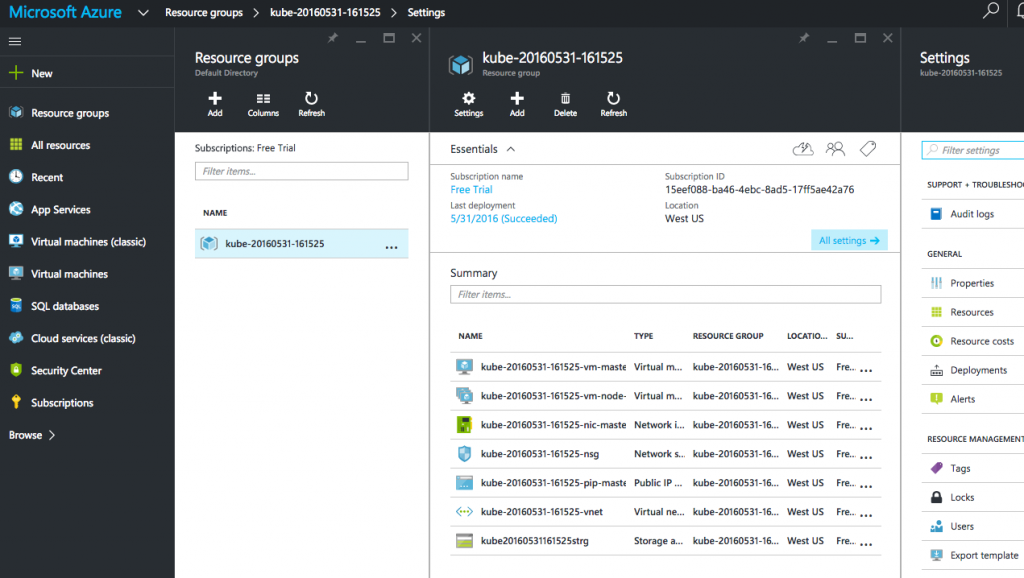
Four instances are created as shown – one for master node and three for worker nodes. Azure Portal shows all the created artifacts in the Resource Group:
More details about the created nodes is available:

Create a Couchbase pod:
|
1 2 |
./Kubernetes/aglomerado/kubectl.sh correr Couchbase —image=arungupta/Couchbase deployment “couchbase” created |
Notice, how the image name can be specified on the CLI. Kubernetes pre-1.2 versions created a Replication Controller with this command. This is explained in Kubernetes on Amazon Web Services ou Kubernetes on Google Cloud. Kubernetes 1.2 introduced Deployments e
so this creates a Deployment instead. This enables simplified application deployment and management including versioning, multiple simultaneous rollouts, aggregating status across all pods, maintaining application availability and rollback.
The pod uses arungupta/couchbase Docker image that provides a pre-configured Couchbase server. Any Docker image can be specified here. Status of the pod can be watched:
|
1 2 3 4 5 |
./Kubernetes/aglomerado/kubectl.sh obter –w po NAME READY STATUS RESTARTS AGE Couchbase–2830197765–f0s9c 0/1 ContainerCreating 0 5s NAME READY STATUS RESTARTS AGE Couchbase–2830197765–f0s9c 1/1 Running 0 1m |
Get more details about the pod:
|
1 2 3 4 5 6 7 8 9 10 11 12 13 14 15 16 17 18 19 20 21 22 23 24 25 26 27 28 29 30 31 32 33 34 35 36 37 38 |
./Kubernetes/aglomerado/kubectl.sh describe po Couchbase–2830197765–f0s9c Nome: Couchbase–2830197765–f0s9c Namespace: default Node: kube–20160531–161525–vm–nó–2/10.0.0.6 Start Tempo: Tue, 31 May 2016 16:28:02 –0700 Labels: pod–template–hash=2830197765,correr=Couchbase Status: Running IP: 10.2.74.2 Controllers: ReplicaSet/Couchbase–2830197765 Containers: Couchbase: Container ID: docker://eba043085c95645cf650206469be5c7e2d6c7395883a053d197446a14e757440 Image: arungupta/Couchbase Image ID: docker://sha256:f6b013d9694354148ace6804127dadee01c733151b5ff5e169f7c3b0e4faf321 Port: QoS Tier: cpu: BestEffort memory: BestEffort State: Running Started: Tue, 31 May 2016 16:29:04 –0700 Ready: Verdadeiro Restart Count: 0 Environment Variables: Conditions: Tipo Status Ready Verdadeiro Volumes: default–token–ylszs: Tipo: Secret (a volume populated by a Secret) SecretName: default–token–ylszs Events: FirstSeen LastSeen Count From SubobjectPath Tipo Reason Message ————– ———— ——– —— ——————– ———— ——— ———– 7m 7m 1 {default–scheduler } Normal Scheduled Successfully assigned Couchbase–2830197765–f0s9c para kube–20160531–161525–vm–nó–2 7m 7m 1 {kubelet kube–20160531–161525–vm–nó–2} spec.contêineres{Couchbase} Normal Pulling pulling image “arungupta/couchbase” 6m 6m 1 {kubelet kube–20160531–161525–vm–nó–2} spec.contêineres{Couchbase} Normal Pulled Successfully pulled image “arungupta/couchbase” 6m 6m 1 {kubelet kube–20160531–161525–vm–nó–2} spec.contêineres{Couchbase} Normal Created Created contêiner com docker identidade eba043085c95 6m 6m 1 {kubelet kube–20160531–161525–vm–nó–2} spec.contêineres{Couchbase} Normal Started Started contêiner com docker identidade eba043085c95 |
Expor Pod no Kubernetes como Serviço
Now that our pod is running, how do I access the Couchbase server? You need to expose the Deployment as a Service outside the Kubernetes cluster. Typically, this will be exposed using the command:
0
But Azure does not support --type=LoadBalancer at this time. This feature is being worked upon and will hopefully be available in the near future. So in the meanwhile, we’ll expose the Service as:
1
Now proxy to this Service using kubectl proxy command:
2
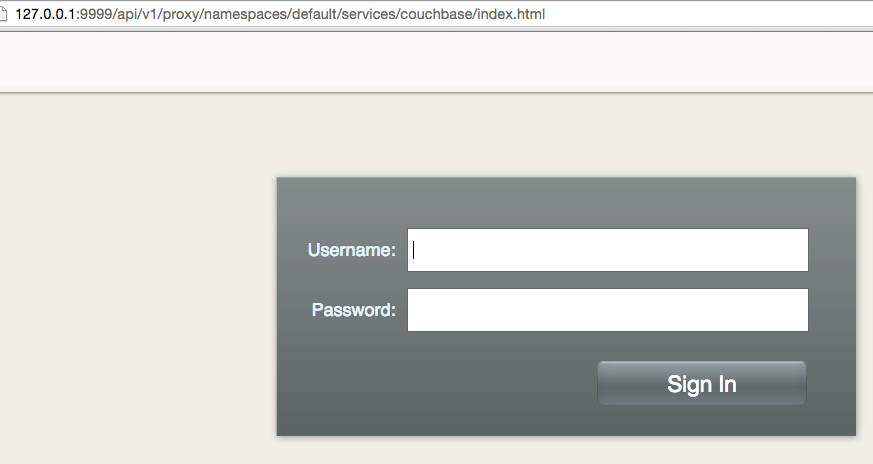
And now this exposed Service is accessible at https://127.0.0.1:9999/api/v1/proxy/namespaces/default/services/couchbase/index.html. This shows the login
screen of Console da Web do Couchbase:
Shutdown Kubernetes Cluster
Finally, shutdown the cluster using cluster/kube-down.sh script.
3
This script shuts down the cluster but the Azure resource group need to be explicitly removed. This can be done by selecting the Resource Group from portal.azure.com:
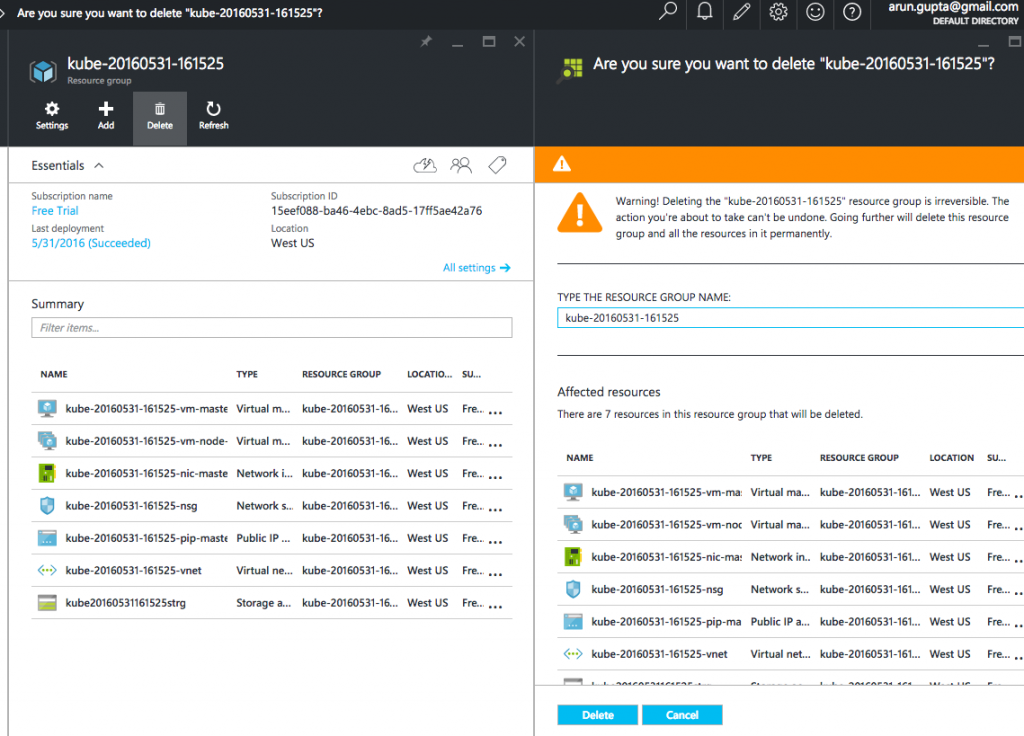
This is filed as #26601.
Further references …
- Couchbase Server Developer Portal
- Couchbase on Containers
- Questions on StackOverflow, Fóruns ou Slack Channel
- Follow us @couchbasedev
- Couchbase 4.5
Enjoy!
Autor

Uma resposta
-
I made good progress on trying this but hit a problem at the very end. I can manually hit the pools endpoint on the proxied connection and authenticate, but the web ui isn’t trying to use the proxied URL and is instead just trying 127.0.0.1:9999/pools (instead of the full proxied url). Did I miss a step? As an aside, I was able to use the –type=LoadBalancer which is now apparently available.

Deixe um comentário
Você precisa fazer o login para publicar um comentário.