

What are PrivateLinks?
PrivateLinks are a networking service that allows for the private connection between a cloud service and your virtual network. This connection is made without exposing your data to the public internet, enhancing security by keeping network traffic within the cloud provider’s network. By utilizing PrivateLinks, you can ensure more secure and reliable access to cloud resources, minimizing the risk of external threats and reducing latency by keeping the traffic internal to the cloud provider’s network.
PrivateLinks facilitate uni-directional communication, enhancing the security of network connections by ensuring that traffic can only flow in a single direction. This design helps in preventing unauthorized access and data exfiltration, further solidifying the security benefits of using PrivateLinks for cloud networking.
Note: XDCR is not compatible with PrivateLinks at the moment.
Part 1 – Installing Azure CLI
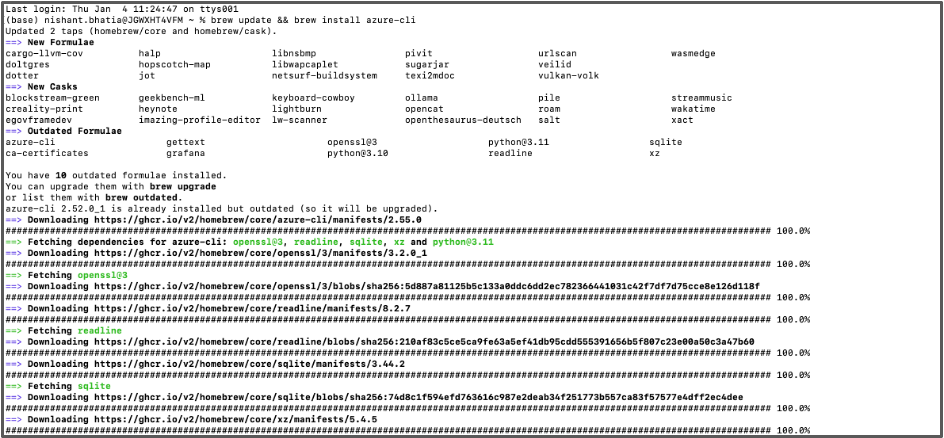
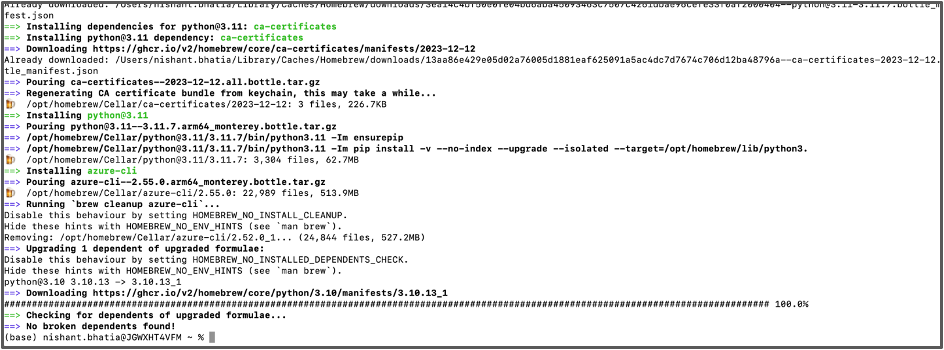
- Open a terminal and install the Azure CLI using the commands in this link for Mac and Windows:
brew update && brew install azure-cli # command for MacOS
Part 2 – Creating a Resource Group, Virtual Network and Subnet in Azure Cloud
- Go to your Azure home page
- Login to your Azure account using the code below via the terminal:
az login
- Create a new resource group in Azure. Replace the name privatelinkazure and location eastus as desired.
Note: This could be done via the Azure UI, however, it is much cleaner to create one with the Azure CLI:-
az group create --name privatelinkazure --location eastus
-
- Check if the group has been created:
-
az group list --output table
-
- Next step is to create a virtual network and subnet in the resource group we just created.
바꾸다 PLVIRTUALNETWORK, 기본값 with the name as desired. You can keep the address to 10.0.0.0/16 그리고 10.0.0.0/24:-
az network vnet create --name PLVIRTUALNETWORK --resource-group privatelinkazure --location eastus --address-prefixes 10.0.0.0/16 --subnet-name default --subnet-prefix 10.0.0.0/24
-
Part 3: Capella Configuration
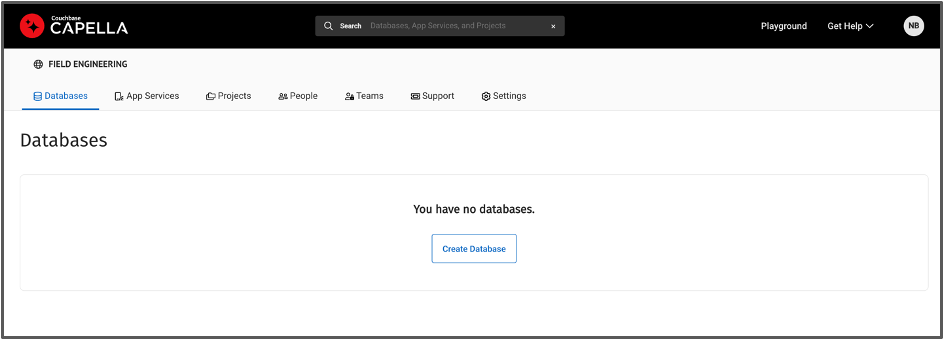
- Login into Capella with your corporate email and credentials.
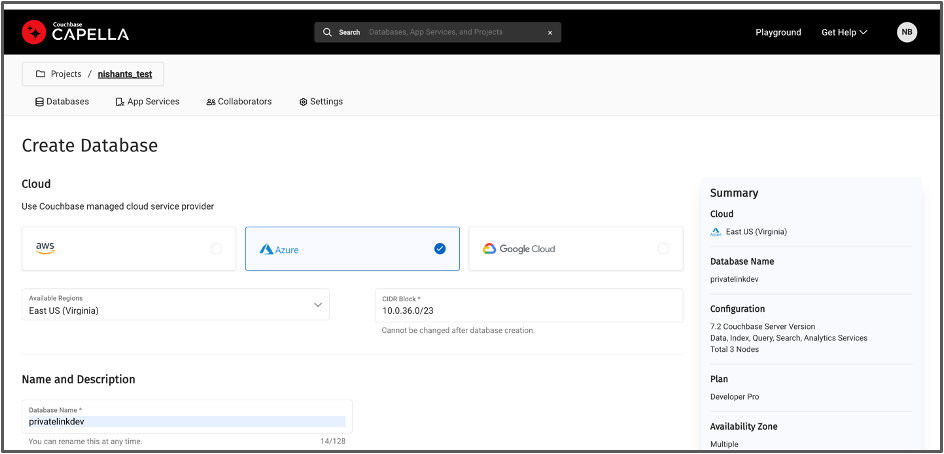
- Within your project, create a database with the following configuration:
- Cloud: Azure
- Region: same as the region where you created your Resource Group & Virtual Network
- 이름 of your choice, e.g. here we use Privatelinkdev
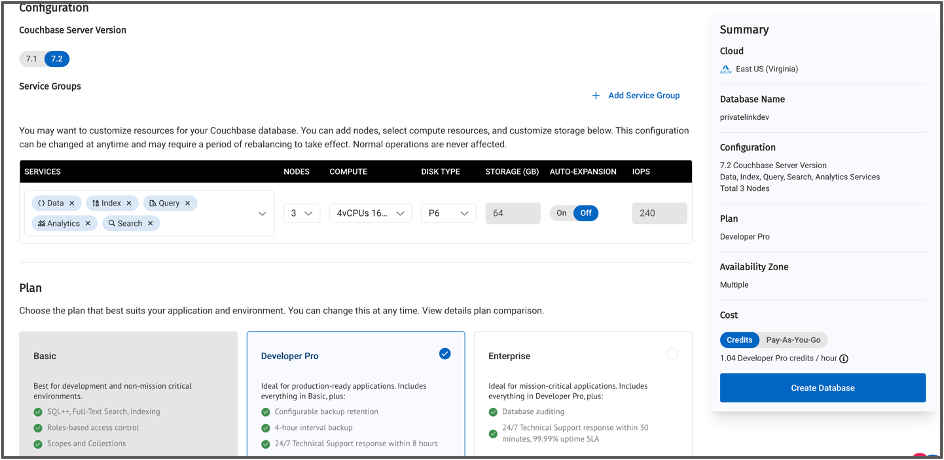
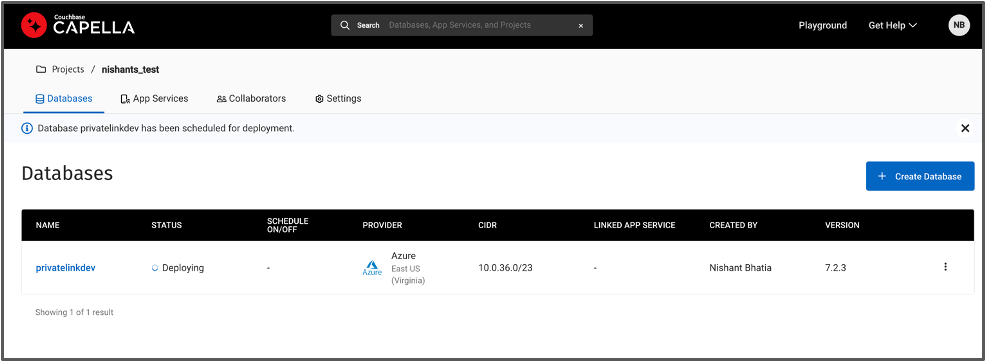
- Once the database is Healthy, deploy the 여행 샘플 bucket:
- Open the database.
- Navigate to the Data Tools tab.
- On the Import page, click Import under the 여행 샘플 tile.

Part 4: Enable Private Endpoint
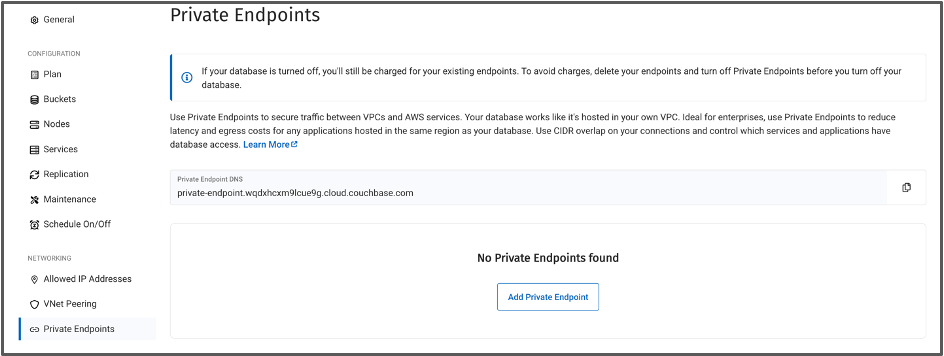
- In your Capella database, open the Settings page, navigate to Private Endpoint and click Enable Private Endpoint.
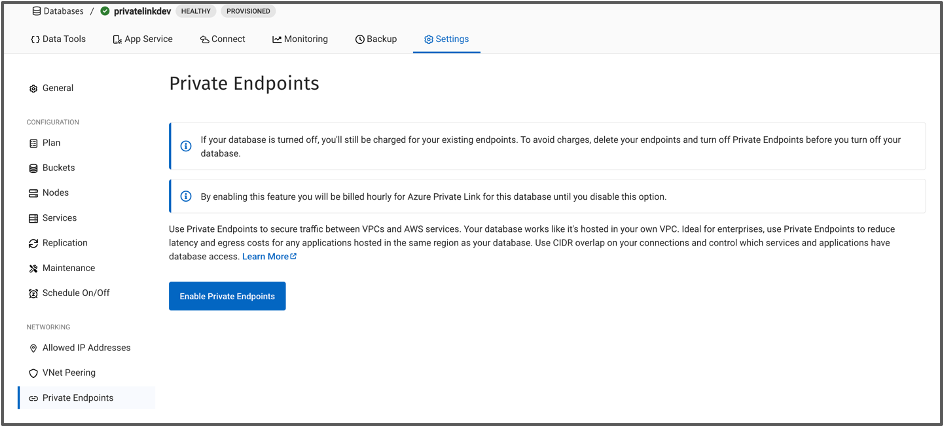
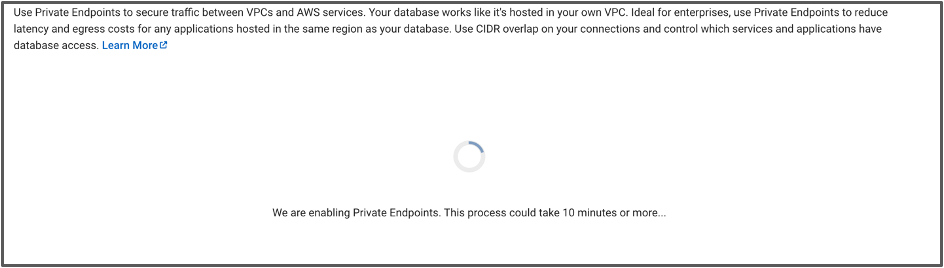
- This action will usually take around 10 minutes to enable Private Endpoint.
- When ready, you should see that the Private Endpoint DNS is now available in the Capella UI. Also notice that Private Endpoints are billed hourly for Azure Private Endpoints for this database until you disable this option.
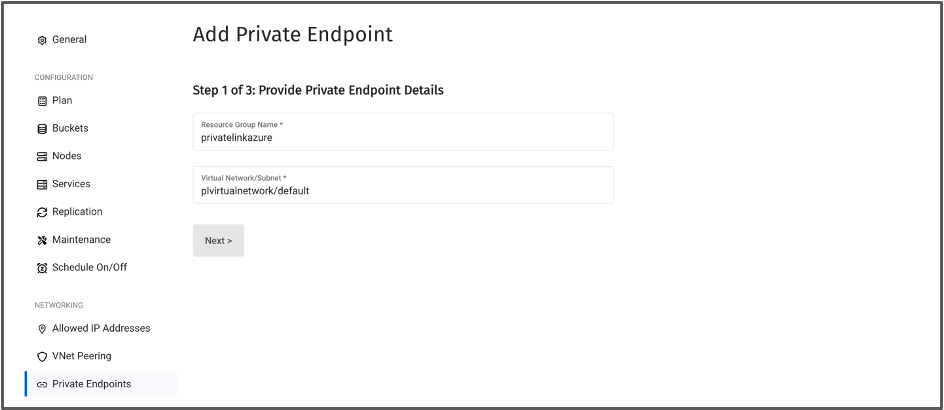
- 클릭 Add Private Endpoint. Add the Resource Group Name and subnet name that we created earlier. In this case resource group will be privatelinkazure, virtual network will be PLVIRTUALNETWORK and subnet name will be 기본값. Refer to Part 2 above.
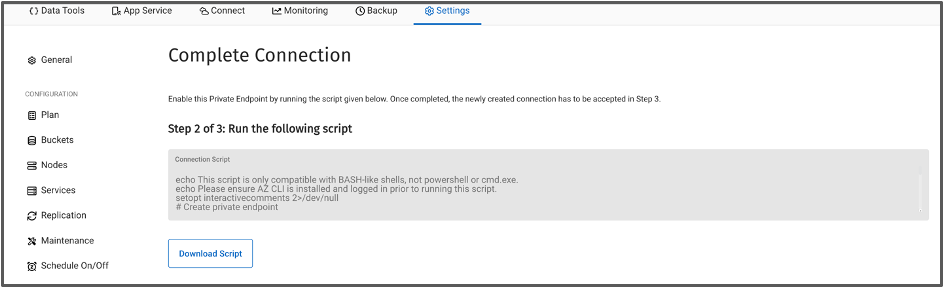
- Download the script and open in Notepad++ or Sublime Text.

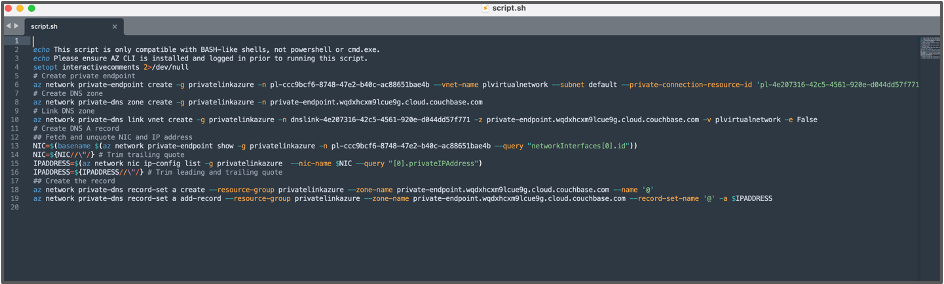
- Open the Azure Terminal again where we created the resource group, virtual network and subnet.
- From shell script we downloaded, run the first three commands starting from:
- Create private endpoint:
az network private-endpoint create -g privatelinkazure -n pl-7330b162-12a1-4695-9317-2ecae322690b --vnet-name PLVIRTUALNETWORK --subnet default --private-connection-resource-id 'pl-4e207316-42c5-4561-920e-d044dd57f771.e520e4d0-fd92-440e-9a82-eabd3562761c.eastus.azure.privatelinkservice' --connection-name pl-7330b162-12a1-4695-9317-2ecae322690b -l eastus --manual-request true
- Create private endpoint:
|
1 2 3 4 5 6 7 8 9 10 11 12 13 14 15 16 17 18 19 20 21 22 23 24 25 26 27 28 29 30 31 32 33 34 35 36 37 38 39 40 41 |
(base) nishant.bhatia@JGWXHT4VFM ~ % az network 사적인–endpoint 만들다 –g privatelinkazure –n pl–7330b162–12a1–4695–9317–2ecae322690b —vnet–이름 PLVIRTUALNETWORK —subnet 기본값 —사적인–connection–resource–아이디 ‘pl-4e207316-42c5-4561-920e-d044dd57f771.e520e4d0-fd92-440e-9a82-eabd3562761c.eastus.azure.privatelinkservice’ —connection–이름 pl–7330b162–12a1–4695–9317–2ecae322690b –l eastus —manual–요청 참인 { “customDnsConfigs”: [], “customNetworkInterfaceName”: “”, “etag”: “W/”465e5e06–5340–4aa9–a5c6–c3fa51c4a51a“”, “id”: “/subscriptions/2192c0ac-2205-4be3-86bf-619230e53f35/resourceGroups/privatelinkazure/providers/Microsoft.Network/privateEndpoints/pl-7330b162-12a1-4695-9317-2ecae322690b”, “ipConfigurations”: [], “location”: “eastus”, “manualPrivateLinkServiceConnections”: [ { “etag”: “W/”465e5e06–5340–4aa9–a5c6–c3fa51c4a51a“”, “id”: “/subscriptions/2192c0ac-2205-4be3-86bf-619230e53f35/resourceGroups/privatelinkazure/providers/Microsoft.Network/privateEndpoints/pl-7330b162-12a1-4695-9317-2ecae322690b/manualPrivateLinkServiceConnections/pl-7330b162-12a1-4695-9317-2ecae322690b”, “이름”: “pl-7330b162-12a1-4695-9317-2ecae322690b”, “privateLinkServiceConnectionState”: { “actionsRequired”: “None”, “설명”: “Awaiting Approval”, “status”: “Pending” }, “privateLinkServiceId”: “pl-4e207316-42c5-4561-920e-d044dd57f771.e520e4d0-fd92-440e-9a82-eabd3562761c.eastus.azure.privatelinkservice”, “provisioningState”: “Succeeded”, “resourceGroup”: “privatelinkazure”, “type”: “Microsoft.Network/privateEndpoints/manualPrivateLinkServiceConnections” } ], “이름”: “pl-7330b162-12a1-4695-9317-2ecae322690b”, “networkInterfaces”: [ { “id”: “/subscriptions/2192c0ac-2205-4be3-86bf-619230e53f35/resourceGroups/privatelinkazure/providers/Microsoft.Network/networkInterfaces/pl-7330b162-12a1-4695-9317-2ecae322690b.nic.9cdf1d1d-ad92-4a2a-8391-1396c4f4701a”, “resourceGroup”: “privatelinkazure” } ], “privateLinkServiceConnections”: [], “provisioningState”: “Succeeded”, “resourceGroup”: “privatelinkazure”, “subnet”: { “id”: “/subscriptions/2192c0ac-2205-4be3-86bf-619230e53f35/resourceGroups/privatelinkazure/providers/Microsoft.Network/virtualNetworks/PLVIRTUALNETWORK/subnets/default”, “resourceGroup”: “privatelinkazure” }, “type”: “Microsoft.Network/privateEndpoints” } |
- Create DNS zone:
az network private-dns zone create -g privatelinkazure -n private-endpoint.wqdxhcxm9lcue9g.cloud.couchbase.com
|
1 2 3 4 5 6 7 8 9 10 11 12 13 14 15 16 17 |
(base) nishant.bhatia@JGWXHT4VFM ~ % az network 사적인–dns zone 만들다 –g privatelinkazure –n 사적인–endpoint.wqdxhcxm9lcue9g.클라우드.카우치베이스.com { “etag”: “8af683b0-e5a6-4abe-a6bf-94ee0261c33b”, “id”: “/subscriptions/2192c0ac-2205-4be3-86bf-619230e53f35/resourceGroups/privatelinkazure/providers/Microsoft.Network/privateDnsZones/private-endpoint.wqdxhcxm9lcue9g.cloud.couchbase.com”, “location”: “global”, “maxNumberOfRecordSets”: 25000, “maxNumberOfVirtualNetworkLinks”: 1000, “maxNumberOfVirtualNetworkLinksWithRegistration”: 100, “이름”: “private-endpoint.wqdxhcxm9lcue9g.cloud.couchbase.com”, “numberOfRecordSets”: 1, “numberOfVirtualNetworkLinks”: 0, “numberOfVirtualNetworkLinksWithRegistration”: 0, “provisioningState”: “Succeeded”, “resourceGroup”: “privatelinkazure”, “type”: “Microsoft.Network/privateDnsZones” } |
- Link DNS zone:
az network private-dns link vnet create -g privatelinkazure -n dnslink-4e207316-42c5-4561-920e-d044dd57f771 -z private-endpoint.wqdxhcxm9lcue9g.cloud.couchbase.com -v PLVIRTUALNETWORK -e False
|
1 2 3 4 5 6 7 8 9 10 11 12 13 14 15 16 17 |
(base) nishant.bhatia@JGWXHT4VFM ~ % az network 사적인–dns link vnet 만들다 –g privatelinkazure –n dnslink–4e207316–42c5–4561–920e–d044dd57f771 –z 사적인–endpoint.wqdxhcxm9lcue9g.클라우드.카우치베이스.com –v PLVIRTUALNETWORK –e False { “etag”: “”540b14b1–0000–0100–0000–65983fc10000“”, “id”: “/subscriptions/2192c0ac-2205-4be3-86bf-619230e53f35/resourceGroups/privatelinkazure/providers/Microsoft.Network/privateDnsZones/private-endpoint.wqdxhcxm9lcue9g.cloud.couchbase.com/virtualNetworkLinks/dnslink-4e207316-42c5-4561-920e-d044dd57f771”, “location”: “global”, “이름”: “dnslink-4e207316-42c5-4561-920e-d044dd57f771”, “provisioningState”: “Succeeded”, “registrationEnabled”: 거짓, “resourceGroup”: “privatelinkazure”, “type”: “Microsoft.Network/privateDnsZones/virtualNetworkLinks”, “virtualNetwork”: { “id”: “/subscriptions/2192c0ac-2205-4be3-86bf-619230e53f35/resourceGroups/privatelinkazure/providers/Microsoft.Network/virtualNetworks/PLVIRTUALNETWORK”, “resourceGroup”: “privatelinkazure” }, “virtualNetworkLinkState”: “Completed” } |
Part 4: Accept Pending Connection and verify endpoint
- Head over to the Capella UI again and accept the pending connection. Once the connection has been established, you will see a Linked status.
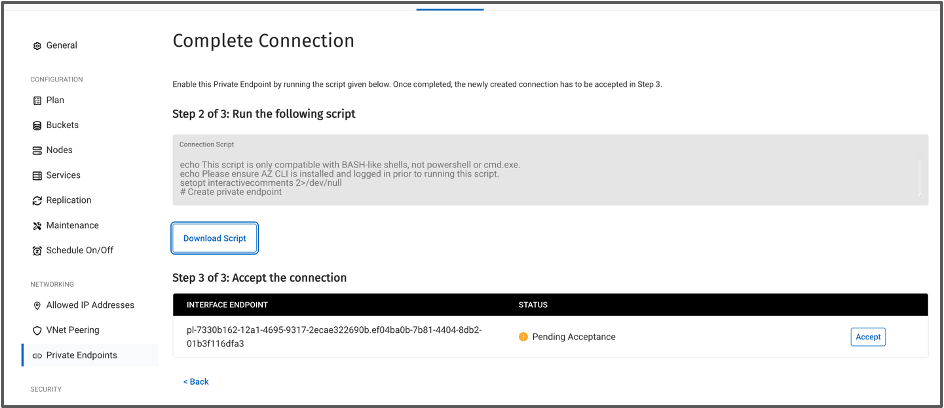
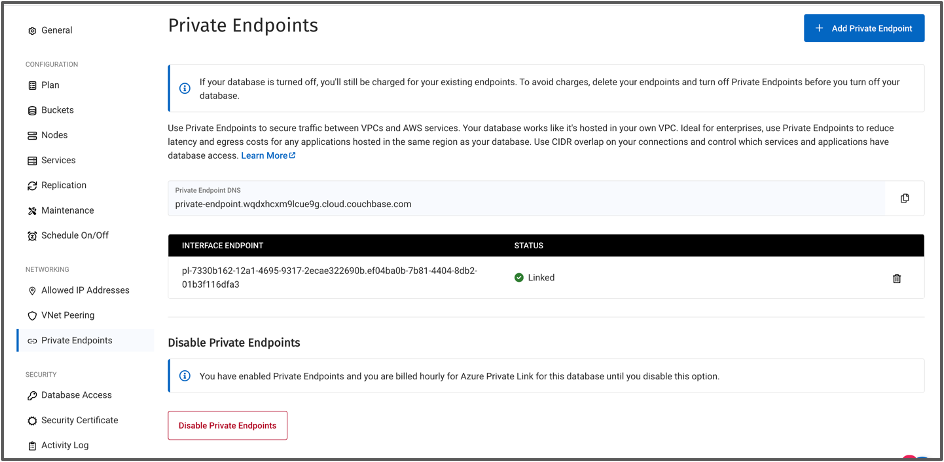
- Copy paste the interface endpoint from Capella UI in a notepad. In this case:
pl-7330b162-12a1-4695-9317-2ecae322690b.ef04ba0b-7b81-4404-8db2-01b3f116dfa3 - In the below code, replace the interface endpoint with your endpoint until the period “.” In this case:
pl-7330b162-12a1-4695-9317-2ecae322690baz network private-endpoint show --name pl-7330b162-12a1-4695-9317-2ecae322690b --resource-group privatelinkazure
|
1 2 3 4 5 6 7 8 9 10 11 12 13 14 15 16 17 18 19 20 21 22 23 24 25 26 27 28 29 30 31 32 33 34 35 36 37 38 39 40 |
(base) nishant.bhatia@JGWXHT4VFM ~ % az network 사적인–endpoint 보여주다 —이름 pl–7330b162–12a1–4695–9317–2ecae322690b —resource–group privatelinkazure { “customDnsConfigs”: [], “customNetworkInterfaceName”: “”, “etag”: “W/”0b317ee7–e04e–4255–aa0c–b58ccd8fc5ff“”, “id”: “/subscriptions/2192c0ac-2205-4be3-86bf-619230e53f35/resourceGroups/privatelinkazure/providers/Microsoft.Network/privateEndpoints/pl-7330b162-12a1-4695-9317-2ecae322690b”, “ipConfigurations”: [], “location”: “eastus”, “manualPrivateLinkServiceConnections”: [ { “etag”: “W/”0b317ee7–e04e–4255–aa0c–b58ccd8fc5ff“”, “id”: “/subscriptions/2192c0ac-2205-4be3-86bf-619230e53f35/resourceGroups/privatelinkazure/providers/Microsoft.Network/privateEndpoints/pl-7330b162-12a1-4695-9317-2ecae322690b/manualPrivateLinkServiceConnections/pl-7330b162-12a1-4695-9317-2ecae322690b”, “이름”: “pl-7330b162-12a1-4695-9317-2ecae322690b”, “privateLinkServiceConnectionState”: { “actionsRequired”: “”, “설명”: “”, “status”: “Approved” }, “privateLinkServiceId”: “pl-4e207316-42c5-4561-920e-d044dd57f771.e520e4d0-fd92-440e-9a82-eabd3562761c.eastus.azure.privatelinkservice”, “provisioningState”: “Succeeded”, “resourceGroup”: “privatelinkazure”, “type”: “Microsoft.Network/privateEndpoints/manualPrivateLinkServiceConnections” } ], “이름”: “pl-7330b162-12a1-4695-9317-2ecae322690b”, “networkInterfaces”: [ { “id”: “/subscriptions/2192c0ac-2205-4be3-86bf-619230e53f35/resourceGroups/privatelinkazure/providers/Microsoft.Network/networkInterfaces/pl-7330b162-12a1-4695-9317-2ecae322690b.nic.9cdf1d1d-ad92-4a2a-8391-1396c4f4701a”, “resourceGroup”: “privatelinkazure” } ], “privateLinkServiceConnections”: [], “provisioningState”: “Succeeded”, “resourceGroup”: “privatelinkazure”, “subnet”: { “id”: “/subscriptions/2192c0ac-2205-4be3-86bf-619230e53f35/resourceGroups/privatelinkazure/providers/Microsoft.Network/virtualNetworks/PLVIRTUALNETWORK/subnets/default”, “resourceGroup”: “privatelinkazure” }, “type”: “Microsoft.Network/privateEndpoints” } |
You have now established a private connection between your Azure VPC and Couchbase Capella using a Private Link!
결론
Azure Private Link offers a secure and efficient method for connecting to Couchbase Capella, ensuring that your data remains protected from external threats by keeping traffic within Microsoft’s private network. This setup eliminates exposure to the public internet, thereby significantly reducing the attack surface. Azure Private Link provides only uni-directional communication, ensuring that data flows securely from your resources to Couchbase Capella without any reverse path. Additionally, Azure Private Link provides consistent network performance, leveraging Microsoft’s global backbone network to deliver low-latency and reliable connectivity. This makes Azure Private Link an essential component for secure and performant database operations in the cloud.
문서

댓글 남기기
댓글을 달기 위해서는 로그인해야합니다.