

In this blog, we will explore how to run Couchbase and Couchbase Sync Gateway using Vagrant. Before beginning, you will need to have VirtualBox 그리고 Vagrant installed locally on your machine. Download those two software first before proceeding as you will need them to install Couchbase. At the time of writing, I am running:
- Vagrant: Version 1.7.4
- VirtualBox: Version 5.0.10
Running Couchbase VM:
Create a directionary to work from and then from within the folder, bring in the Couchbase software distribution that is defined in a ‘Vagrantfile’ configuration file and also an associated ‘.box’ file. You will need both these files in the directory before continuing and can find those files located in the direct ZIP download. The next step is to set up Sync Gateway and we will do that by executing:
|
1 |
$ vagrant up |
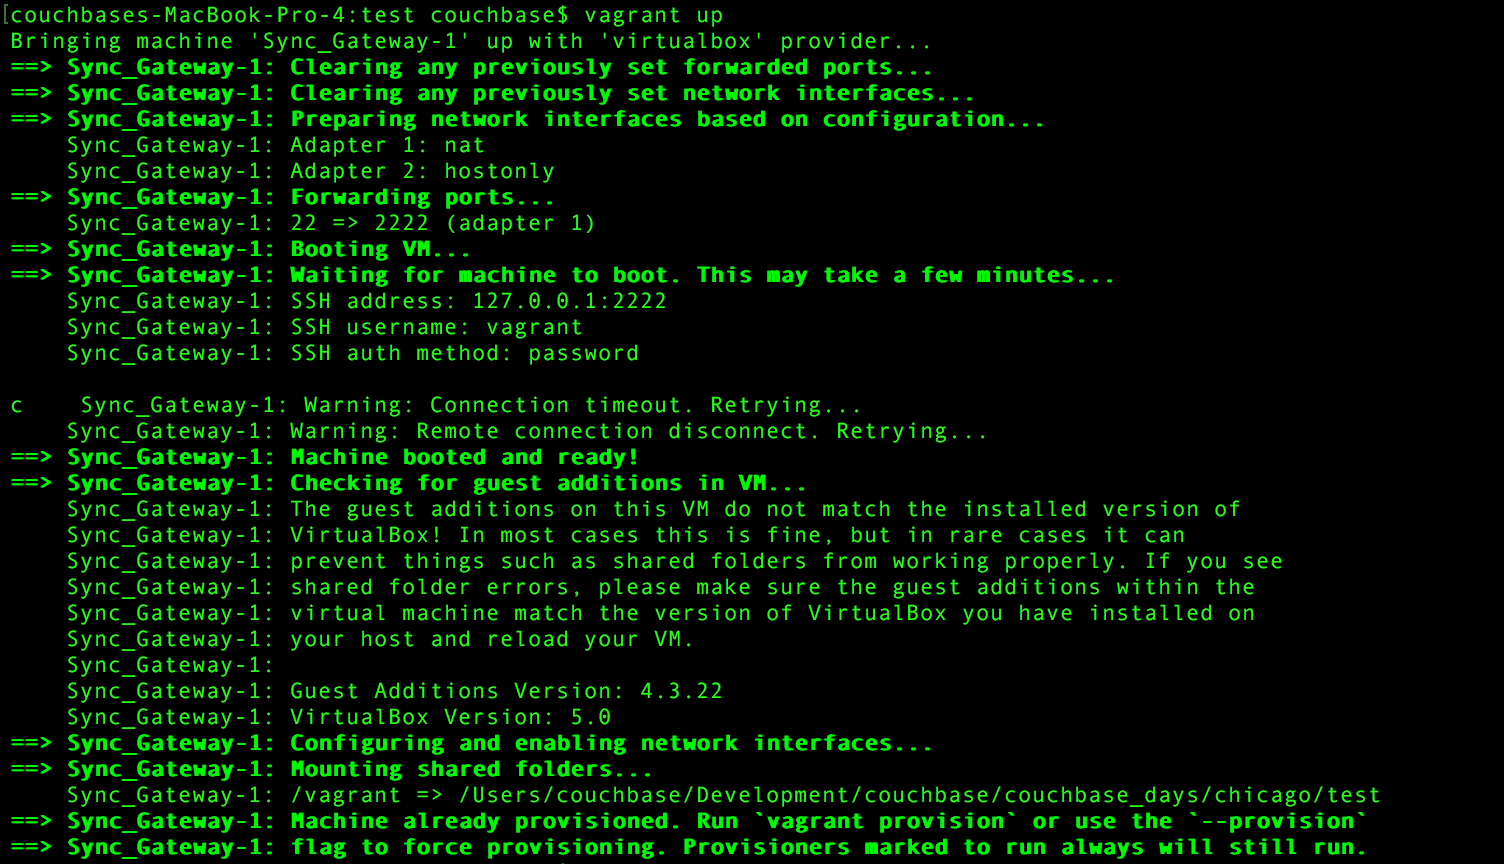
Disregard any warnings or connection timeouts as this process takes some time to setup. To see the list of VM instances that are running or if ever you wish to restart/poweroff a VM, then you can execute the command:
|
1 |
$ VBoxManage list runningvms |

For the example here, the name and UUID of the VirtualBox Vagrant VM that is running Sync Gateway is, ‘test_Sync_Gateway-1’ and ‘83305d4f-5fa8-4523-8037-48142b9d7ebf’ respectively which I got from running the previous command. You should see a similar output as above before continuing.
Optionally, if you would like to shut off the VM and restart again from the beginning of the tutorial then run the command below and reference the VM UUID of interest.
|
1 |
$ VBoxManage controlvm 83305d4f–5fa8–4523–8037–48142b9d7ebf poweroff |

Now if you check for the list of running machines, you should see none that are outputted like below.

Connect to VM:
With the ‘test_Sync_Gateway-1_…’ running, we can take a look at the status of our VM and what is running by executing:
|
1 |
$ vagrant 상태 |

Now we are ready to log into our machine and look at starting Sync Gateway. To do that, first we ‘SSH’ into our instance by running:
|
1 |
$ vagrant ssh |

Let us take a look at the content we have in our VM.
|
1 |
$ ls |

The folder ‘finished’ contains completed code files that we will reference. Taking a look also on what is available, let us execute:
|
1 |
$ ls finished/ |

We can start our Sync Gateway by calling the script ‘start-Sync_Gateway-configured.sh’ and passing in the JSON parameter that defines our Sync Gateway configurations.
|
1 |
$ ./start–Sync_Gateway–configured.sh sync–gateway–설정.json |

Couchbase Admin UI:
Now that you have Sync Gateway started, you are able to log into the Couchbase Admin UI. This is located at:
https://10.111.72.101:8091/index.html
- Username: 관리자
- Password: 비밀번호
Open a browser and type in the URL end point and the above credentials to log in. You would need to be connected to the VM and also have started Sync Gateway at this point to be able to login.

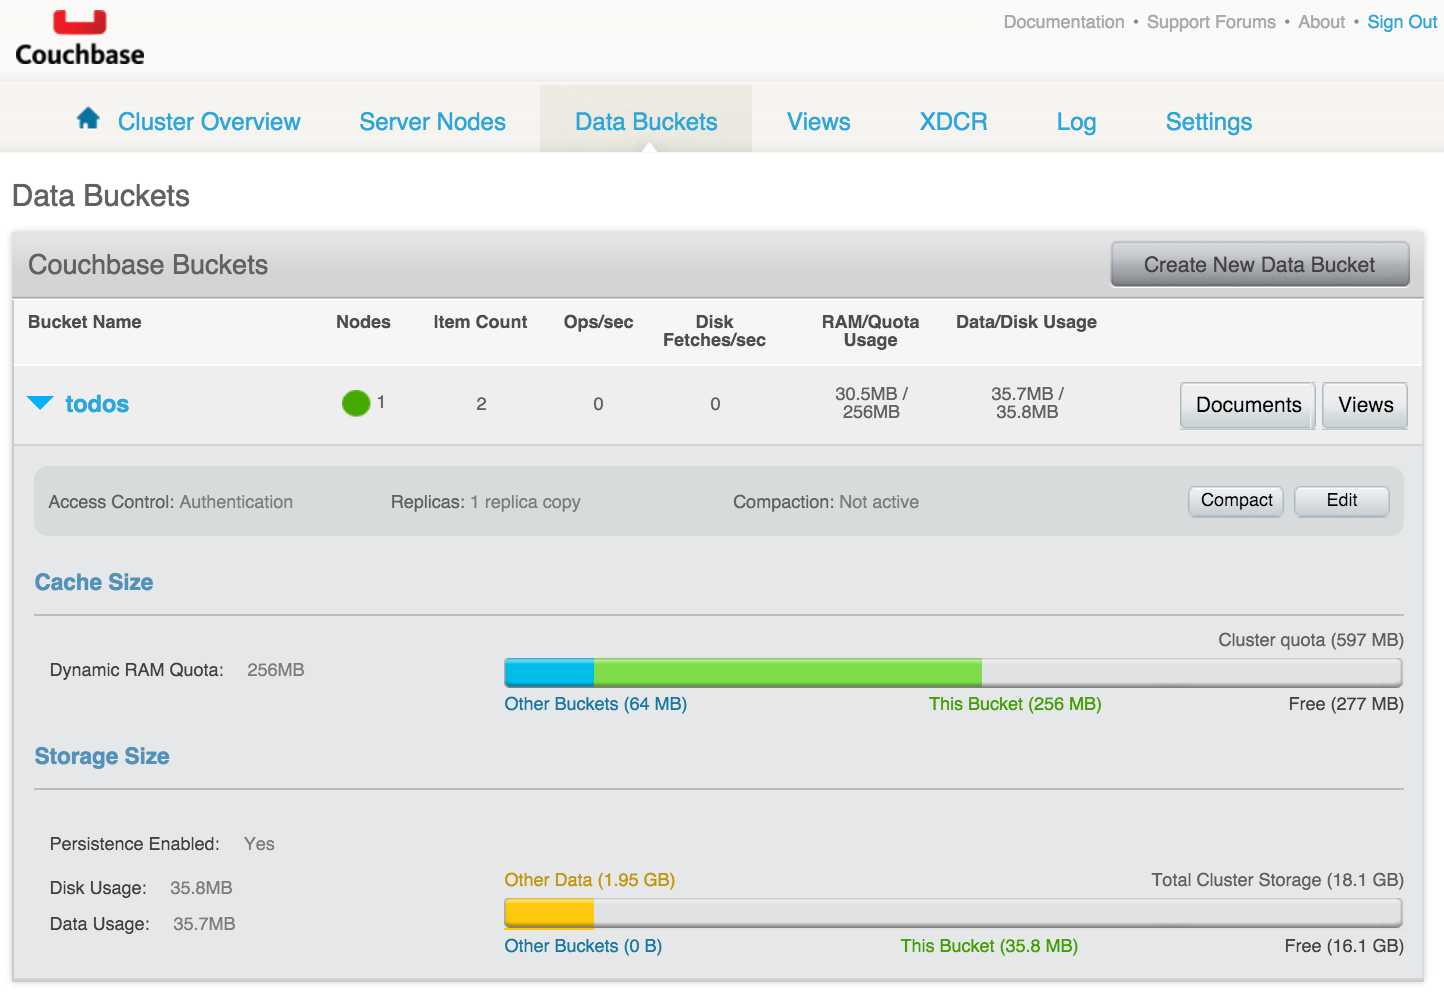
Click on ‘Data Buckets’ section to see that the ‘todos’ bucket details from within the Couchbase portal. The current configurations have been set up to target the sample ToDoLite mobile application (안드로이드 | iOS) that is running 코우치베이스 라이트.
 Of course there are many other ways to set up Couchbase Sync Gateway and Couchbase Server. You can opt for running both software from your own machine using the binaries downloaded from Couchbase or you can use the Couchbase AMI on AWS and then connect the Couchbase Sync Gateway accordingly. Either way, you are able to quickly have a scalable solution up and running that supports a full offline mobile user experience across various platforms. In the next blog, we explore how to do that!

댓글 남기기
댓글을 달기 위해서는 로그인해야합니다.