

Arkadiusz Borucki works as a Site Reliability Engineer at Amadeus, focused on NoSQL databases and automation. In his day-to-day work, he uses Couchbase, MongoDB, Oracle, Python, and Ansible. He’s a self-proclaimed big data enthusiast, interested in data store technologies, distributed systems, analytics, and automation. He speaks at several conferences and user groups in the United States and Europe. You can find him on Twitter at @_Aras_B

{{ Couchbase – writing your first Ansible automation }}
Couchbase is a modern, fast, scalable, and easy to automate technology. When you are running a Couchbase farm with thousands of nodes you do not want to have to log on to every single machine and apply settings manually. This could result in huge overhead, inconsistencies, and human errors. A good solution is to start using Ansible for your farm automation and orchestration. You can run operating system commands from Ansible, make Couchbase API calls from Ansible, or use Couchbase CLI commands from Ansible. This blog will show you how to start using Ansible with your Couchbase farm.
When you create Ansible automation for a Couchbase cluster you should think about what you want to achieve. If you do not want to apply a complicated set of commands on your Couchbase farm the simplest solution is to create a basic Ansible playbook and put your playbook tasks in specific order. This solution is very simple and fast. Playbook syntax is not complicated and creation of a basic playbook takes just a few minutes! Playbooks are essentially sets of instructions (plays) that you will send to your host or group of hosts. Ansible will execute those instructions on targets and send you back return code. You will be able to validate if the instructions have been applied successfully or not. That’s basically how a playbook works.
If you want to achieve more complicated results you should take advantage of Ansible roles and organize your tasks in roles. Roles are nothing but a further abstraction of making your playbook more modular. A role is a set of tasks and additional files to configure your Couchbase environment. Ansible roles will be described shortly.
{{ Playbook }}
Let’s build our first playbook. This playbook will install Couchbase Server on our hosts and get the server up and running. You no longer have to log on to every single machine and run commands there! If you want to save a lot of time for repeatable operations and avoid human errors you need to invest some time in automating and coding. All you need to do is just create Ansible playbook! Keeping that in mind, you need to understand logic that needs to be executed on a Couchbase farm. Ansible assumes you know what you are trying to do and automates it. Playbooks are instructions or directions for Ansible.
A playbook is a text file written in YAML format, and is saved with yml extension. A playbooks uses indentation with space characters to indicate the structure of its data. There are two basic rules:
- data elements at the same level in the hierarchy must have this same indentation
- items that are children of another item must be indented more than their parents
{{ example }} – single task playbook:
|
1 2 3 4 5 6 7 8 9 10 11 12 13 14 15 16 17 |
—– – name configure 카우치베이스 user ~에 your farm hosts: 모두 tasks: – name: 만들다 카우치베이스 user ~와 함께 UID 5000 user: name: 카우치베이스 uid: 3000 상태: present |
Playbooks begins with a line consisting of three dashes (—) and may also end with three dots (…). Between those markers, the playbook is defined as a list of plays. An item in a YAML list starts with a single dash followed by a space. YAML lists might appear like this:
|
1 2 3 4 5 6 7 8 9 10 11 |
—– – name just example hosts: 모두 tasks: first second third |
이름, hosts, 그리고 tasks are the keys. Those keys all have this same indentation. The Couchbase user creation example play starts with a dash and space, and then the first key – the name attribute occur. The name associated with string which is a label. This helps identify what the play is for. The name key is optional but it is recommended because it documents your playbook especially when your playbook has multiple plays. The second key is a hosts attribute, which specifies the hosts against which the play’s tasks should be run. The hosts attribute takes a host name as a value or groups of hosts from inventory. Finally, the last key in the play is the tasks attribute, whose value specifies a list of tasks to run for this play. In our example we run a single task which runs the user module with specific arguments. It is worth it to mention that Ansible ships with a number of modules (called the “module library”) that can be executed directly on remote hosts or through playbooks. These modules can control system resources like services, packages, or files (anything really), or handle executing system commands.
{{ second example }}
Install Couchbase cluster from a single playbook – let’s call this playbook couchbase-install.yml. Login data for clusters will be kept for security reasons in Vault. Ansible-vault is a command line tool we use in Ansible to encrypt information. We should not keep Couchbase login data in plain text. Passwords should always be encrypted!
- Create encrypted login data for Couchbase cluster:
Let’s create two files: variables.yml 그리고 vault.yml. Those two files must be under the following directory structure: /ansible/group_vars/all.
ansible
|
1 2 3 4 5 6 7 8 9 10 11 12 13 |
├── 카우치베이스–install.yml ├── group_vars │ └── 모두 │ ├── varibales.yml │ └── vault.yml ├── inventory.inv └── template–추가–node.j2 |
In file variables.yml let’s put username, RAM size, and password variables for our new cluster. Real password value will be put in second file vault.yml and encrypted.
|
1 2 3 4 5 6 7 8 9 10 11 12 13 14 15 16 17 |
# cat variables.yml user: admin password: “{{ vault_password }}” ram: 512 replicas: 2 bucket_ram: 256 양동이: Ansible # cat vault.yml password: couchbase321 |
Let’s use ansible-vault and encrypt password in vault.yml file:
|
1 |
ansible–vault encrypt vault.yml |
New Vault password:
From now on the password will be encrypted and safe. We will have to provide the password we set during vault creation every time when we run playbook. Note: Ansible provides AES-256 encryption algorithm.
|
1 2 3 4 5 |
cat vault.yml $ANSIBLE_VAULT;1.1;AES256 6339353631303431626531306636313862396434306661356432373434623834653 |
Main playbook couchbase-install.yml will contain many tasks, and those tasks will use Ansible modules such as: template, shell, service 또는 yum.
|
1 2 3 4 5 6 7 8 9 10 11 12 13 14 15 16 17 18 19 20 21 22 23 24 25 26 27 28 29 30 31 32 33 34 35 36 37 38 39 40 41 42 43 44 45 46 47 48 49 50 51 52 53 54 55 56 57 58 59 60 61 62 63 64 65 66 67 68 69 70 71 |
cat 카우치베이스–install.yml —– – name: Install 그리고 configure 3 node 카우치베이스 cluster hosts: 모두 tasks: – name: Download the appropriate meta package 에서 the package 다운로드 location get_url: URL: https://packages.couchbase.com/releases/couchbase-release/ 카우치베이스–release–1.0–1–x86_64.rpm dest: /tmp/카우치베이스–release–1.0–1–x86_64.rpm – name: install the package source 그리고 the 카우치베이스 공공의 keys yum: name: /tmp/카우치베이스–release–1.0–1–x86_64.rpm 상태: present – name: Install 카우치베이스 서버 package yum: name: 카우치베이스–server 상태: present – name: make sure 카우치베이스 서버 started service: name: 카우치베이스–server 상태: started – name: Initialize the cluster 그리고 추가 the nodes -로 the cluster hosts: 카우치베이스–master tasks: – name: 설정–up 카우치베이스 central node – init 카우치베이스 cluster shell: /opt/카우치베이스/bin/카우치베이스–cli cluster–init –c 127.0.0.1 —cluster–username={{ user }} —cluster–password={{ password }} —cluster–port=8091 —cluster–ramsize={{ ram }} – name: template use case example – use Jinja2 templating template: 소스=template–추가–node.j2 dest=/tmp/add_nodes.sh mode=750 – name: start 설정 스크립트 – 추가 remaining nodes -로 the cluster shell: /tmp/add_nodes.sh – name: 리밸런싱 카우치베이스 cluster shell: /opt/카우치베이스/bin/카우치베이스–cli 리밸런싱 –c 127.0.0.1:8091 –u {{ user }} –p {{ password }} – name: 만들다 양동이 Ansible ~와 함께 2 replicas shell: /opt/카우치베이스/bin/카우치베이스–cli 양동이–만들다 –c 127.0.0.1:8091 —양동이={{ 양동이 }} —양동이–type=카우치베이스 —양동이–port=11222 —양동이–ramsize={{ 양동이_ram }} —양동이–replica={{ replicas }} –u {{ user }} –p {{ password }} 카우치베이스 cluster is ready in a few seconds – this is 어떻게 fast Ansible 할 수 있다 만들다 it! |
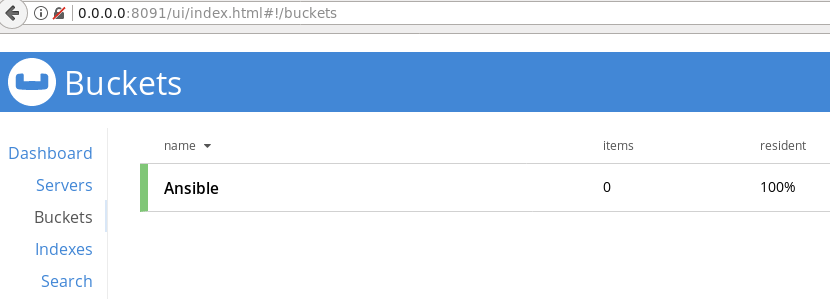
Let’s analyze playbook. Playbook is divided in two parts separated by different levels of indentations. Hosts on which Couchbase is installed are described in inventory.inv file. An inventory.inv file consists of host groups and hosts within those groups. Below is an example of our very basic Ansible hosts file:
|
1 2 3 4 5 6 7 8 9 10 11 |
cat inventory.inv [카우치베이스–master] 192.168.178.83 [카우치베이스–nodes] 192.168.178.84 192.168.178.85 |
The first part of the tasks will be executed on all three hosts (hosts: all). On every host Ansible installs Couchbase repo and then installs via Linux tool YUM Couchbase Server. At the end Couchbase Server must be up and running. The following modules are executed:
get_url: Downloads files from HTTP, HTTPS, or FTP to the remote server. The remote server must have direct access to the remote resource.
yum: Installs, upgrades, downgrades, removes, and lists packages and groups with the yum package manager.
service: Controls services on remote hosts. Supported init systems include BSD init, OpenRC, SysV, Solaris SMF, systemd, upstart.
The second part of the tasks will be executed on the “master” Couchbase Server node (hosts: couchbase-master). The following modules are executed in the second part:
shell: The shell module takes the command name followed by a list of space-delimited arguments. It is almost exactly like the command module but runs the command through a shell on the remote node. We use shell module to execute Couchbase CLI commands like cluster-init, rebalance or bucket-create.
template: Templates are processed by the Jinja2 templating language. A template in Ansible is a file which contains configuration parameters, but the dynamic values are given as variables. During the playbook execution, depending on the conditions like which cluster you are using, the variables will be replaced with the relevant values. In our scenario the template looks like this:
|
1 2 3 4 5 6 7 |
cat template–추가–node.j2 {% ~를 위해 host in groups[‘couchbase-nodes’] %} /opt/카우치베이스/bin/카우치베이스–cli server–추가 –c 127.0.0.1:8091 –u {{ user }} –p {{ password }} —server–추가={{ hostvars[host][‘ansible_default_ipv4’][‘address’] }}:8091 —server–추가–username={{ user }} —server–추가–password={{ password }} {% endfor %} |
Our template creates the following script under /tmp directory: (this script will be called in next task).
|
1 2 3 4 5 |
cat /tmp/addnodes.sh /opt/카우치베이스/bin/카우치베이스–cli server–추가 –c 127.0.0.1:8091 –u admin –p couchbase321 —server–추가=192.168.178.84:8091 —server–추가–username=admin —server–추가–password=couchbase321 /opt/카우치베이스/bin/카우치베이스–cli server–추가 –c 127.0.0.1:8091 –u admin –p couchbase321 —server–추가=192.168.178.85:8091 —server–추가–username=admin —server–추가–password=couchbase321 |
Created dynamically via template module /tmp/add_nodes.sh script will add two remaining nodes to the Couchbase cluster.
The last two tasks will use Ansible shell module and execute Couchbase CLI commands:
- name: rebalance Couchbase cluster,
- name: create bucket Ansible with 2 replicas
After all those tasks our 3-node Couchbase cluster is ready to use! It was fast and simple, and we can reuse this playbook for our next installations by simply adding more hosts to inventory.inv file.
{{ Roles }}
A single file Ansible playbook is good when you need to execute a few simple tasks. When the complexity of the playbook increases you should think about using Ansible roles. A role is a way to organize your playbook into a predefined directory structure so that Ansible can automatically discover everything.
-
Creating Role Framework
In order for Ansible to correctly handle roles, we need to build a directory structure that it can find and understand. We do this by creating a “roles” directory in our working directory for Ansible.
Let’s start to create a role structure for our Couchbase installation. I will show how to “translate” our single file playbook into roles.
- Create roles directory structure for Couchbase installation. A simple roles structure can look like this:
0
This is what they are all for:
- couchbase: role name
- defaults: default variables for the role
- handlers: all handlers that were in your playbook previously can now be added into this directory
- meta: defines some meta data for this role
- 템플릿: keep there jinja2 templates
- tasks: contains the main list of tasks to be executed by the role
- vars: other variables for the role
2. Divide playbook created above into Ansible roles. You should start from the tasks directory. All tasks from couchbase-install.yml should be divided into separate files and moved under /tasks directory. tasks/main.yml file should tell Ansible execution order for tasks. Our scenario solution looks like this:
1
I will show what is inside of our yml files:
2
As we know, the playbook has been divided into small tasks under tasks directory. Now we have to tell the Ansible execution order and also Ansible needs to know which tasks needs to be executed on all hosts and which tasks must be executed just on couchbase-master node. Let’s see our main.yml file:
3
Tasks will be executed according to the order shown in the main.yml file. Tasks which needs to be executed just on couchbase-master machine contain the condition “where” in the main.yml file. Those tasks will be skipped on couchbase-nodes machines.
Final structure:
4
playbook couchbase-install.yml contains just those lines:
5
3. Run couchbase-install.yml playbook and install your Couchbase cluster.
6
{{ 요약 }}
The example above shows that Couchbase is a flexible technology, ideal for automation and orchestration with Ansible. The best method to learn is by doing! Ansible provides very good documentation with examples and detailed module descriptions. Ansible lets you run Playbook Couchbase CLI commands to make administration of your database farm nice and easy! There is also potential to write your own modules in Ansible. If you cannot find what you are looking for in the modules provided by Ansible there is an easy way to write own module.
There is also the potential to use Ansible roles created by the Ansible community. Ansible Galaxy is a website where users can share roles, and has a command line tool for installing, creating, and managing roles. Galaxy is a free site for finding, downloading, and sharing community developed roles. Downloading roles from Galaxy is a great way to jumpstart your automation projects. You can also use the site to share roles that you create. By authenticating with the site using your GitHub account.
This post is part of the Couchbase Community Writing Program

댓글 남기기
댓글을 달기 위해서는 로그인해야합니다.